General SSO Guide
Last modified on January 2, 2025
In addition to offering integrations with a variety of single sign-on (SSO) providers, StrongDM also allows the use of any OpenID Connect (OIDC)-compliant SSO service or SAML SSO service via our generic OIDC and SAML integrations. If you are looking for specific instructions for a particular SSO provider, see our SSO guides in the Identity Providers section.
Provisioning and Suspension
StrongDM provides access to sensitive company-owned information and resources. When provisioning users via SSO, it is recommended to enable multi-factor authentication (MFA) through the identity provider (IdP). With this action, you can maximize security when connecting to StrongDM.
For successful SSO authentications, users must exist in the StrongDM Admin UI. They must also exist with the correct access within the SSO provider. When a user is suspended or deleted from the SSO provider, their current sessions are terminated and future authentications are not allowed.
When you set up an SSO provider to authenticate with StrongDM and also MFA in the Admin UI, MFA prompts during logins do not occur. In this scenario, MFA only plays a role to re-authenticate users when the StrongDM Desktop App locks due to inactivity, or to provide MFA prompts based on policies, but does not prompt users during normal login attempts.
If you are using SSO, we recommend setting up MFA through your SSO provider to trigger MFA prompts during user logins.
General SSO Options
When enabling SSO in the StrongDM Admin UI (Settings > User Management > Single Sign-on), there are several fields to complete, starting with the provider. Once a provider is chosen, the rest of the fields appear. Follow the steps in the SSO setup guide for your specific provider for details on the values needed for these fields.
After filling in the provider-specific fields, three additional SSO-related options are available for all SSO configuration types. This section discusses these three options further while explaining their ramifications for your SSO user management.
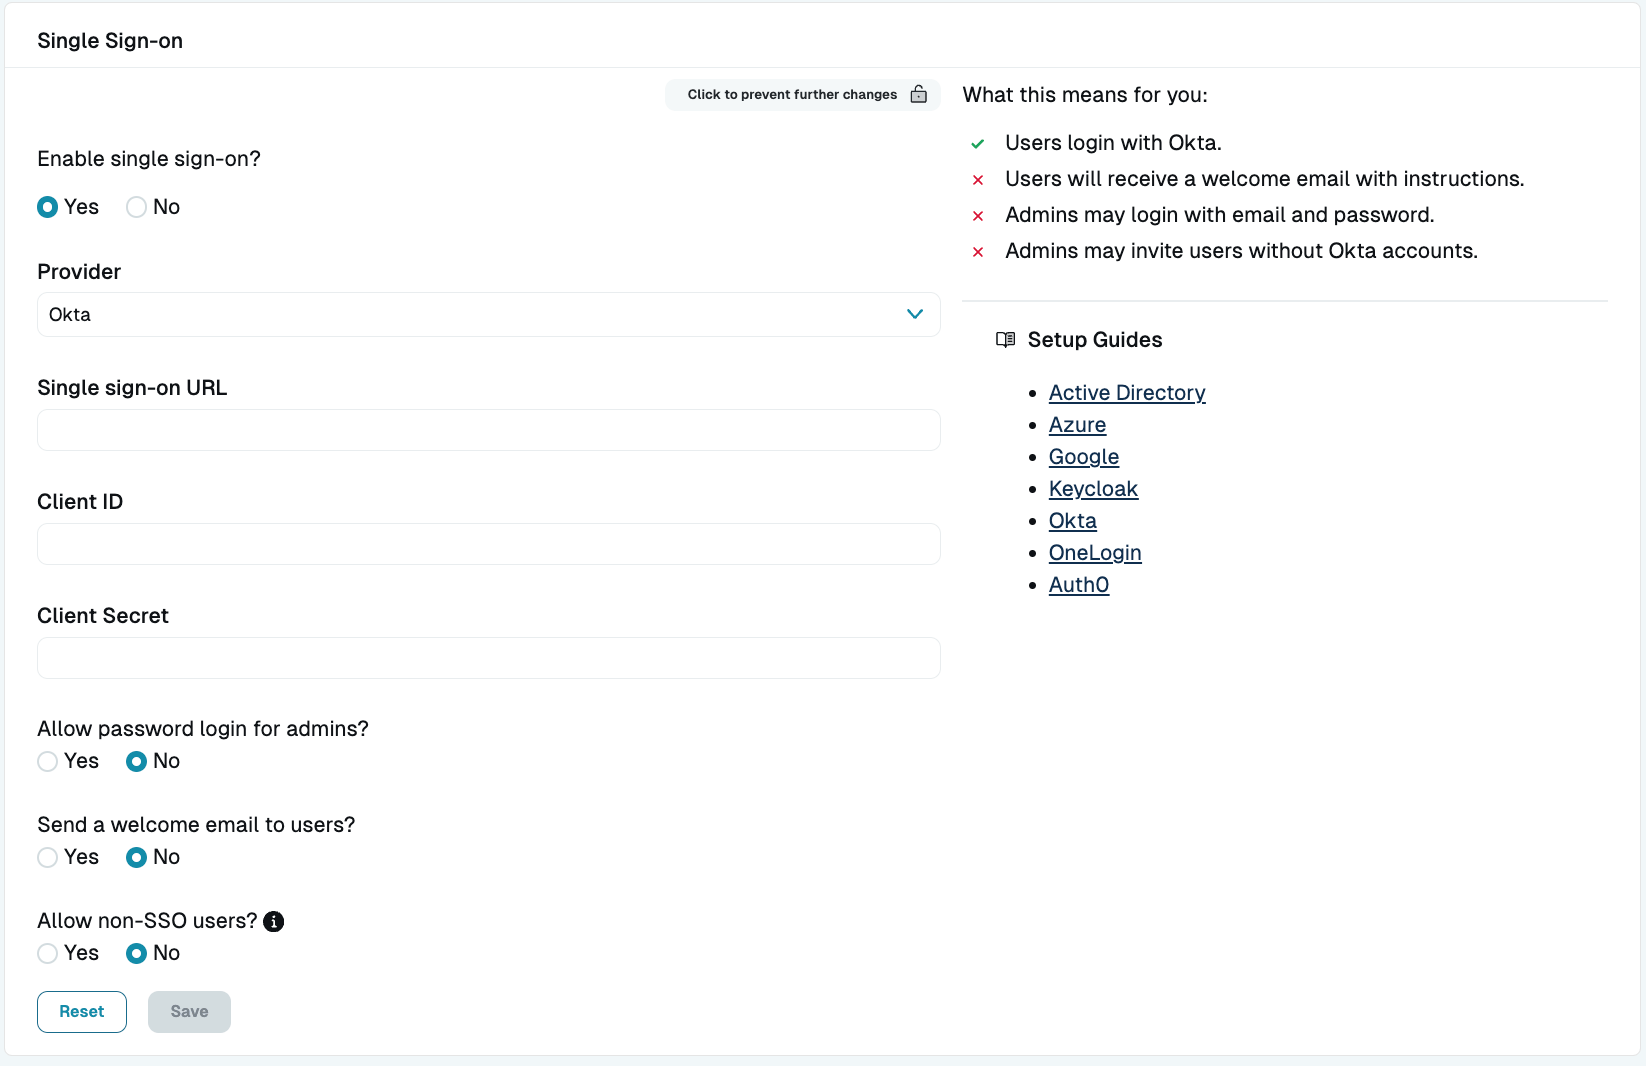
Allow password login for admins
When the Allow password login for admins? option is enabled, current or future administrators can log in with either SSO or password credentials. The password can be reset any time via a password reset email.
If using SSO, they log in to StrongDM by clicking the login button for their respective SSO provider (for example, if the provider is Okta, the button is Log in with Okta) and entering their credentials for that provider. If using a password, they log in in by entering their username and password for StrongDM and clicking Log in.
This option permits administrators to access the organization if SSO is down or misconfigured. For this reason, StrongDM recommends that this option be enabled until you are confident that your SSO is configured properly. If this option is disabled and you are unable to use SSO to log in, you can contact StrongDM Support to restore access to your organization.
Send a welcome email to users
If the Send a welcome email to users? option is enabled, new users receive a welcome email. When disabled, a notification is not sent when the user is created within StrongDM. You must notify them separately.
Allow non-SSO users
The Allow non-SSO users? option allows the creation of a user who is permitted to log in to StrongDM with their username and password instead of SSO only. This option is useful if you want to invite users to the organization who are not in your SSO system but need access to some resources (for example, contractors, interns, and so forth).
To create non-SSO users, first select Allow non-SSO users? and save the SSO settings. Then go to the Admin UI’s Users page, click Add user, and under Allow Password Login, select Allow. The user receives an invitation email with a link to set a password to log in.
Going forward, whenever the non-SSO user logs in to StrongDM, they enter their username and password, and click Log in.
Non-SSO users can be identified by the non-SSO indicator beside their name on the Users page of the Admin UI.
SSO Reauthentication

By default, when SSO (currently for Okta only) is set up for an organization, users must re-authenticate when logging in to StrongDM. If you have a reason to remove this reauthentication behavior, such as a conflict with your MFA service or a specific setup of your SSO service, this setting (located in the Admin UI at Settings > Security > SSO Reauthentication) allows you to disable it. In most cases, we recommend that the setting remain at its default No position, in order to help prevent clickjacking attacks.
Headless SSO Authentication
In some cases, you may wish to authenticate to StrongDM and use it from a “headless” client (one that has no user interface), such as a Linux terminal. If your organization is configured to use an SSO provider that is doing the authentication remotely, or off of your device, often using a browser window, you are unable to complete the entire authentication process on your terminal. When you try to log in with sdm login, you are prompted for a user email, and then you are prompted to continue in your browser window to complete the SSO interaction to authenticate you on your device.
In these cases, you can simply copy the unique SSO authentication URL from your terminal and paste it into a browser on another device and finish the SSO interaction, which authenticates the originating (headless) device. This enables you to use headless devices as StrongDM clients while still using SSO to authenticate.