Certificate Authorities
Last modified on June 6, 2025
Overview
A certificate authority (CA) allows your organization’s SSH and RDP resources to authenticate with trusted certificates. Using certificate authentication eliminates the need to manage unique key pairs for each of your servers.
When managing your resources in StrongDM, you can use the Strong CA, StrongDM’s certificate authority that is automatically assigned to every organization. Alternatively, you can use any supported third-party CA option that you prefer (if the Enterprise plan is enabled for your organization).
This article describes how to use the Certificate Authorities page of the Admin UI to manage CAs, as well as how to view details about the resources configured to use them.
Strong CA
Every organization in StrongDM is automatically assigned a StrongDM Certificate Authority (CA) for RDP resources and a StrongDM CA for SSH resources. The Strong CA issues certificates that, when configured on your servers, allow them to authenticate with the trusted certificate. By using a CA managed by StrongDM, every connection is secured with a client certificate that helps to reduce the risk of lost keys being compromised.
The Strong CA is the default certificate authority type and is always shown on the Certificate Authorities page of the Admin UI.
Third-Party CA Integrations
This feature is part of the Enterprise plan. If it is not enabled for your organization, please contact StrongDM at the StrongDM Help Center.
As an alternative to the Strong CA, organizations that have the Enterprise plan enabled may use a CA issued by a third party with certificate-based RDP and SSH resources.
A third-party certificate authority (CA) is a CA that is issued by a provider outside of StrongDM. If the Enterprise plan is enabled for your organization, you may use an existing third-party CA, instead of the default Strong CA, to issue certificates for authentication to your certificate-based RDP and certificate-based SSH resources.
Third-party CA integration requires you to have a preexisting CA. StrongDM does not configure, issue, manage, or rotate third-party CAs in any way. Such CAs are configured and typically stored with a third-party service. When the CA is integrated with StrongDM, StrongDM only uses the CA configuration to specify what service to use to sign certificate requests.
You may add third-party CAs to StrongDM in the Admin UI from the Network > Certificate Authorities page, as well as from the CLI, SDKs, or Terraform using secret store commands, domain objects, and resources.
API Account example-terraform-key (cc1e23eb-e456-7891-23c4-edf5678c9123) created a secret store named example-tf-ssh-ca.If no third-party CAs are added, your organization uses the Strong CA.
Supported CA integrations
StrongDM supports the following third-party CA integrations:
- Active Directory Certificate Services CA Integration for RDP
- AWS CA Integration for RDP
- GCP Certificate Authority Service Integration for RDP
- HashiCorp Vault CA Integration for RDP
- HashiCorp Vault CA Integration for SSH
- Keyfactor EJBCA CA Integration for RDP
- Keyfactor EJBCA CA Integration for SSH
Manage Certificate Authorities
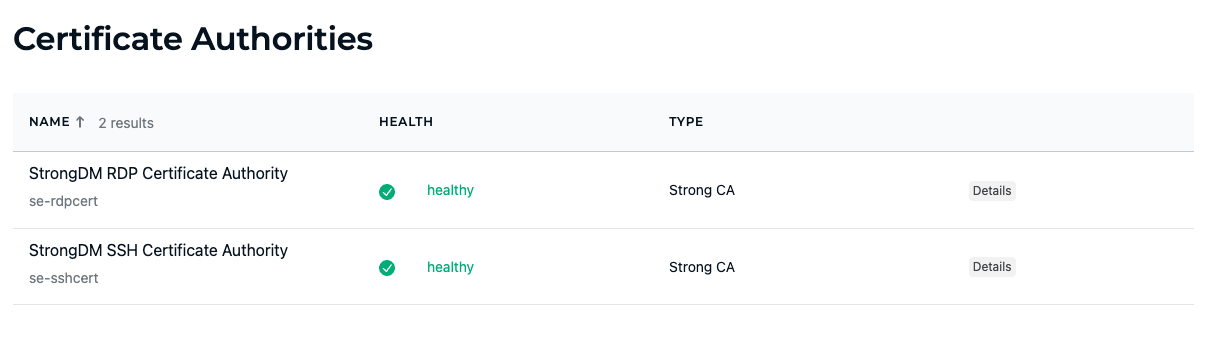
You can manage all the CAs available for your organization from the Admin UI in Settings > Secrets Management within the Certificate Authorities tab.
If the Enterprise plan is enabled for your organization, you may add a supported CA type issued outside of StrongDM.
Selecting a CA from the list opens a new page, which displays that CA’s Settings and Resources tabs.
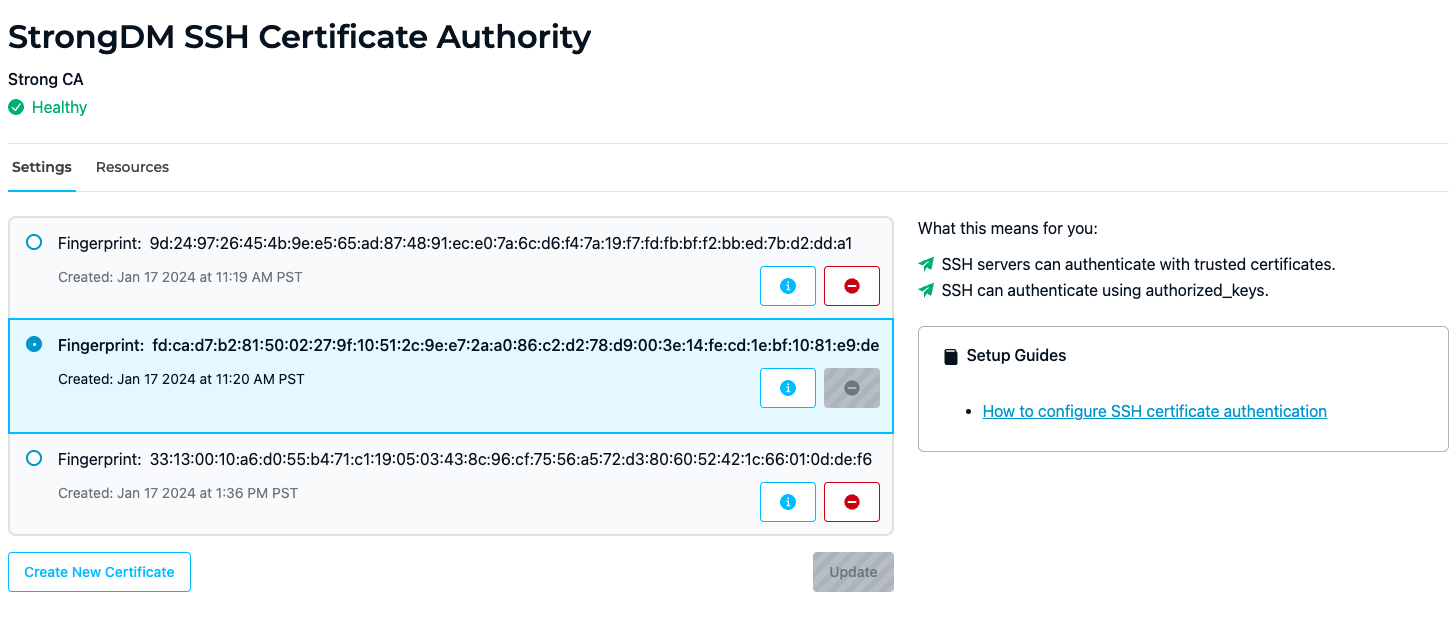
CA Settings tab
The Settings tab displays all certificates issued by the selected CA and allows you to create, copy or download, update, and remove certificates.
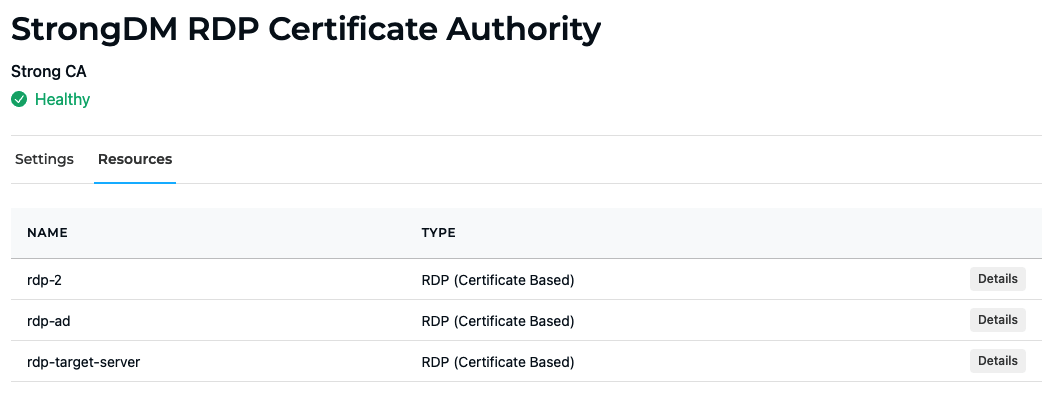
CA Resources tab
The Resources tab displays all resources configured to use the certificates. Clicking the details button beside a resource name opens the resource’s configuration form.
Create a Certificate
To create a new certificate, follow these steps.
- In the Admin UI, go to Settings > Secrets Management and to the Certificate Authorities tab.
- Select the desired CA from the list (for example, “StrongDM SSH Certificate Authority”) to display that CA’s settings, certificate(s), and the resources configured to use the certificate.
- From the Settings tab, click Create New Certificate. A new certificate is created with a unique fingerprint identifier and the date and time of creation.
- If creating a certificate for RDP, additionally specify when the certificate will expire (1, 2, or 3 years).
- On the new certificate, click the appropriate button to copy the public key (for SSH) or download the root certificate file (for RDP).
- Add the new certificate to your host. See the instructions for SSH and RDP.
Remove a Certificate
Only inactive certificates may be removed. If you wish to remove an active certificate, you must first create a new certificate, and use the Update button to make the new certificate active. Then you may remove the previously active certificate.
To remove a certificate, follow these steps.
- In the Admin UI, go to Settings > Secrets Management and to the Certificate Authorities tab.
- Select the desired CA from the list (for example, “StrongDM SSH Certificate Authority”).
- From that CA’s Settings tab, select the certificate you wish to remove.
- Click the remove button and confirm.
Certificate Rotation
Your organization is allowed to have multiple certificates for each CA, but only one SSH certificate and one RDP certificate may be active at any given time. An active certificate is the one configured to authenticate to the resource.
Occasionally, you may need to rotate (that is, update) a certificate for various reasons, such as when the certificate is about to expire. When an active certificate is rotated, however, that certificate becomes inactive, and all sessions using the current certificate are terminated. In order to avoid session downtime, StrongDM allows certificates to be rotated in stages.
Prerequisites for rotation
Before you begin, please ensure that the following requirements are met.
- Have an SSH (Certificate Based) or RDP (Certificate Based) resource configured. If the resource is not yet configured, please see the setup instructions for SSH or RDP.
- The certificate-based resource must be accessible by a StrongDM gateway. You can confirm that it’s accessible by going to the resource’s Diagnostics tab and ensuring that its status is “healthy.”
Update a certificate
We recommend staging certificate rotation in the following way.
- In the Admin UI, go to Settings > Secrets Management and to the Certificate Authorities tab and select the desired CA from the list (for example, “StrongDM SSH Certificate Authority”). The CA’s settings and list of certificate(s) displays, with the current active certificate highlighted in blue.
- On the CA’s Settings tab, click Create New Certificate. A new certificate is created with a unique fingerprint identifier and the date and time of creation.
- If creating a certificate for RDP, additionally specify when the certificate will expire (specify 1, 2, or 3 years).At this point, the old certificate is still active, while the new certificate is staged. To make the new certificate active, continue with the next steps to configure it in your server.
- Select the new certificate from the list, and click the appropriate button to copy the public key (for SSH) or download the root certificate file (for RDP).
- Follow the setup instructions for SSH or RDP to configure the new certificate in your server.
- Return to Certificate Authorities in the Admin UI and select the new certificate from the list.
- Click Update and then confirm to enable the new certificate and disable the old certificate.
- Verify that authentication works with the new certificate by making a connection (for example, in the CLI use
sdm ssh <RESOURCE-NAME>to connect to the resource configured to use the CA). Then view what you did in the logs. - If authentication is successful, you may safely remove the old certificate. On the old certificate, click the red remove button and confirm that you want to remove it.
Recommended Reading
For more configuration information regarding certificate-based servers, please see the following documentation: