SAML for Okta
Last modified on September 17, 2024
This guide shows you how to use StrongDM’s Generic SAML identity provider integration with Okta as the identity provider (IdP).
Prerequisites
- Administrative access to a working Okta account
- Administrative access to your StrongDM organization
StrongDM Setup
- In the StrongDM Admin UI, go to Settings > User Management.
- Under Single Sign-on, unlock the settings menu (Click to make changes), and then select Yes. For the Provider, select the SAML option.
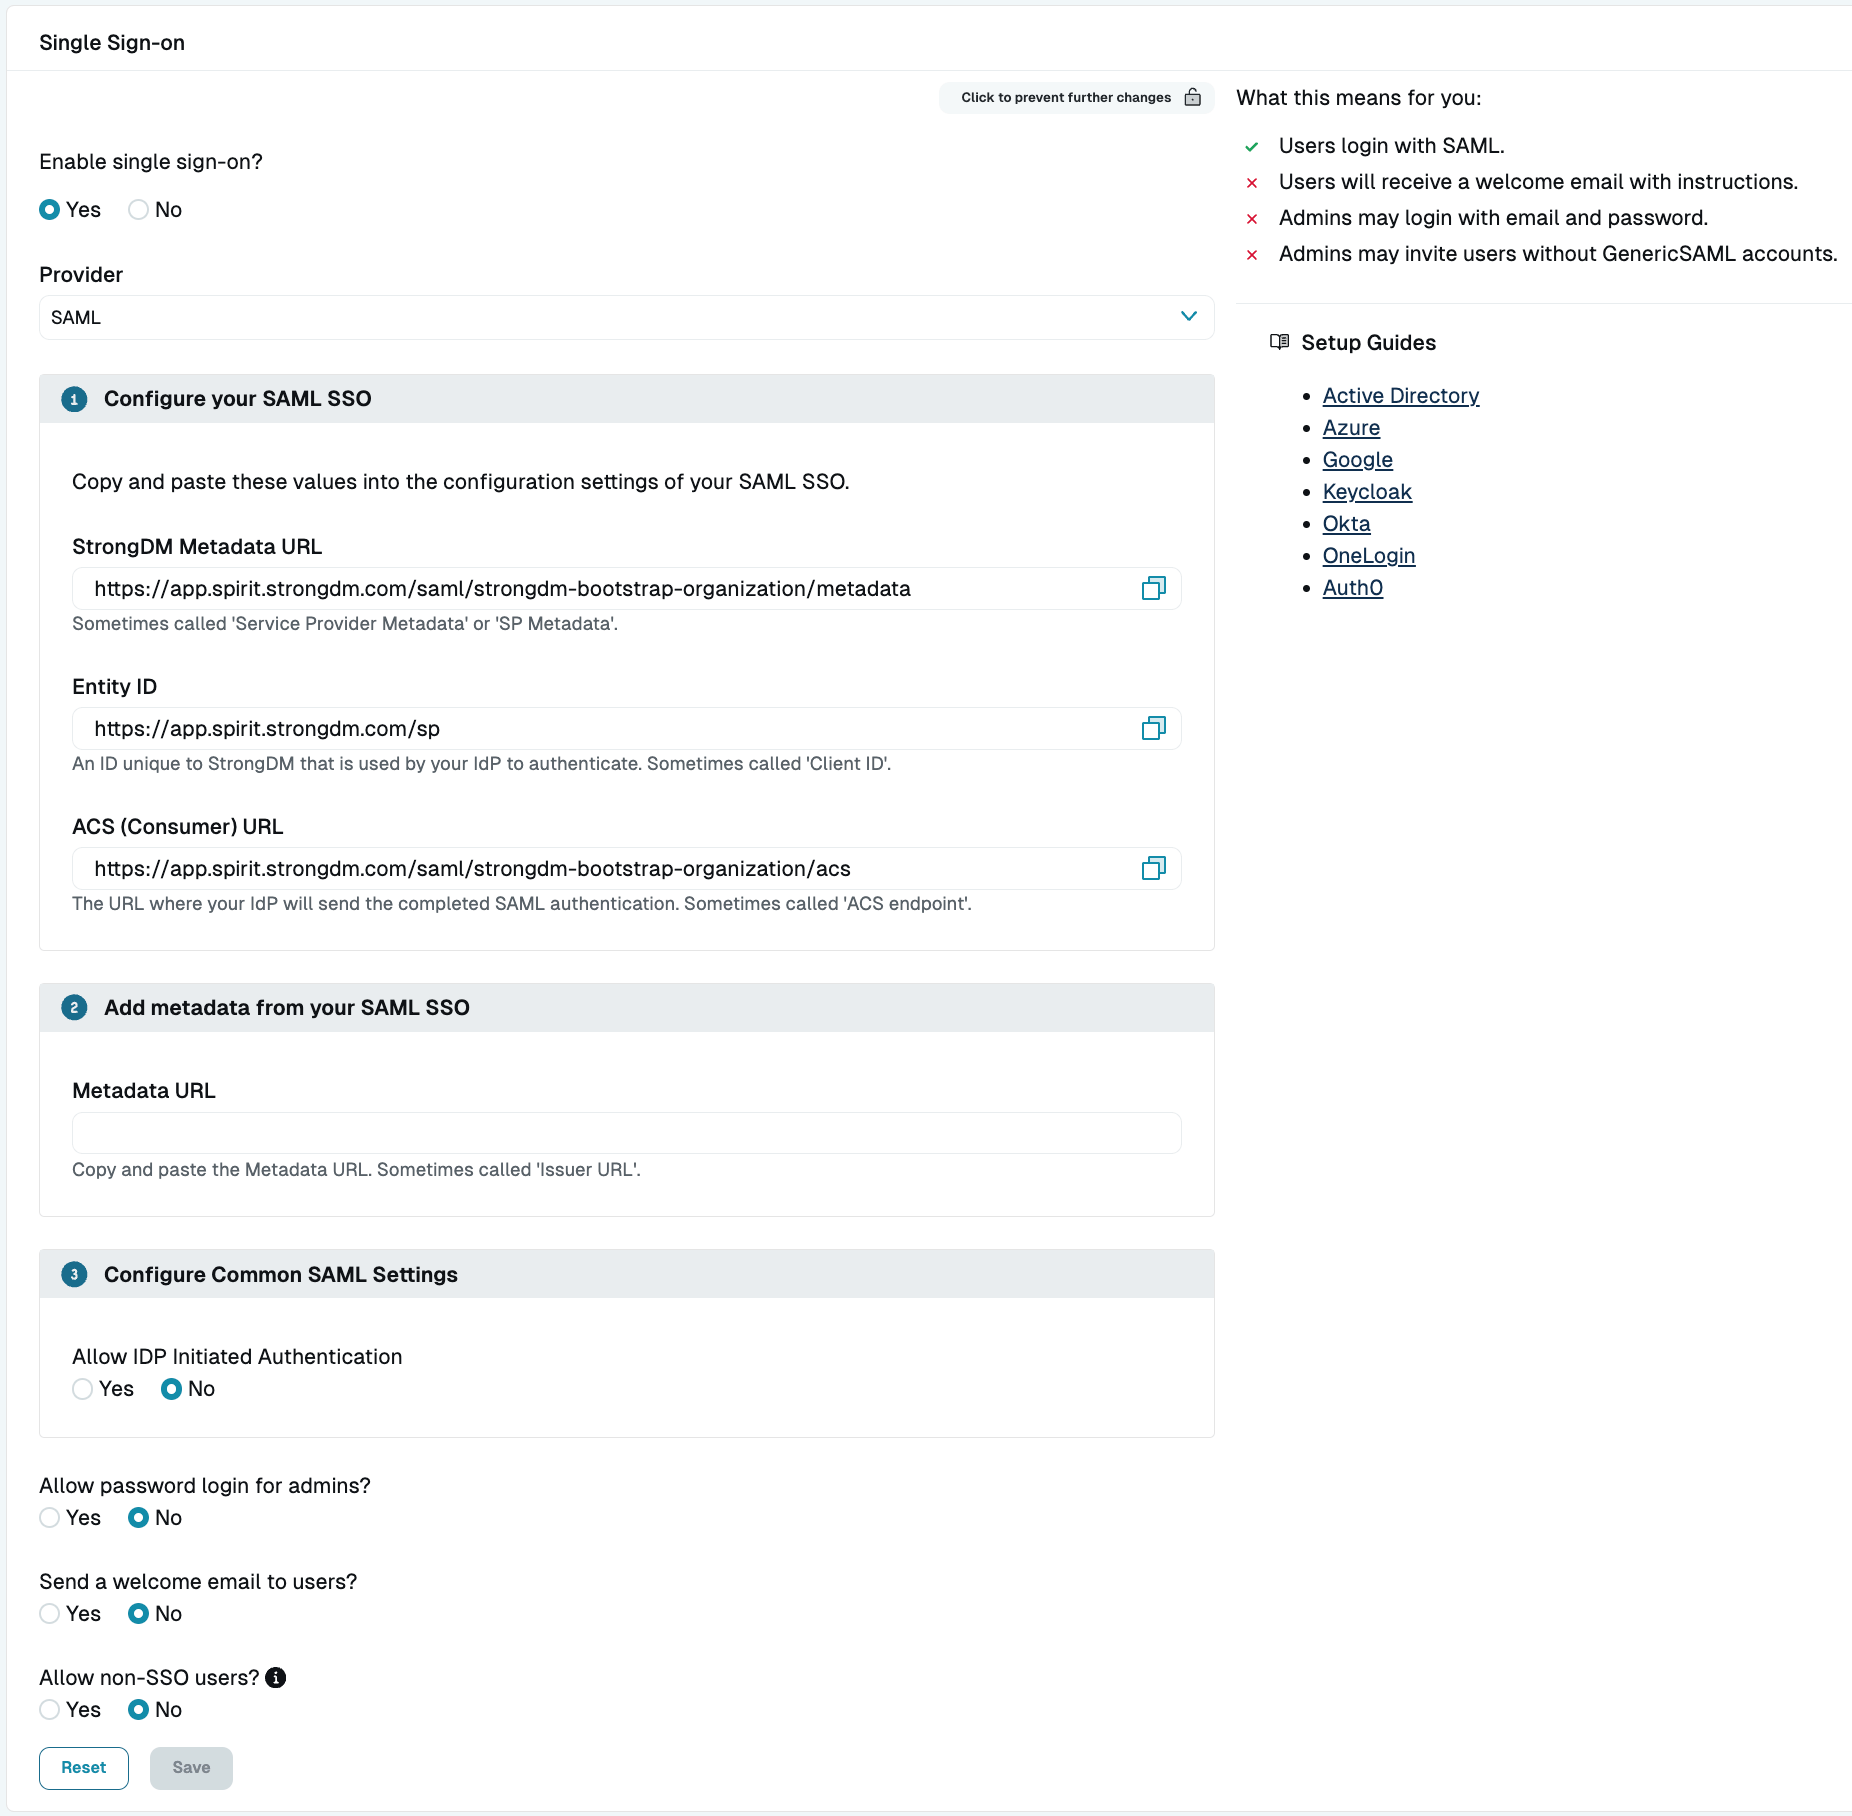
Fill in the Metadata URL and Copy StrongDM Info - Copy the values provided for Entity ID and ACS (Consumer) URL (or leave this page open).
Okta Setup
- Log in to your Okta admin console, and under Applications, create a new app integration.
- For the Sign-in method, choose “SAML 2.0.”
- In the General Settings of the Create SAML Integration wizard, set the App Name to “StrongDM.”
- (Optional) Set an App Logo image if desired.

StrongDM Logo - (Optional) To allow IdP-initiated logins, leave App visibility unchecked.
- Select Next to move to the Configure SAML tab. Copy the value from StrongDM for ACS (Consumer) URL and paste it into the Single sign-on URL field in Okta.
- Copy the value from StrongDM for Entity ID and paste it into the Audience URI (SP Entity ID) field in Okta.
- Change the Application username to “Email.”
- Leave the other fields as they are, scroll down, and select Next.
- In the Feedback tab, select “I’m an Okta customer adding an internal app” and click Finish.
- Copy the Metadata URL from the settings on the Sign On tab.
Complete StrongDM Setup
- Copy the Metadata URL from Okta and paste it into the Metadata URL field in the Admin UI.
- (Optional) Click Yes for Allow IDP Initiated Authentication. Be sure that if you are enabling IdP-initiated authentication and that you have left the App visibility option unchecked in the Okta admin console.
- (Optional) Click Yes for Allow password login for admins to prevent accidentally locking out your admins. We recommend that you enable this option at least until your SSO is configured and tested.
- Click Save.