SSO With Ping Identity (SAML)
Last modified on September 17, 2024
Overview
This guide provides step-by-step instructions on how to configure single sign-on (SSO) with Ping Identity using the Security Assertion Markup Language (SAML) 2.0 authentication standard.
Prerequisites
To get started, make sure the following conditions are met:
- In Ping Identity, you must have elevated privileges or be an administrator with the ability to manage application settings.
- In StrongDM, your permission level must be set to Administrator.
- Ensure you have a unique identifier for users. Only email address is currently supported.
Steps
We recommend that you keep both Ping Identity and the Admin UI open in your browser so you can easily tab between them.
Begin to configure StrongDM
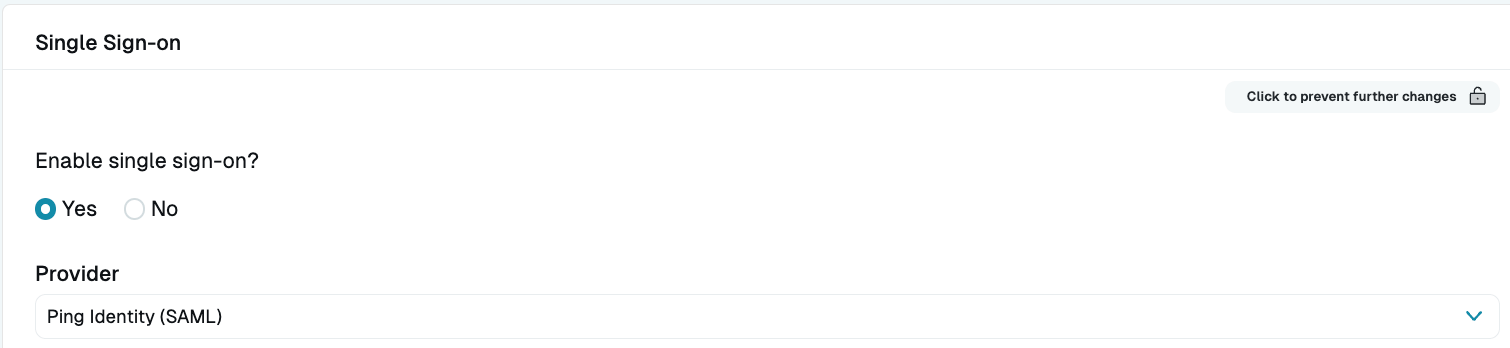
- In the StrongDM Admin UI, go to Settings > User Management.
- Click the Lock icon to make changes.
- Click Yes to enable single sign-on.
- Select Ping Identity (SAML) from the Provider dropdown menu.
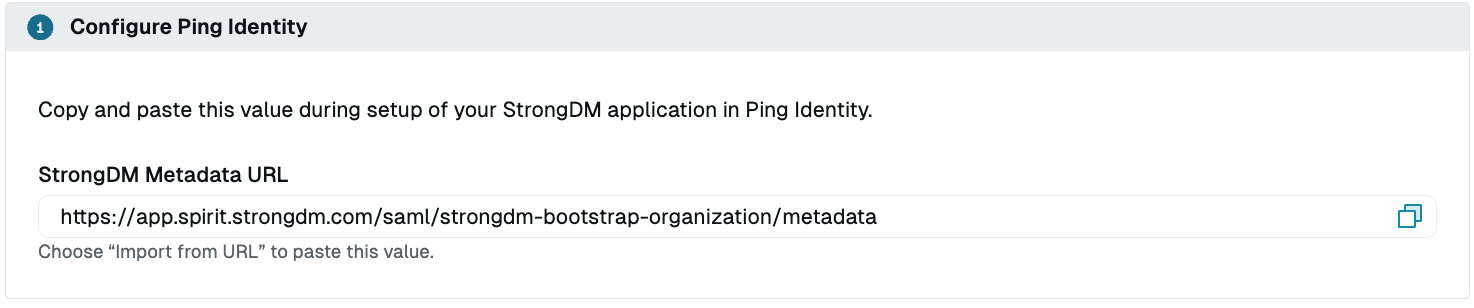
- From the Configure Ping Identity section, copy the StrongDM Metadata URL. This URL is necessary when you configure your Ping Identity SAML application.
Create a new Ping Identity SAML application
- In the PingOne admin console, select the appropriate environment and navigate to Connections > Applications.
- Click the Plus icon, select the SAML Application type, and name the new application.
- From the SAML Configuration section, select Import from URL.
- Paste the StrongDM Metadata URL in the Import URL field.
- Click Import.
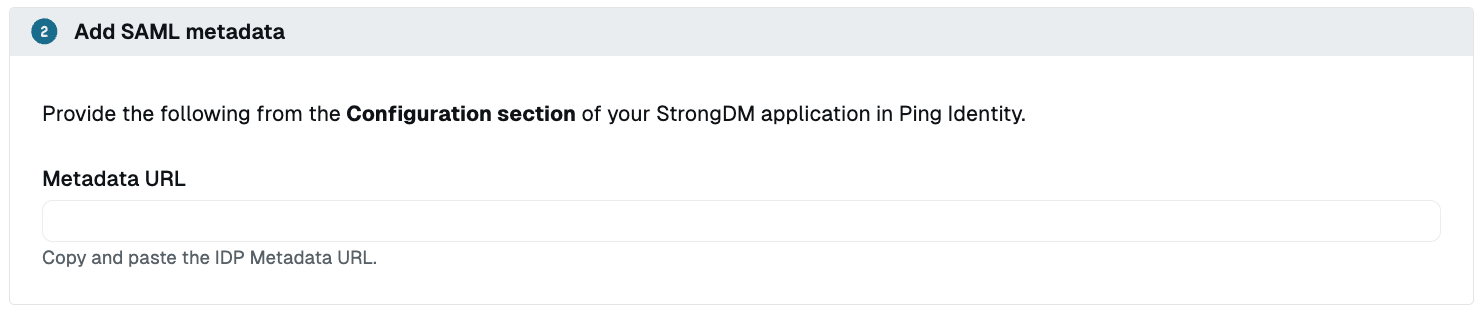
- From the Configuration tab, copy the IDP Metadata URL.
- Go back to the Admin UI. In the Add SAML metadata section, paste the IDP Metadata URL in the Metadata URL field.
Map attributes and turn on the app
- In the Admin UI, copy the email URN from section Map attributes and go back to the PingOne admin console.
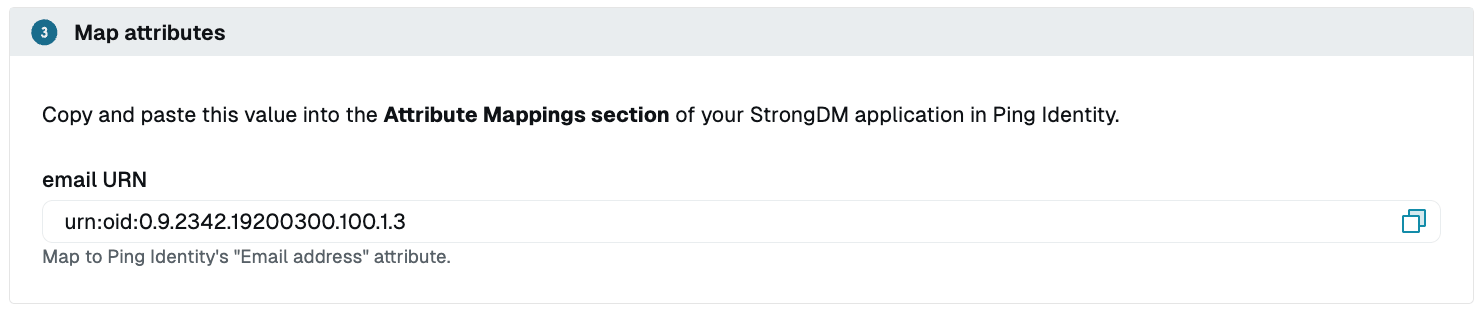
- From the Attribute Mappings tab, add an attribute mapping.
- In the column with your app’s name (on the left), paste the email URN in the field. In the PingOne column, enter
Email Addressin the corresponding field. - When you are finished configuring the required and desired settings, save your progress and set the app to On.
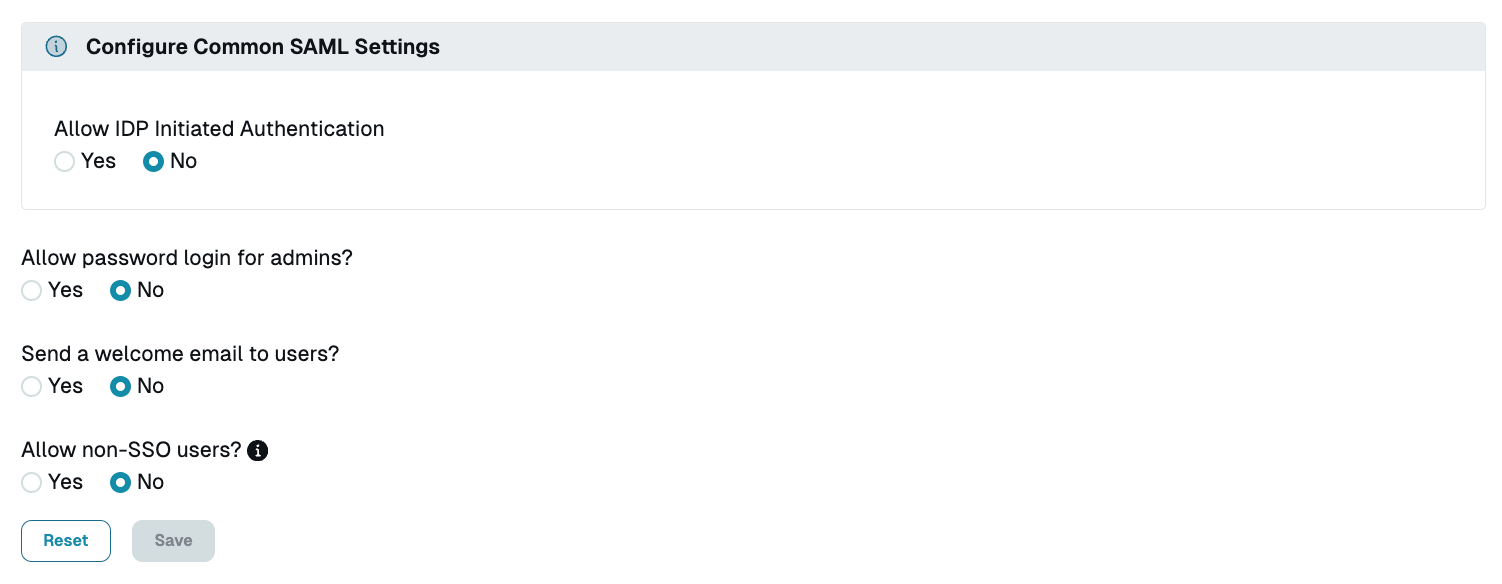
Configure other StrongDM settings
In the Admin UI, configure the remaining settings (for example, Allow password login for admins?). If you wish to allow users to log in via a link from Ping Identity, enable Allow IDP Initiated Authentication. Click Save when you are finished.