Kubernetes Nodes
Last modified on May 22, 2025
Overview
This guide describes how to create a node (gateway or relay) in your Kubernetes cluster. You can follow the manual approach or optionally use the Helm chart method to install your node. If you’re interested in using a proxy cluster rather than a gateway or relay, see the Proxy Clusters in Kubernetes guide.
Prerequisites
To be successful when using this guide, you must meet the following general requirements:
- Ensure that you are an Administrator in StrongDM.
- Be sure that your Kubernetes cluster(s) is at version 1.16 or later and has publicly accessible nodes and stable IPs.
- Install the kubectl command-line tool locally to interact with your Kubernetes clusters.
- If you are using Nginx Ingress Controller, manually patch your services to allow TCP and UDP traffic.
- If you are using Helm to manage your node, install Helm 3.0 or later locally.
Manage Kubernetes Nodes With Helm
StrongDM has a Helm chart that can be used to create a node within your cluster, register it with your StrongDM organization, and then register the cluster itself as a resource in your StrongDM organization as well. All you need to do this is to have an admin token that gives you permission to create nodes and cluster resources.
- Create a
values.yamlfile for use with the Helm chart. You can see a reference schema of the available options in thesdm-relayGitHub repository values.yaml file or on ArtifactHub for further customization. The minimum values that must be specified in order to create the node, register it with your organization, and register the cluster as a resource are shown in the following example.
strongdm:
  auth: # StrongDM authentication sources
    adminToken: "" # Specify an admin token to allow the chart to create and register your node
  autoCreateNode: # create/register the node in StrongDM, using the SDM_ADMIN_TOKEN
    enabled: true
  autoRegisterCluster: # register this cluster as a resource in StrongDM
    enabled: true
Install the Helm chart. Replace
<RELEASE_NAME>with a unique and meaningful name.helm repo add strongdm https://helm.strongdm.com/stable/ helm install <RELEASE_NAME> strongdm/sdm-relay -f values.yaml helm status <RELEASE_NAME>If you wish, you can verify that the chart created the node, and that the node and resource were added to your StrongDM organization with the following methods:
- You can check that the node is running in your cluster with
kubectl get services, which should output something similar to the following, with ansdm-relay-servicerunning:
NAME TYPE CLUSTER-IP EXTERNAL-IP PORT(S) AGE kubernetes ClusterIP 10.96.0.1 <none> 443/TCP 21h sdm-relay-service NodePort 10.104.132.14 <none> 30001:30001/TCP 21h- You can check that the node is added to StrongDM by looking in the Admin UI under Networking > Gateways or Networking > Relays, or by using the CLI (
sdm admin nodes list). If you did not specify any settings for your node, it will be named something random, but the IP will match your cluster. - You can check that the cluster is added to StrongDM as a resource by looking in the Admin UI under Resources > Clusters, or by using the CLI (
sdm admin clusters list). If you did not specify any settings for your cluster resource, it will be named something based on your chosen<RELEASE_NAME>.
- You can check that the node is running in your cluster with
gateway.enabled:true to your chart, as shown in the GitHub repository values.yaml file or on ArtifactHub. You can also customize further in this configuration, such as naming the gateway or relay something specific or creating it with custom maintenance windows.Upgrade the sdm-relay Helm chart
To upgrade the sdm-relay Helm chart, run the following command. For more, see the helm upgrade command documentation.
helm upgrade <RELEASE_NAME> strongdm/sdm-relay
Uninstall the sdm-relay Helm chart
You can uninstall the sdm-relay Helm chart by running the following command. This command removes all Kubernetes components associated with the release and deletes the release. For more, see the helm uninstall reference documentation.
helm uninstall <RELEASE_NAME>
Create a Node Manually
In some circumstances, you may wish to deploy a gateway or relay in a Kubernetes cluster without using Helm. You will need to create a gateway token or relay token in StrongDM, install your node and configure it in your cluster, and then verify that it is connected to StrongDM.
Create a token
To successfully set up your Kubernetes node, you must first create the gateway or relay in the Admin UI and generate a token for it.
Create a gateway token
To create a gateway token, follow these steps.
- Log in to the Admin UI.
- Go to Networking > Gateways.
- Click Add gateway.
- For Name, enter a name for the gateway.
- For Advertised Host, enter the IP address or host that the gateway listens on.
- For Advertised Port, set the port (default 5000) for the service to listen on.
- Click Create gateway and the gateway token appears in a modal.
- Copy the token and keep it in a secure place.
To generate a gateway token via the CLI instead, see sdm admin relay create-gateway.
On macOS, there is an additional step: encode the resulting token in Base64 using echo -n [token-string] | base64. PowerShell and Windows commands may differ. If you generated the token from the CLI, it may contain a trailing \n character, which you have to remove before passing it through base64.
Create a relay token
To register the node and create a relay token, follow these steps.
- Log in to the Admin UI.
- Go to Networking > Relays.
- Click Add relay.
- For Name, enter a name for the relay.
- Click Create relay.
- Copy the token and keep it in a secure place.
To generate a relay token via the CLI instead, see sdm admin relay create.
On macOS, there is an additional step: encode the resulting token in Base64 using echo -n [token-string] | base64. PowerShell and Windows commands may differ. If you generated the token from the CLI, it may contain a trailing \n character, which you have to remove before passing it through base64.
Create your node
Once you have a valid token, you can continue with the steps in this section to manually create your Kubernetes gateway or relay.
Follow the steps to create a token.
Create the YAML manifest for your Kubernetes node. Use the following content, replacing
[token-in-base64]with your Base64-encoded token.kind: Secret apiVersion: v1 metadata: name: sdm-relay-secret type: Opaque data: token: [token-in-base64] --- kind: Deployment apiVersion: apps/v1 metadata: name: sdm-relay-deployment labels: app: sdm-relay spec: replicas: 1 # must always be 1. selector: matchLabels: app: sdm-relay template: metadata: labels: app: sdm-relay spec: # You may use node affinity to ensure that these containers are only # deployed to publicly visible nodes. # This doesn't work with fargate profiles # affinity: # nodeAffinity: # requiredDuringSchedulingIgnoredDuringExecution: # nodeSelectorTerms: # - matchExpressions: # - key: alpha.eksctl.io/nodegroup-name # operator: In # values: # - ng-1 containers: - name: sdm-relay image: public.ecr.aws/strongdm/relay:latest imagePullPolicy: Always env: - name: SDM_ORCHESTRATOR_PROBES value: ":9090" - name: SDM_RELAY_TOKEN valueFrom: secretKeyRef: name: sdm-relay-secret key: token livenessProbe: httpGet: path: /liveness port: 9090 initialDelaySeconds: 25 timeoutSeconds: 10 periodSeconds: 15 failureThreshold: 5 ---If you are setting up a relay, that is the end of the config file. If you are setting up a gateway, you also need the next snippet added to your YAML manifest.
kind: Service
apiVersion: v1
metadata:
  name: sdm-relay-service
  labels:
    app: sdm-relay
spec:
  type: "NodePort"
  selector:
    app: sdm-relay
  ports:
    - name: gateway
      # or relay
      port: 30001
      targetPort: 5000
      nodePort: 30001
      # You may use externalIPs as a way to get a stable IP configuration.
      # then map 80.11.12.10 to sdmrelay.mycompany.com
  externalIPs:
    - 34.220.97.45
To ensure that the external IP address is persistent, you need to either use node affinity (in the Deployment section) orexternalIPsin the NodePort section.Create the deployment and activate your gateway. You may have to specify a directory for the YAML file.
kubectl create -f name-of-gateway-file.ymlVerify the node is running. Your node appears in the list of running services.
kubectl get servicesNAME TYPE CLUSTER-IP EXTERNAL-IP PORT(S) AGE kubernetes ClusterIP 10.96.0.1 <none> 443/TCP 21h sdm-relay-service NodePort 10.104.132.14 <none> 30001:30001/TCP 21hRelay deployments are not listed under kubectl services.Log in to the Admin UI. Go to Networking > Gateways (or Networking > Relays). The node you created appears online with a heartbeat. Click Details to view additional information.
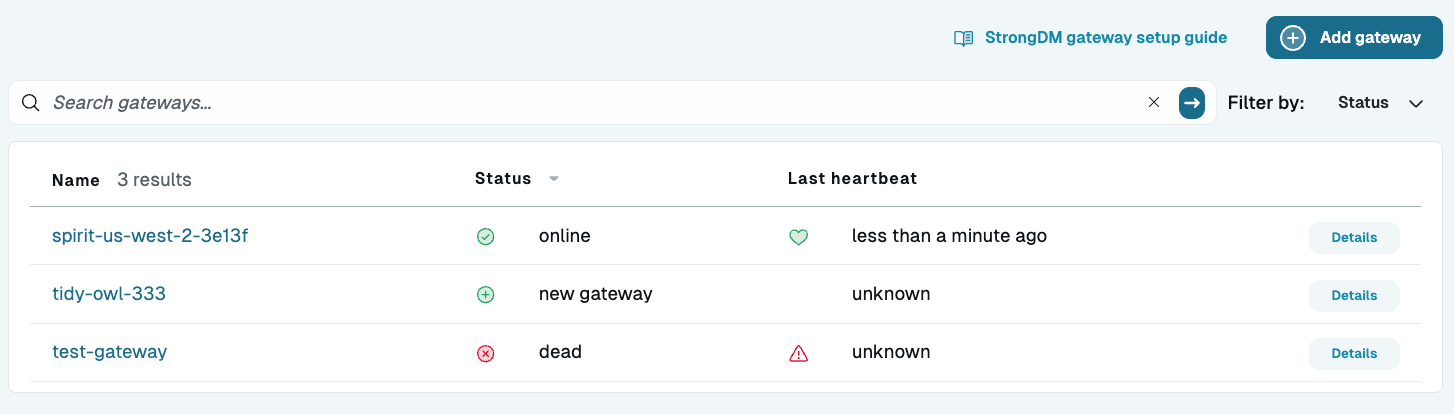
Gateway List in Admin UI