Oracle
Last modified on June 2, 2025
Overview
A datasource consists of a database resource and the credentials used to access it. This guide describes how a StrongDM administrator can add an Oracle database as a datasource in the Admin UI. After completing this setup, users can follow the steps in the Oracle User Guide to connect to your Oracle database.
Supported Versions
StrongDM broadly supports various JDBC clients, such as DBeaver and SQL Developer, as well as SQL*Plus clients for use with Oracle databases. Toad for Oracle is also supported. Our automated tests check against Oracle 19 and 21 servers configured without legacy authentication modes before version 12.
StrongDM can confirm support for Oracle database versions 19c and 21c and the SQL client versions in the following table.
| SQL*Plus versions | JDBC client versions |
|---|---|
|
|
SQL*Plus information in the previous table applies to standard Oracle configurations. Non-standard implementations on Windows or macOS my cause the SQL*Plus client to fail.
We do not support the SQL*Plus clients available via the Docker images under ghcr.io/oracle/oraclelinux8.
Prerequisites
To add a datasource in the StrongDM Admin UI, note the following prerequisites:
- Properly configure an account for your database resource. If you choose to store the resource credentials with StrongDM, have those credentials ready. When not using StrongDM, set up a Secret Store integration and be able to enter the location of the secrets required to access the resource.
- The hostname or endpoint you enter for your resource must be accessible by at least one gateway or relay. To verify this, log in to the gateway or relay and use the
nc -zv <YOUR_HOSTNAME> <YOUR_PORT>Netcat command. For example, usenc -zv testdb-01.fancy.org 5432. If your gateway server can connect to this hostname, you can proceed.
-z flag to check for listeners without sending data and the -v flag to show verbose output. If you do not have Netcat, you can use a package manager such as APT (Advanced Package Tool) to install it. On Linux-based distributions, run apt-get install netcat.Add a Datasource
To add your new Oracle database as a StrongDM datasource, use the following steps.
Log in to the Admin UI.
Go to Resources > Datasources.
Click Add datasource.
Select Oracle as the Datasource Type and set other configuration properties for your new database resource.
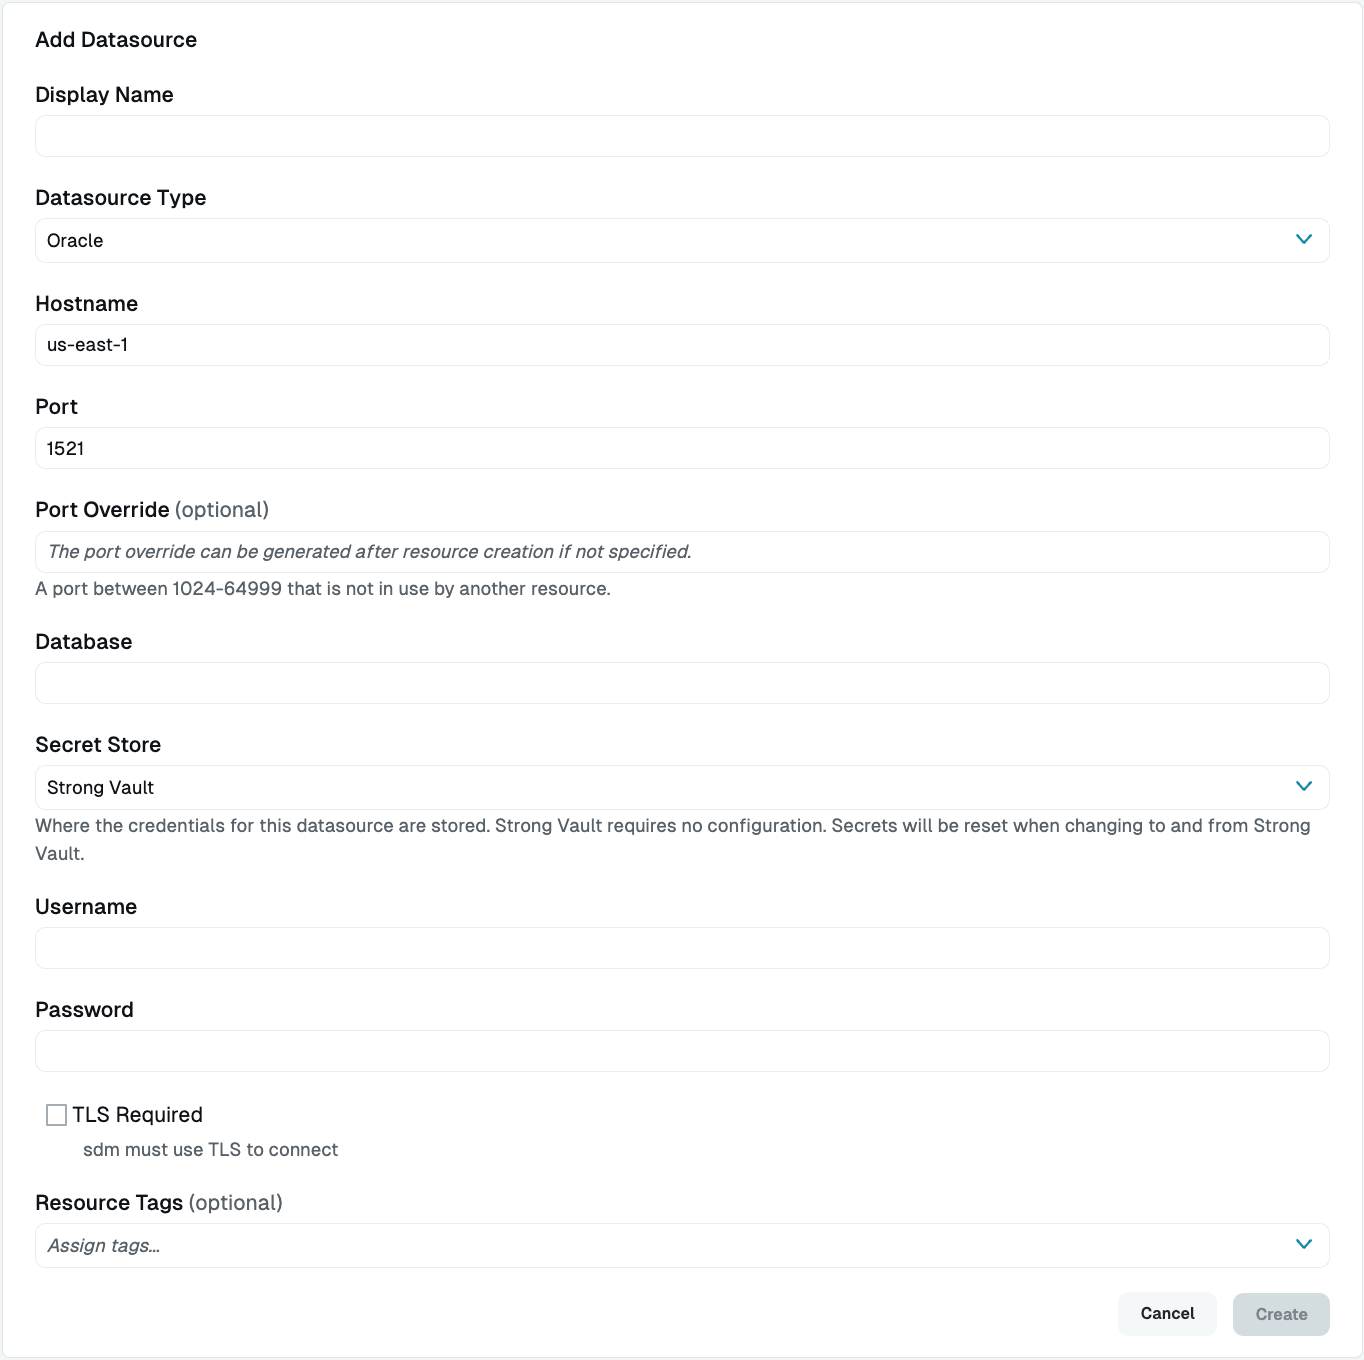
Add Oracle Datasource Complete all required fields.
Click create to save the resource.
Click the resource name to view status, diagnostic information, and setting details.
Resource properties
Configuration properties are visible when you add a datasource or when you click to view its settings. The following table describes the settings available for your Oracle database.
| Property | Requirement | Description |
|---|---|---|
| Display Name | Required | Meaningful name to display the resource throughout StrongDM; exclude special characters like quotes (") or angle brackets (< or >) |
| Datasource Type | Required | Select Oracle |
| Proxy Cluster | Required | Defaults to “None (use gateways)”; if using proxy clusters, select the appropriate cluster to proxy traffic to this resource |
| Hostname | Required | Hostname for your Oracle database resource; must be accessible to a gateway or relay |
| Port | Required | Port to use when connecting to your Oracle database; default port value is 1521 |
| Bind Interface | Read only | Automatically generated IP address value in the 127.0.0.1 to 127.255.255.254 IP address range; default is 127.0.0.1; preferred bind interface value can be modified later under Settings > Port Overrides |
| Port Override: | Read only | Automatically generated with a value between 1024-59999 as long as that port is not used by another resource; preferred port can be modified later under Settings > Port Overrides |
| Database | Required | Database name you would like to connect to using this datasource |
| Secret Store: | Optional | Credential store location with the default set to Strong Vault; learn more about Secret Store options |
| Username | Required | Username to utilize when connecting to this datasource; displays when Secret Store integration is not configured for your organization or when StrongDM serves as the Secret Store type |
| Password | Required | Password for the user connecting to this datasource; displays when Secret Store integration is not configured for your organization or when StrongDM serves as the Secret Store type |
| Username (path) | Required | Path to the secret in your Secret Store location (for example, path/to/credential?key=optionalKeyName where key argument is optional); required when using a non-StrongDM Secret Store type |
| Password (path) | Required | Path to the secret in your Secret Store location (for example, path/to/credential?key=optionalKeyName where key argument is optional); required when using a non-StrongDM Secret Store type |
| TLS Required | Optional | Indicator to require StrongDM to use TLS to connect to the database |
| Resource Tags | Optional | Datasource tags consisting of key-value pairs <KEY>=<VALUE> (for example, env=dev) |
Secret Store options
By default, datasource credentials are stored in StrongDM. However, these credentials can also be saved in a secrets management tool.
Non-StrongDM options appear in the Secret Store dropdown if they are created under Settings > Secrets Management. When you select another Secret Store type, its unique properties display. For more details, see Configure Secret Store Integrations.
Resource status
After a resource is created, the Admin UI displays that resource as unhealthy until the health checks run successfully. When the resource is ready, the Health icon indicates a positive, green status.
When the resource does not display a positive status, click the resource name to go to the Diagnostics tab and check for errors.