Identity Alias for RDP
Last modified on June 10, 2024
You can use an Identity Alias, instead of a leased credential, with StrongDM to proxy authentication with your certificate-based RDP resources. Actions are executed via the user’s account (that is, the Identity Alias) with the resource, while user-level auditing and monitoring occur on the resource side via native logging.
Utilizing an Identity Alias results in your native server logs identifying the particular user performing an action, rather than identifying all actions conducted via StrongDM connections as being performed by the single leased user account. The username employed is the user’s Identity Alias set in their StrongDM user account.
Identity Aliases for RDP are supported for Microsoft Entra ID (formerly Azure AD) and on-premises AD.
Prerequisites
- The RDP root certificate must be installed on the target environment (Microsoft Entra ID or on-premises AD).
- On-premises AD must have AD Certificate Services enabled.
- Network Level Authentication (NLA) must be disabled on the RDP server.
Set Up Identity Aliases
Set up your server and user account
- Create your RDP server if you do not have one already.
- Create or identify an account on the server that StrongDM can use to check its health. This user should have access to the machine.
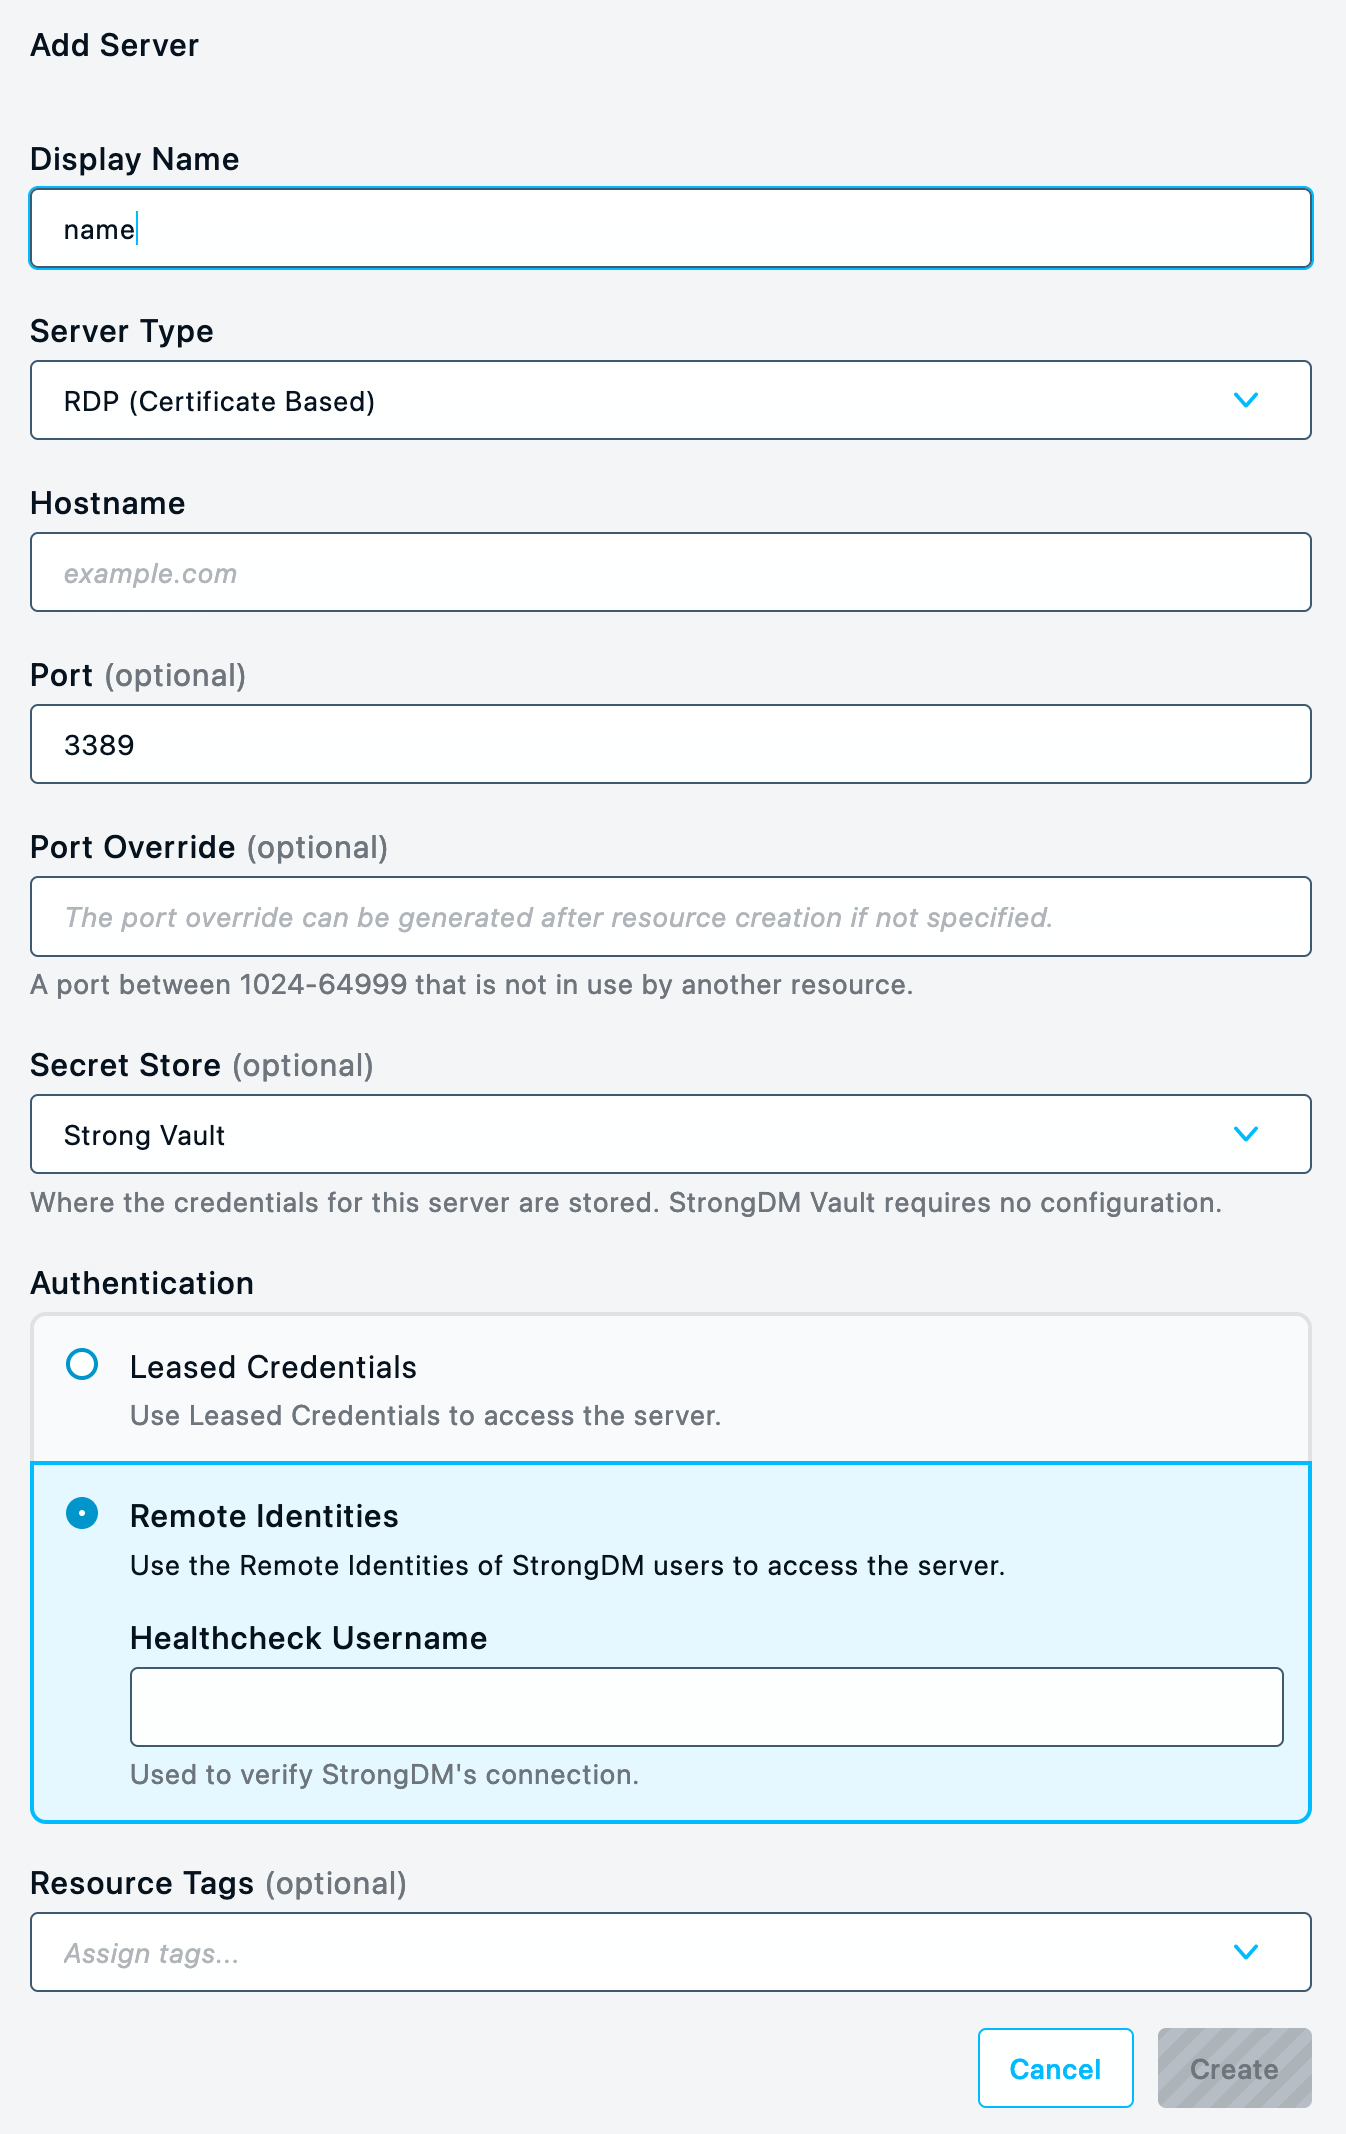
Add the resource in StrongDM
- In the Admin UI, go to Infrastructure > Servers .
- Click Add server to create the resource.
- Select RDP (Certificate Based) as the server type and complete the fields on the resource form.
- For Authentication, set Identity Aliases. Select an Identity Set name from the list, and enter a Healthcheck Username, which is the RDP user account name to use for the healthcheck.The healthcheck only checks if the RDP resource is alive. It connects to the server but doesn’t log in. It might not work as intended if it is unable to authenticate, even if the Admin UI shows it as healthy because it can be reached.
- Set all required RDP (Certificate Based) properties.
- Click Create to save the resource.
Add the Identity Alias to the user’s settings
In the Admin UI, go to Access > Users and select the user who is going to use an Identity Alias.
In that user’s Identity Aliases tab, for Identity Alias, enter the RDP user account name (for example,
alice.glick@example.com) that is used to authenticate to the RDP (Certificate Based) resource that is configured to use Identity Aliases.For Identity Set, enter the name of the Identity Set that the Identity Alias will be used for. A user can only have one alias per set.
If Identity Aliases are configured on a resource, an Identity Alias also must be set for any user that is given access to that resource. If it is not, that user is unable to connect to the resource.
Individual users must have their own accounts on the server. The account name must match the Identity Alias value specified in the user’s settings.
Configuration is now complete. You may now start using Identity Aliases to authenticate with your RDP resource.