Access Workflows
Last modified on May 19, 2025
This feature is part of the Enterprise plan. If it is not enabled for your organization, please contact StrongDM at the StrongDM Help Center.
StrongDM provides the tools that you need to secure access to your resources, manage user roles and permissions to facilitate access, generate detailed audit histories, and more.
Although your organization may assign standing access to users via roles (groups of users) based on their team or position, there may also be situations where you wish to allow users to request access to particular resources temporarily.
Access workflows enable you to automate how access requests are submitted, reviewed, and approved (or denied). With access workflows, you can create subsets of resources and allow users with particular roles to request access to them. When requests are made, the pre-selected approvers for that workflow are notified and may then accept or deny the request.
For more information about how the access requests are submitted and reviewed, see the Request Access page.
Access Workflows List

The Access Workflows page in the Admin UI allows you to manage your current access workflows. The page lists all the workflows that you have the ability to administer. Your organization may have up to 50 access workflows. In the list, for each workflow you can see the following:
- Name and description of the access workflow
- Priority of the workflow (this can be adjusted to have it take precedence over another overlapping workflow)**
- Status of the access workflow (whether it is currently enabled or disabled)
Add and Edit Access Workflows
You can click on the Actions button to open the actions menu on an existing access workflow in the list. This menu contains the options to view details about that access workflow (and edit them) or to delete the access workflow. The Add workflow button at the top of the page begins setup of a new access workflow.
In either case, you are presented with several items to configure for your workflow.
Summary
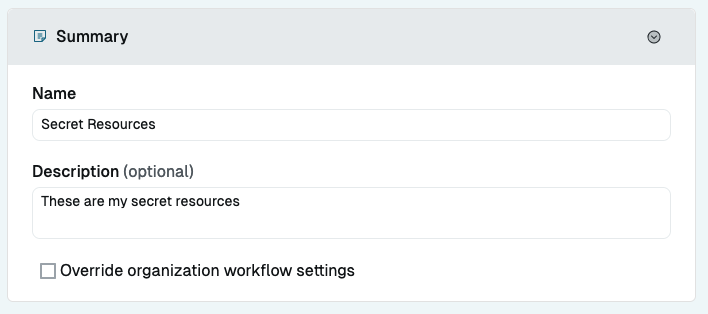
When adding or editing an access workflow, the Summary section is where you define the name of the access workflow as well as a short description, which should clearly depict what the access workflow does. This helps administrators to find the correct access workflow when navigating the Workflows page.
Additionally, in the Summary section, there is an Override organization workflow settings checkbox. If enabled, you can set values for Fixed duration for access request or User specified duration for access requests. These values will override (for just this workflow) the organization-wide settings that are found in the Admin UI under Settings > Workflows. The fields under Override organization workflow settings work the same way as the organization-level settings, but only for the workflow being edited. See the linked sections for details.
Assign resources to this access workflow
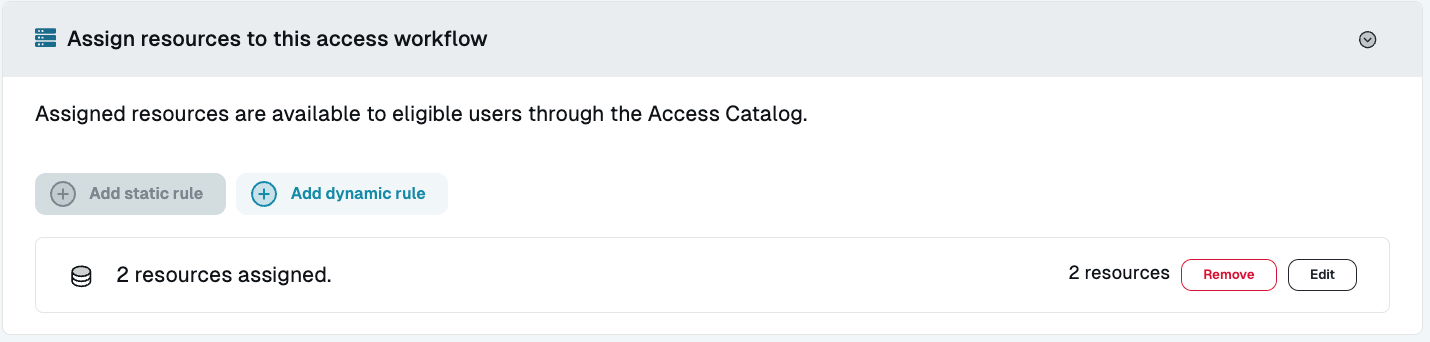
In the Assign resources to this workflow section, you select resources to assign to this access workflow. These assigned resources are available for users who match the indicated roles to request from the catalog via this access workflow. When a request is created for one of the assigned resources, it triggers this access workflow and sends the request to be approved or denied based on whatever approval criteria are configured.
Resources can be assigned to the access workflow with either static rules or dynamic rules.
Static rules (assign specific resources)
To add specific individual resources to an access workflow, click Add Static Rule (or, if an access workflow already has resources statically assigned, click Edit in the “X resources assigned” section). Then, choose resources to add to this access workflow. The list to choose from includes all resources in the organization. The search bar and filters are available for use when searching longer lists.
Dynamic rules (assign resources dynamically)
For a more dynamic and scalable approach to assigning resources to a workflow, you can click Add Dynamic Rule (or click on Edit on an existing dynamic rule). Here, similarly to the process used to define the access given to roles with dynamic access rules, you may dynamically assign any resources that meet a set of criteria to the workflow. Dynamic rules can be created around the resource type or the tags on the resources.
For example, you can choose to add all resources of the “MySQL” type to this workflow. Dynamic rules apply to resources that are added in the future as well. In this example, if more MySQL resources are added later, they become available in the catalog; and if any are removed, they cease to be available.
You can also use tags for dynamic rules. For instance, you might add to a workflow all resources tagged with the env=dev tag. You can also combine the two methods, and allow access to, for example, all resources of the MySQL type and with the env=dev tag.
Attach roles
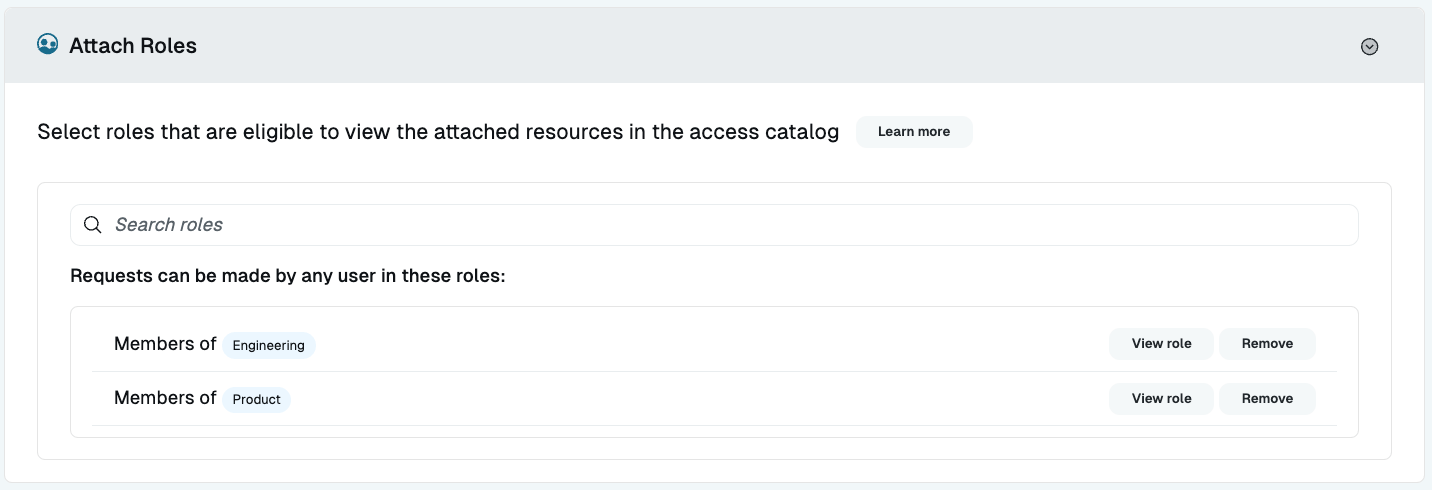
The Attach Roles section is where you choose the roles that are eligible to see the attached resources in their catalog and request access to them. If a user browsing the catalog is not a member of any of the roles assigned here, they are not able to make requests to access resources using this workflow.
Approval criteria
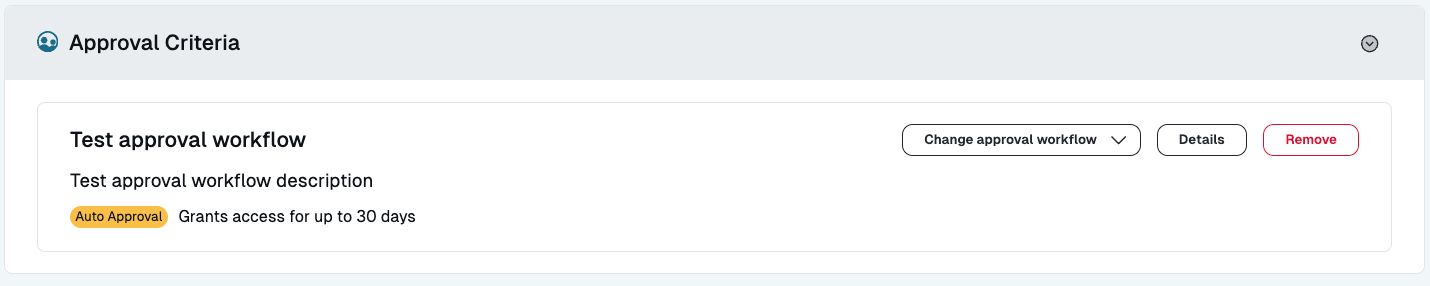
The Approval Criteria section is where you choose an approval workflow to use to approve requests that are made via this access workflow. Approval workflows can be automatic, can flow through ServiceNow or Jira if those integrations are set up, or can be manually approved by various individual users, roles, or a requester’s designated manager.
Workflow settings
In addition to managing individual workflows, you may apply certain settings to all workflows in your organization. These settings include the maximum access grant duration for approved requests, and whether or not email notifications are sent to requesters and approvers for new or completed access requests.
To make changes to workflow settings, go to Settings > Workflows in the Admin UI.
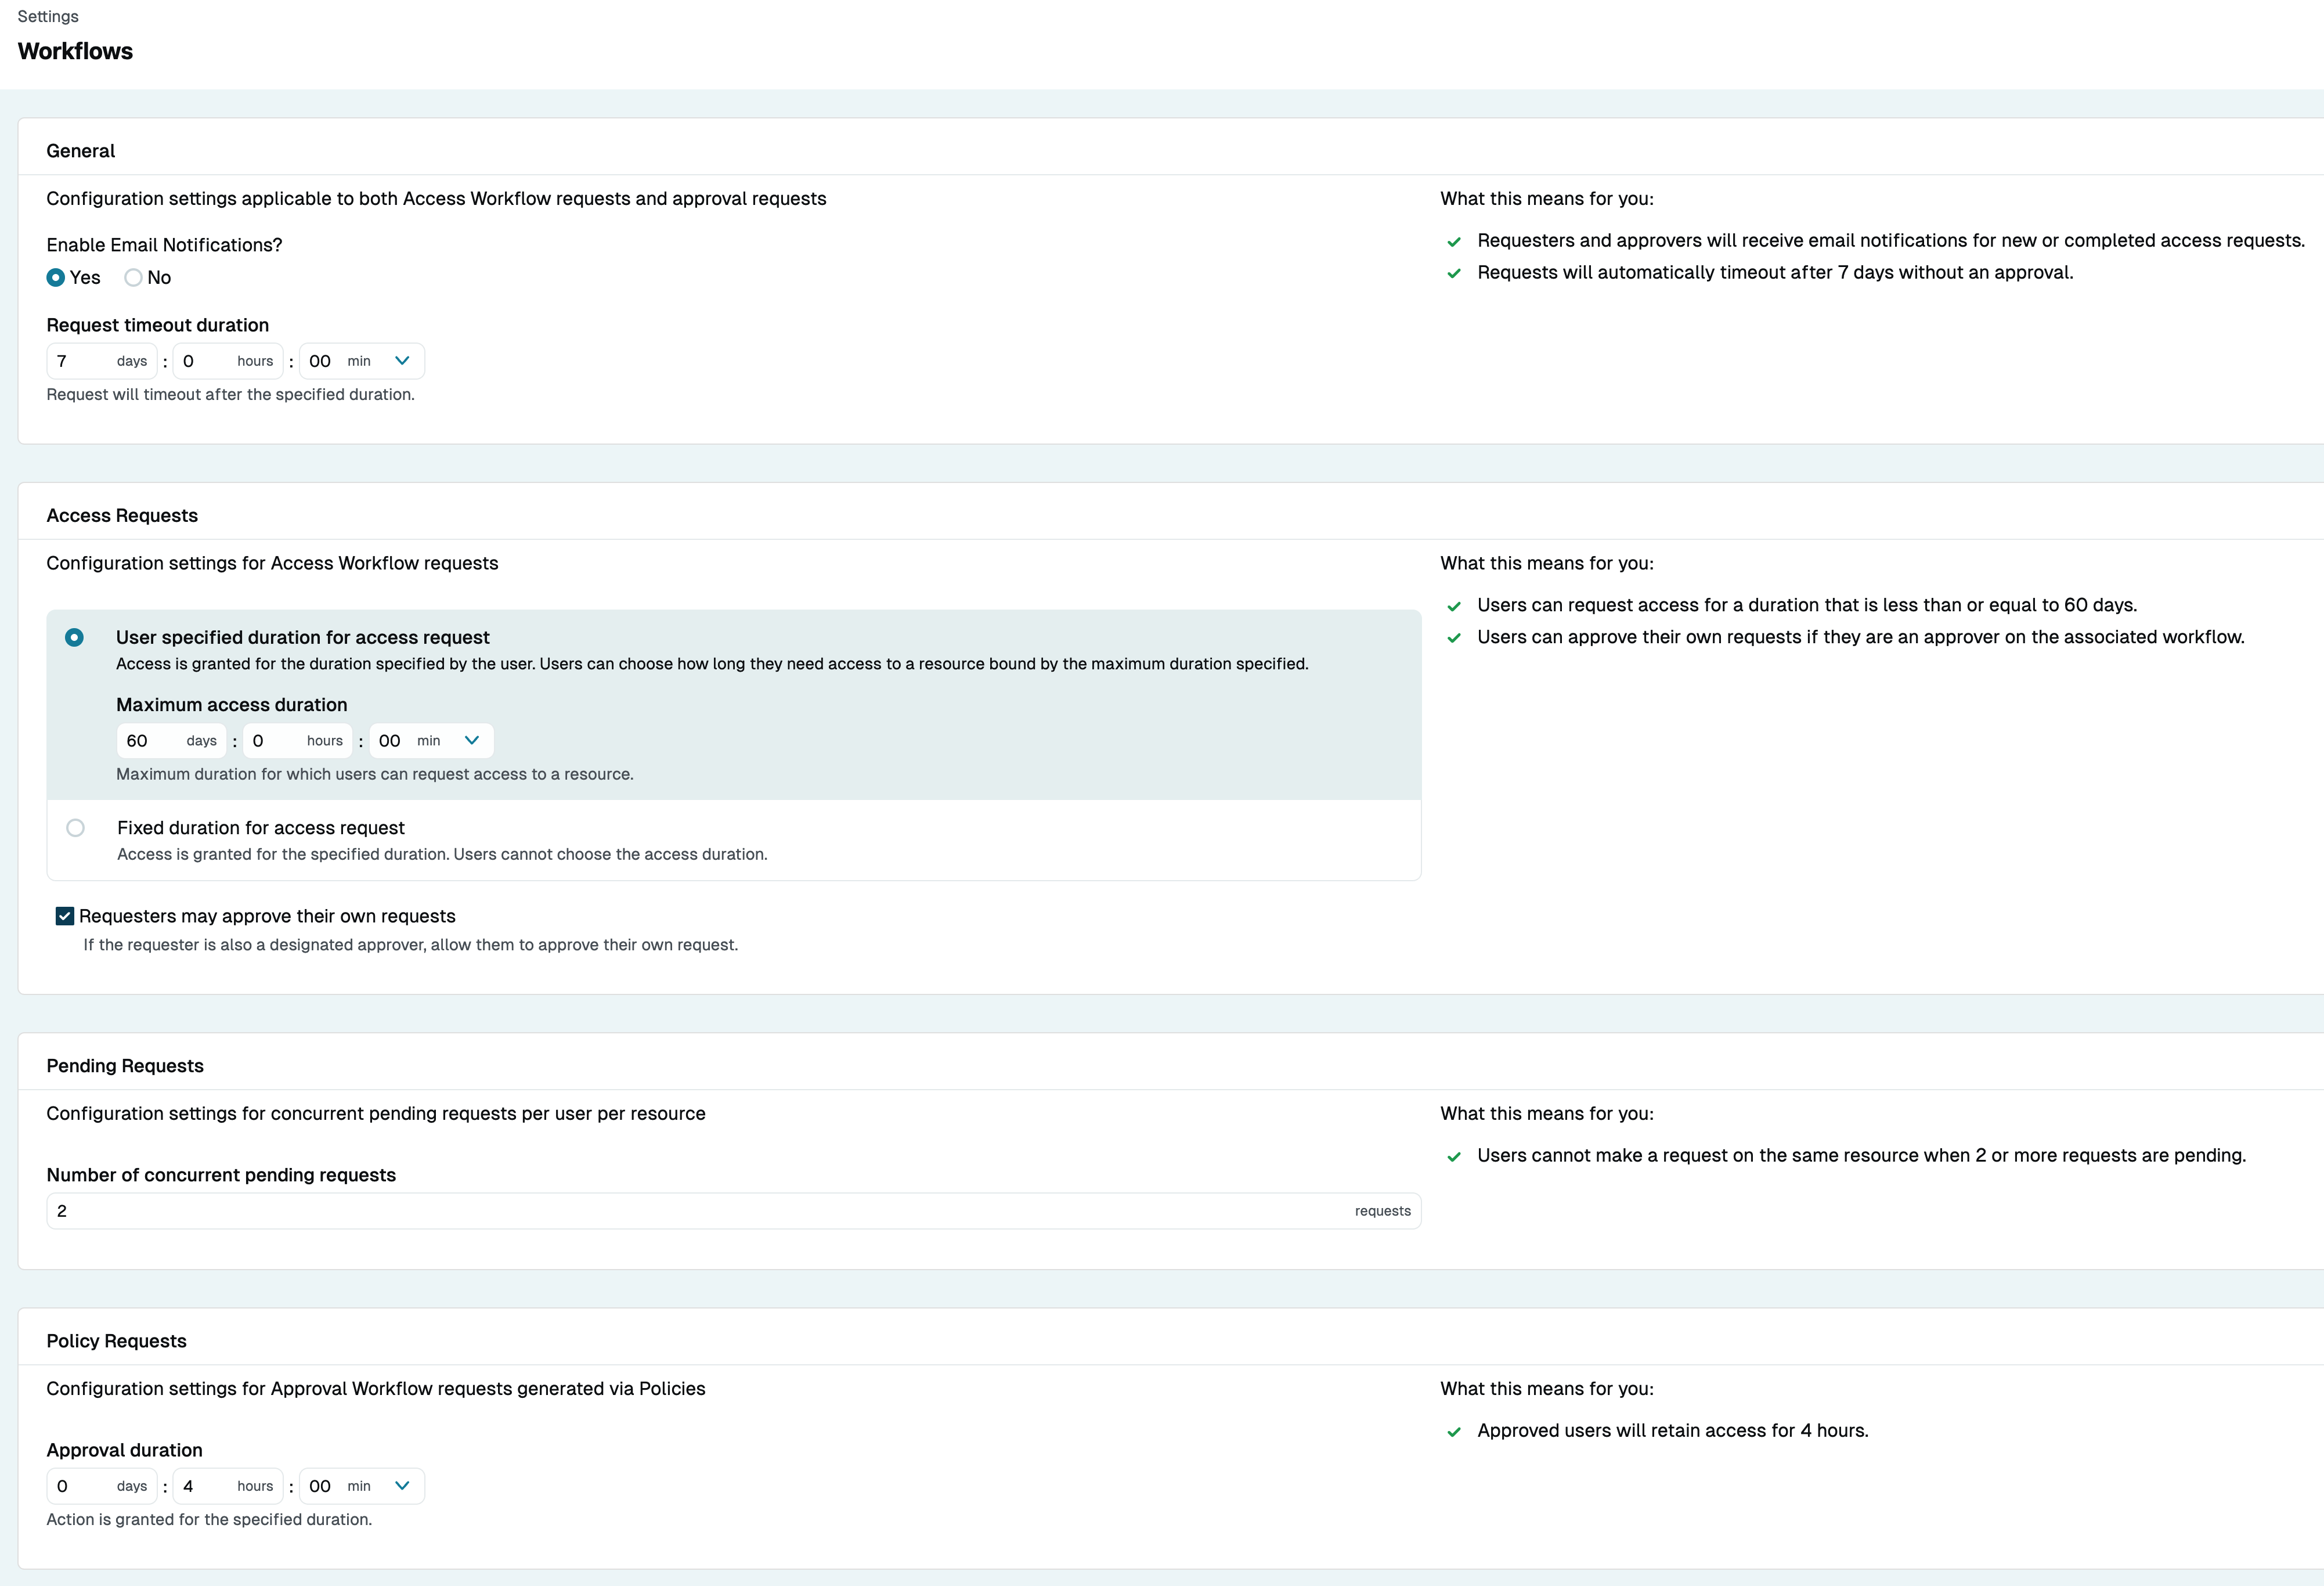
General
- Enable Email Notifications: When enabled, requesters and approvers will get email notifications for new or completed access requests. Notifications are enabled by default.
- Request timeout duration: You can select a duration in days, hours, and minutes. After the selected time period elapses, requests will be closed if they have not been approved.
Access requests
User specified duration
If the User specified duration for access request option is selected, access is granted for the duration specified by the user in the request. This duration is bound by a maximum duration set here.
The maximum access grant duration for approved access requests is 30 days by default. To change the maximum duration, enter the desired number of days, hours, and/or minutes (in increments of 15 minutes, such as 00, 15, 30, and 45) and click Update. After the maximum duration is set, users can request access to resources for a custom amount of time, as long as it doesn’t exceed the maximum duration.
This setting can be overridden at the workflow level by enabling the Override organization workflow settings option when creating/editing an access workflow.
Fixed duration
If the Fixed duration for access request option is selected, access is always granted for the duration specified here, and users cannot choose a duration.
To change the fixed duration, enter the desired number of days, hours, and/or minutes (in increments of 15 minutes, such as 00, 15, 30, and 45) and click Update. After the fixed duration is set, users can request access to resources for only the specified amount of time.
Requests made via the integration for ServiceNow will not respect the fixed duration setting. Only the maximum duration for such requests can be limited by the organization’s workflow settings in StrongDM.
Additionally, requests made via the integration for Slack do not respect the fixed duration or the maximum duration settings.
This setting can be overridden at the workflow level by enabling the Override organization workflow settings option when creating/editing an access workflow.
Requesters may approve their own requests
If the Requesters may approve their own requests option is enabled, requesters who are eligible approvers in a workflow may approve their own requests made via that workflow. If the option is disabled, an approver who makes a request via the same workflow does not get the option to approve or deny their own request.
Pending requests
The Number of concurrent pending requests setting accepts a number value that defaults to 1. This is the number of pending requests that any one user can have open for a resource at one time. If this option is set to 1, the user may only make one request for a resource at a time; requests to other resources are still allowed. If it is set to 3, and they have two requests already pending, they may still make a different request if they want.
Policy requests
Approval duration
For Approval Workflow requests generated via policies, Approval duration is the amount of time that approved users will retain access.
The approval duration value is required. The minimum value that can be set is 15 minutes, and the maximum value is 9999 days.
To change the approval duration, enter the desired number of days, hours, and/or minutes (in increments of 15 minutes, such as 00, 15, 30, and 45) and click Update.
Enable and Disable Access Workflows
When editing or adding an access workflow, there is a toggle that allows you to enable or disable the current one.
An enabled access workflow presents resources to eligible users in the access catalog. A disabled access workflow is available to edit but does not present any resource options to users in the catalog.
Note the following about enabling and disabling access workflows:
- Access workflows that are being created, have no approvers, or are otherwise not viable for production use are disabled and cannot be enabled until they are created, approvers are added, or problems are otherwise resolved.
- Access workflows that have just been created default to the disabled state and must be enabled in order to begin use.
- Pending access requests via a workflow that becomes disabled are immediately canceled.
Enabling and disabling a single access workflow, or multiple workflows at one time, can be done from the Access Workflows screen. Select one or more access workflows using the checkboxes next to each access workflow in the list. Once you make your selection, you are presented with the option to enable or disable the selected access workflow(s).
Approve Requests
As an approver, when viewing a request in the Admin UI (Requests > All Requests) you can see the request details view when you choose a request and click Actions > View request details.
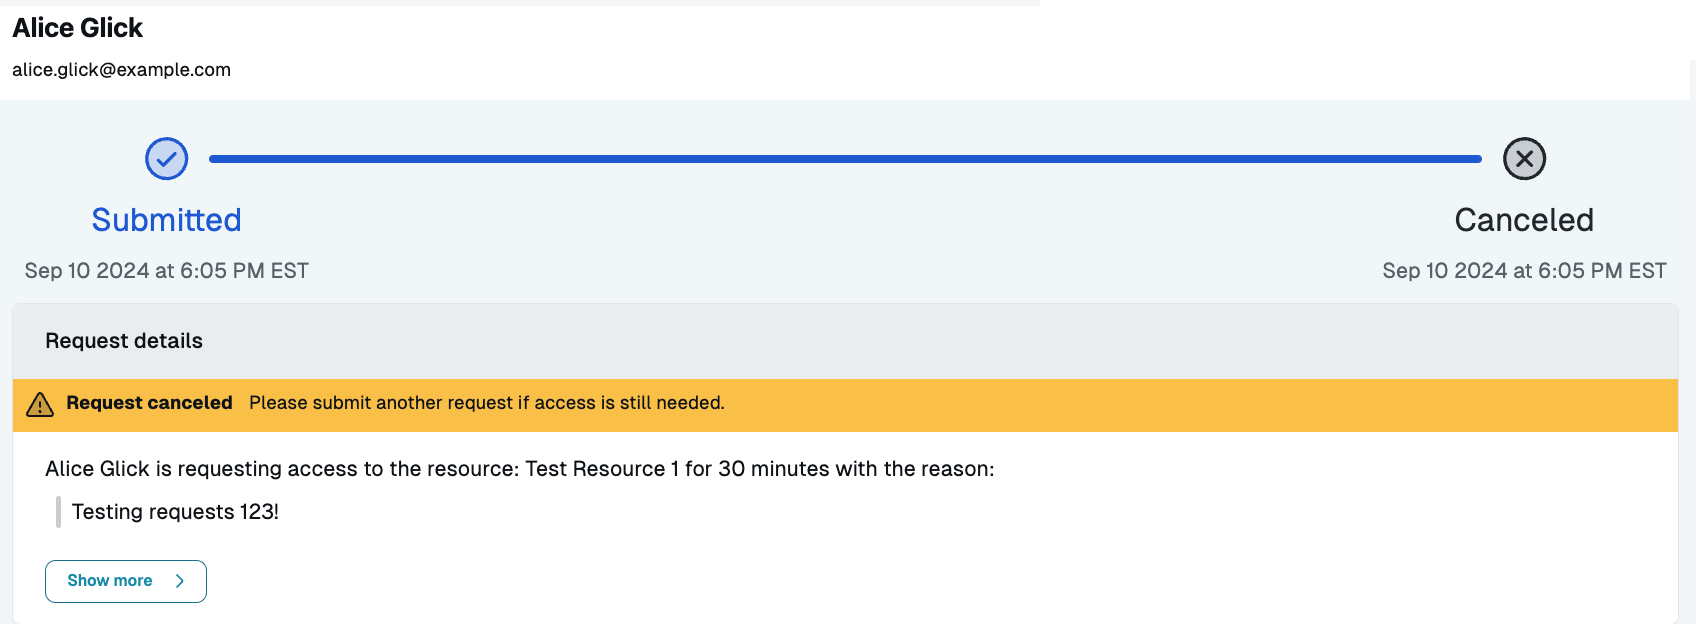
The request details view allows you to see the specifics of the request, including:
- History of the request
- Duration of access requested
- Duration of access is actually approved (potentially different if the requested start date was immediate and the approval happens at a later time)
- Date access begins
- Approval date
- Approval workflow that is being used
- Date access ends
- Reason the user is making the request
- Resources that the user has requested access to
In addition, if the resource has Privilege Levels enabled and the user has requested any, you can select Show details to see the specific privileges they are requesting.
Once a request has been approved or denied, an email is sent to the requester letting them know that the request has been finalized (if email notifications are enabled).
At any time, an approver can look at any previously granted request and revoke the access early where necessary or appropriate.
Integrations
Workflows are also capable of interaction with third-party services to further increase their usefulness. StrongDM has integrations with the following services that extend the capabilities of workflows and access requests: