StrongDM Desktop
Last modified on April 10, 2025
The StrongDM Desktop application (macOS and Windows) is the graphical component of the StrongDM client that is installed on your local machine. The other component is the StrongDM command line interface (CLI). Both the desktop app and the CLI allow you to authenticate to and use StrongDM to access resources.
The desktop app features a single window that is used for logging in to StrongDM and for viewing all the resources available to you. This page provides an overview of the desktop app and how to use it.
Authentication
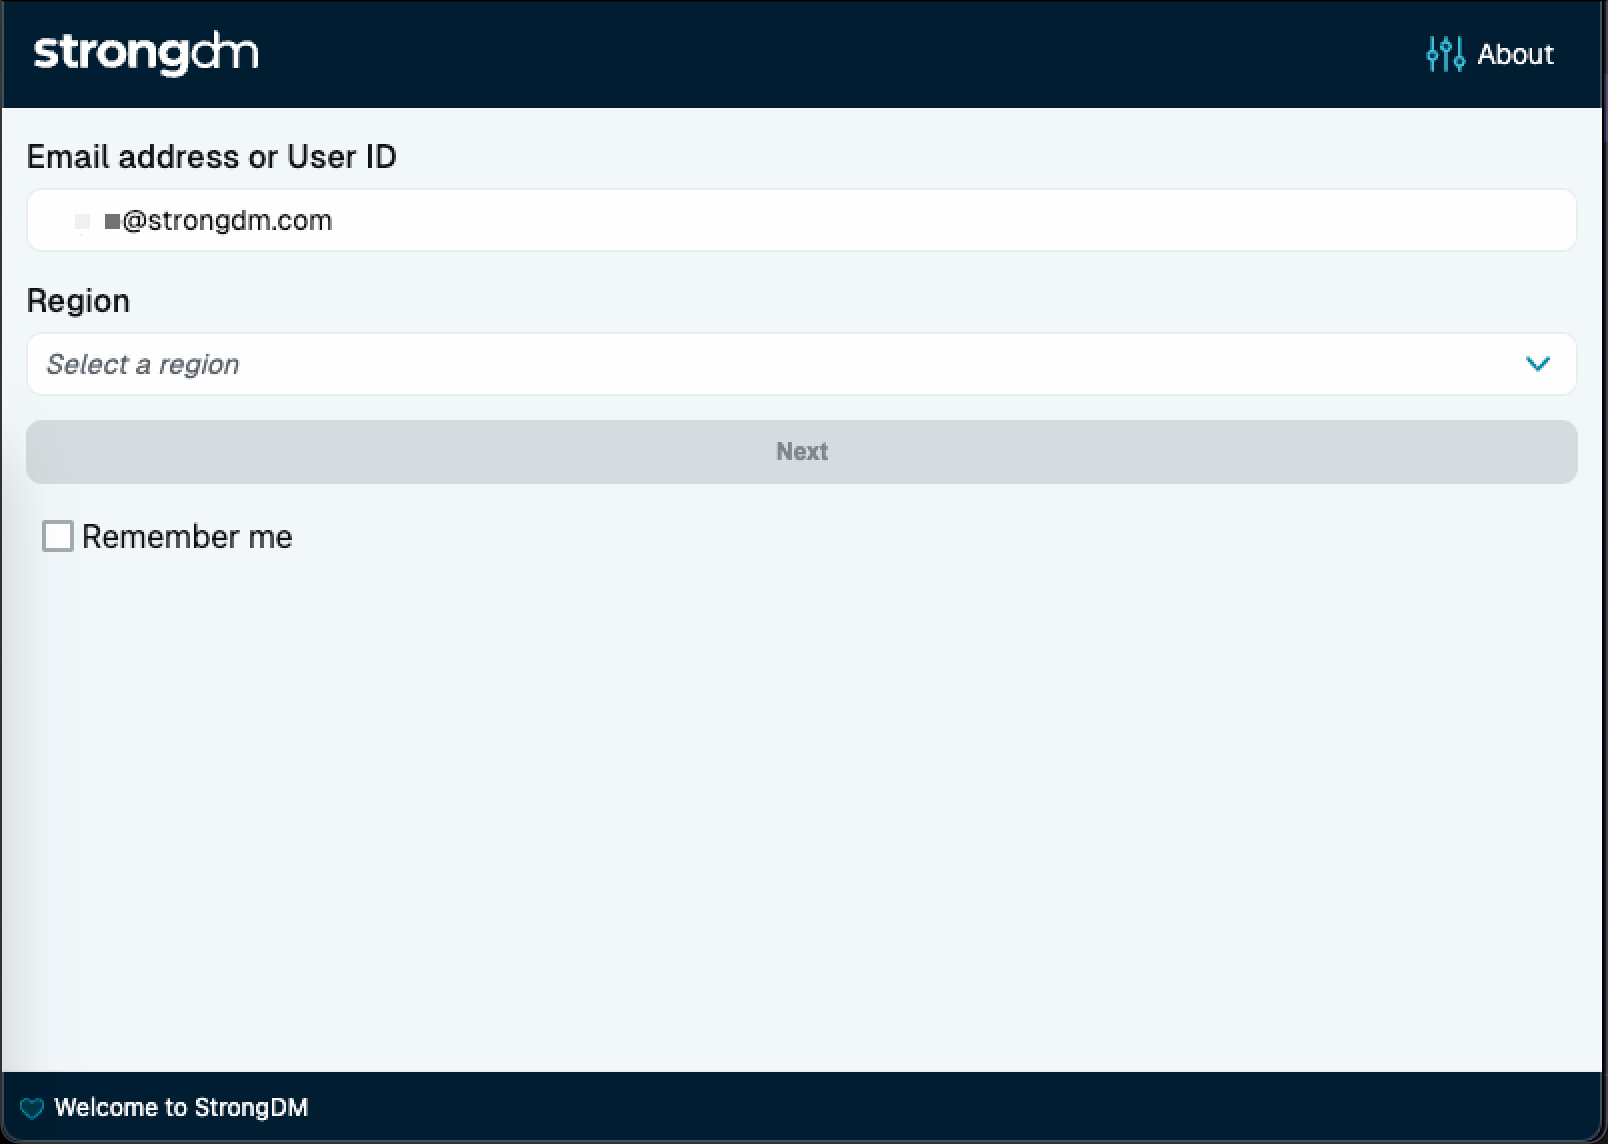
You can log in to StrongDM via one of the following methods.
- Email address or User ID: To log in as a user, enter your email address or user ID, followed by your password. Select Remember me to avoid having to enter your email address for subsequent logins.
- Service Account: To log in as a service account instead of a user, enter a token into the Email address or User ID field. Note that tokens are not remembered for subsequent logins. If an email address was previously remembered, that email is pre-populated on your next login.
- Single sign-on (SSO): If your organization has SSO enabled, log in by entering your email address. Your web browser then opens and handles the rest of the authentication. Once authentication is complete, you will be redirected back to the desktop app. Your browser may ask you if it has permission to open the desktop app, unless you have disabled that behavior in the browser. Note that if SSO is enabled for your organization, you must log in via SSO unless you are a non-SSO user.

Region
After you enter your email address, a Region field may appear.
The StrongDM control plane is available in multiple regions for organizations who wish to house their StrongDM instance in a different geographic location than the default (US). Switching to a non-default region when using the desktop is sometimes done by setting an environment variable (SDM_APP_DOMAIN).
If the email you enter in the Email address or User ID field is present as a user on multiple control planes, and you do not have an environment variable set to indicate your region, the Region field is presented. Use it to choose which control plane you intend to log in to and use.
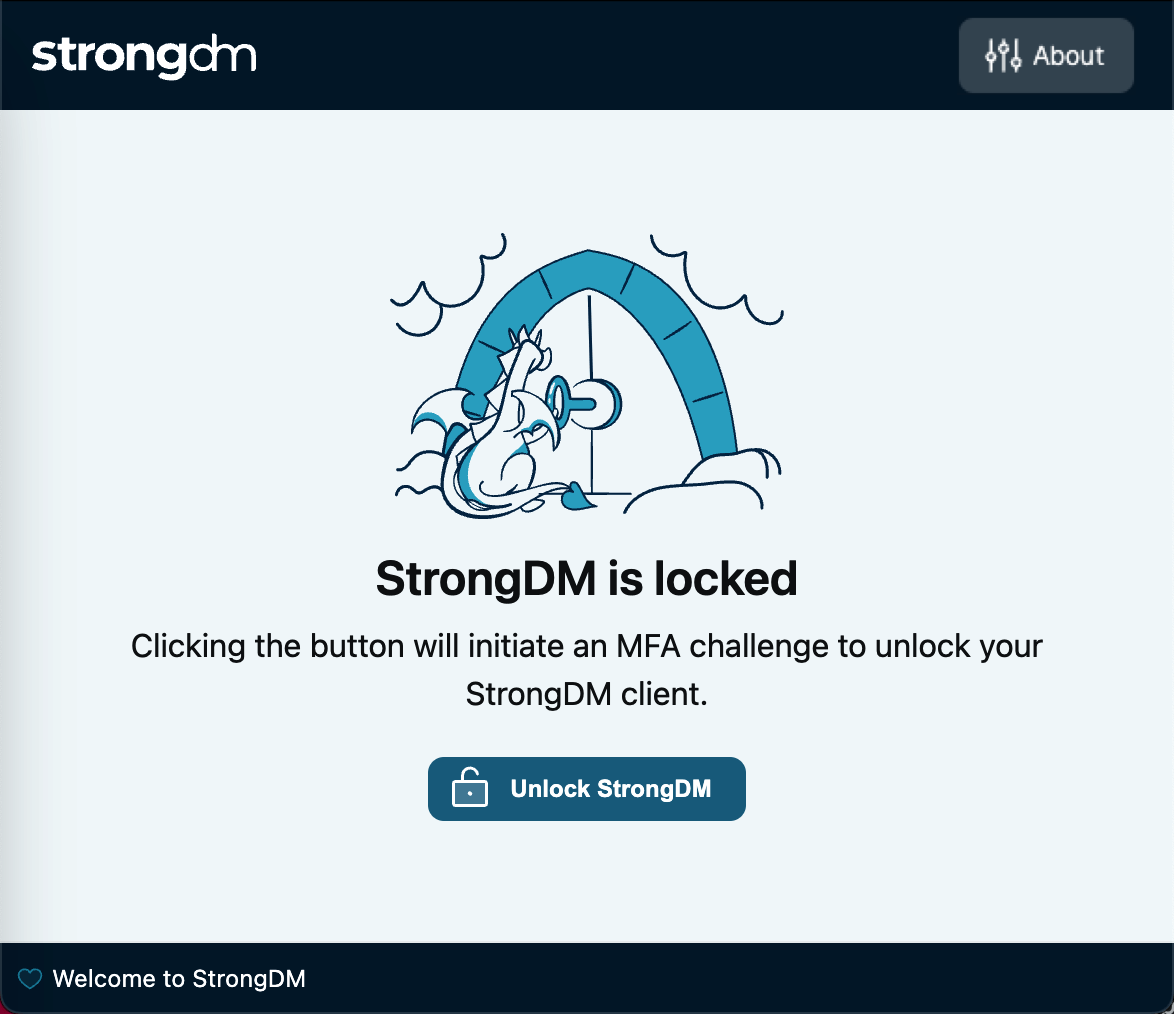
User lock and unlock
If your account is locked due to inactivity, the desktop app shows the locked screen. When locked, you cannot use the Resource Center to interact with resources. To unlock it, click Unlock StrongDM and authenticate to proceed.
To lock your account, go to the Account menu and select Lock. When locked, the Account menu shows that your status is Locked, with a red dot beside it.
Desktop App Menu Options
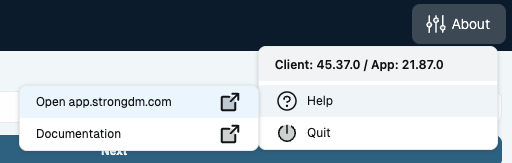
The button at the top right corner of the desktop app’s Resource Center window shows all the options available to you.
When logged out of StrongDM, the button is called About and displays the following options:
When logged in to StrongDM, the button shows your username and icon. Clicking on your username displays the following options:
- Account information
- Actions
- Help
- Documentation
- Diagnostics
- About: Version numbers of the CLI and desktop app
- Lock
- Log Out
- Quit
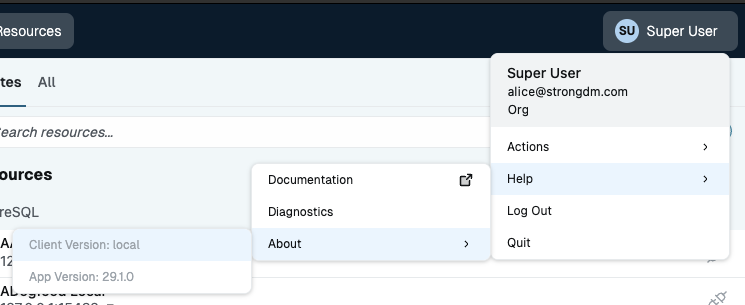
Account information
Account information includes your name, email address, and the name of your organization.
Versioning
The version number of your client (that is, the CLI) and desktop app are displayed in the format Client: XX.YY.Z / App: XX.YY.Z. Occasionally, you may be required to update to a higher version. When an update is available, the desktop app displays the Update required message. Updates do not happen automatically, so you need to select this option to update the desktop app.
For detailed information about versioning, please see our versioning information.
Connect all
The Connect all option lets you connect to all accessible resources simultaneously. Depending on your operating system, however, you may be limited in the number of resources to which you can connect. This limit is known as the file descriptor limit. Standard limits are as follows:
- Linux-based: 1,024 resources
- MacOS: 256 resources
- Windows: 512 resources
Note the following potential scenarios that may occur if you reach the limit for your OS:
- If you run
sdm connect --alland the number of resources you currently have access to is greater than the standard limit for your OS, the operation may fail. - If you run
sdm connect --filterand the number of results for that filter is greater than the standard limit for your OS, the operation may fail.
Install sdm in PATH
Select Install sdm in PATH from the desktop app’s menu to set up the StrongDM CLI in your system. You need to do this one time only.
For detailed information about installing the CLI, please see the installation guide for your particular operating system.
Update kubectl configuration
If cluster resources are available to you, the Account menu provides the Update kubectl configuration option. This option adds StrongDM-specific sections to your existing ~/.kube/config file or creates a new one if it does not yet exist.
Note that you need kubectl to be in your PATH before starting the desktop app and/or CLI in order for this option to work.
You should see either a success message or an error message.
If there is a conflict that prevents the completion of the kubeconfig update, you can choose to force the update. The error message displays the exact text of the configuration conflict.
Open app.strongdm.com
Open app.strongdm.com opens the Admin UI (https://app.strongdm.com) in your web browser.
Documentation
The Documentation option opens StrongDM documentation in your web browser.
Diagnostics
The Diagnostics option uses the SDM Doctor Utility to check your system for potential problems. A new window launches, providing information that could be helpful if you need to troubleshoot or provide a copy of the output to Support.
The Copy diagnostics button lets you copy the diagnostic information to your clipboard.
The Reset StrongDM button allows you to rename the current SDM configuration directory and create a fresh one.
Diagnostic information includes but is not limited to the following.
| Diagnostic property | Description |
|---|---|
| API | API ping rate (in milliseconds) |
| Clock Drift | Clock drift (in milliseconds) |
| CPUs | CPU count |
| DNS Resolution | Information about where the Admin UI, gateway, and relay resolve |
| FD | Maximum FD count |
| File Permissions | Access information |
| Gateway Latency | Status and latency (in milliseconds) |
| Gateway Link Redundancy | Information about redundant links |
| Gateway TCP/IP | Link information and status |
| GUI Version | Desktop app version number |
| HTTP Proxy Settings | http_proxy and https_proxy settings |
| IP | Your IP address |
| Local Network | Hostname and addresses |
| Network Quality | Latency and packet information |
| OS Version | Operating system and architecture information |
| RootCAs | Your certificates |
| Runtime | StrongDM version number, hash, and build information |
| Uptime | Uptime (in minutes and seconds) |
sdm doctor -v command.If the desktop app is in a bad connection state, the diagnostics window loads the last cached diagnostics information.
If the desktop app is disconnected and then reconnected, the desktop app refetches the diagnostics.
Lock
The Lock option is shown in the desktop app menu if MFA is enabled for your organization. Selecting the Lock option allows you to lock the desktop app on your computer. When locked, you are unauthenticated to StrongDM, your status is “Locked,” and you cannot use the Resource Center.
To use the desktop app again, you must unlock it.
Log Out
Click Log Out to log out of the desktop app.
Quit
Click Quit to close the desktop app. You remain logged in to StrongDM if you choose to use the CLI while the desktop app is closed.
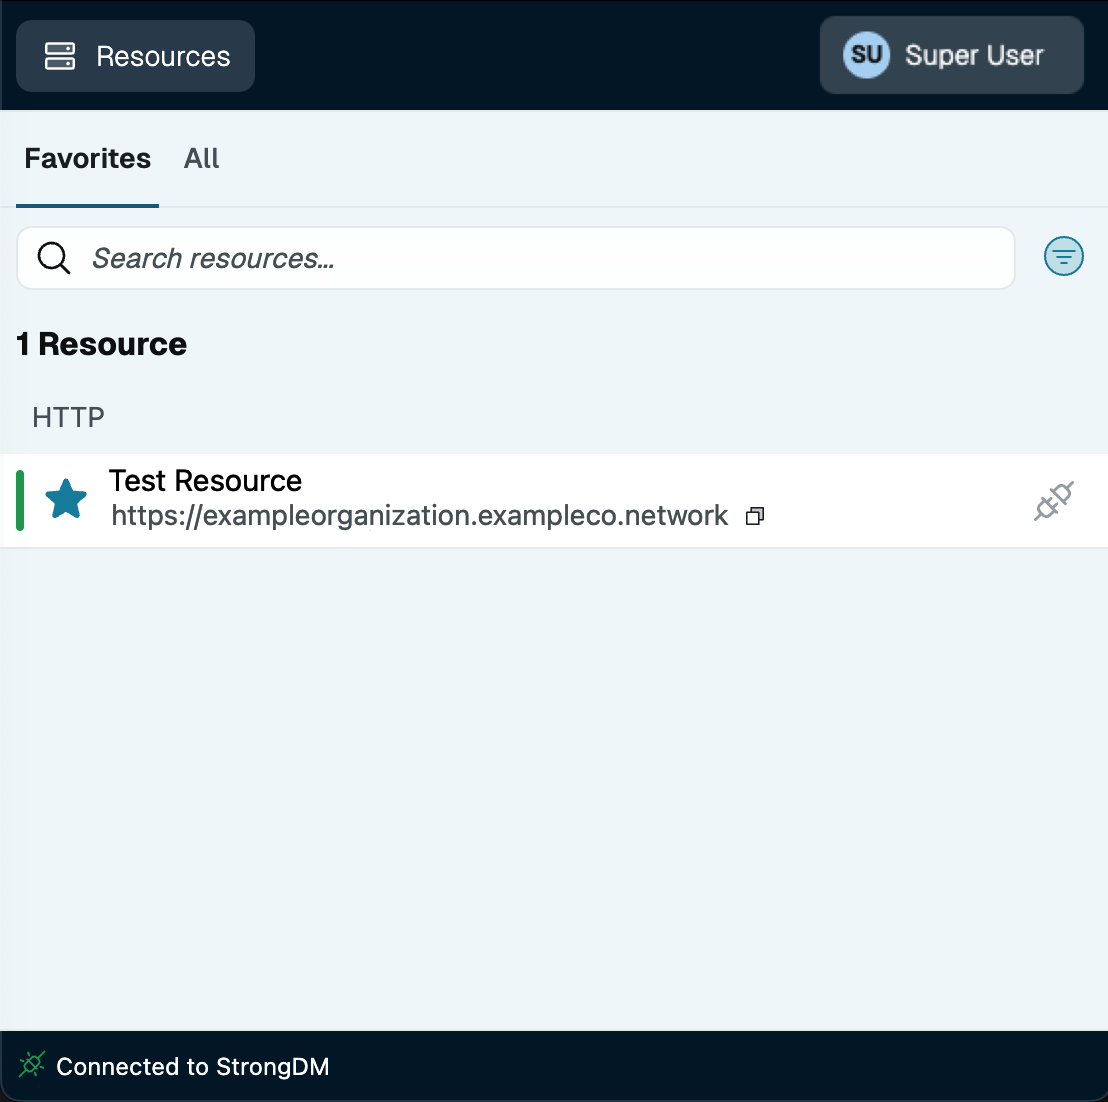
Resource Center
The Resource Center is the desktop app’s main window that shows all the resources that you can access. The Resource Center is displayed when you launch the desktop app and log in to StrongDM, or (if you are already logged in) when you click on the sdm icon in the taskbar.
Changes in access grants are shown in real time. If you are unassigned from a role that provides access to PostgreSQL resources, for example, all such resources are immediately removed from your view in the Resource Center.
If you do not have access to any resources, or if you have questions about what you can or cannot access, please ask your StrongDM administrator.
The status bar at the bottom of the Resource Center indicates whether you are connected to StrongDM. If the status remains in the reconnecting state indefinitely, please contact your administrator.
Move and resize
The Resource Center window’s width and height is adjustable to any size, and you can move it to any area of any screen.
Dock icon
For macOS the desktop app’s SDM icon is shown in the dock. For Windows, the blue sdm icon is shown in the tray and displays “StrongDM - Resource Center” upon hover. Click on it to open the Resource Center.
You may right-click the dock icon or tray icon to reveal the following options:
- Open app.strongdm.com: This option opens the Admin UI (https://app.strongdm.com) in your web browser.
- Connect All: Visible only when authenticated to StrongDM, this option allows you to connect to all assigned resources.
Display of resources
By default, resources are sorted first by the resource type and then by the resource name. Each resource is shown with its host address and port number.
The Resource Center shows up to 25 resources at a time and supports infinite scroll. If you have access to 100,000 resources, for example, you can scroll through all of them until you reach the end of the list.
Connection to resources
Click-to-connect capability lets you click on the plug icon beside any resource name to connect immediately. When the plug icon is gray, the resource is not connected. When green, the resource is connected or the port is now open. Once connected, you can proceed to use your existing database, SSH, or RDP client to connect.
Port overrides
By default, every resource that is created is assigned a port override value, which is the port that you use to connect to the resource through StrongDM.
Websites
The desktop app allows you to connect to any website resource with a single click.
To open any website resource in your browser, first make sure you have already configured a proxy. Then click the connect button next to the website resource name.
Saved resources
You can save resources as favorites by selecting the star icon beside the resource name. Marking certain resources as favorites helps you to get to those resources quickly without having to search for them by name or type.
Favorite resources persist and remain as favorites even after you log out of or quit the desktop app. You can view a list of all favorite resources by clicking the Favorites tab at the top of the Resource Center.
To remove resoures from the Favorites list, deselect the star icon beside the resource name.
Resource search
You can search for and display specific resources by name. The Search field recognizes partial strings, allowing you to type just part of a resource’s name to find matching resources.
To return an exact match, encapsulate the resource name in quotation marks (for example, "azure-gateway").
Resource filters
You can save resources that you often connect to or that are particularly important to your Favorites list.
You can also narrow the list of resources shown by clicking the filter button and selecting Type, Health, and/or Connection filters.

- Type filters for resources of a specific type, such as Google Kubernetes Engine. The list shows all resource types that are currently present in the list of available resources.
- Health filters for healthy or unhealthy resources.
- Connection filters for resources that are connected (a local port is connected or open for that resource) or not connected (no ports are open for that resource).
Once you have made your selection, those resources are displayed.
To clear out your filter selection, you can click the “x” next to the filter you’d like to remove.
Multiple Sessions on Shared Workstations
Multiple concurrent StrongDM sessions on a shared Windows workstation are not supported. If a user of a shared Windows workstation is using StrongDM and a second user of that workstation attempts to log in and use StrongDM at the same time, the second user is given an error that informs them that someone else is currently connected to StrongDM on that machine.
You can find resources and information about the following StrongDM topics in this section: