Windows Installation Guide
Last modified on February 10, 2025
Overview
This guide describes how to install StrongDM on Windows. The primary download package includes the StrongDM Desktop application and a command-line interface (CLI). You can optionally download the CLI independently from the Admin UI.
Download StrongDM
Use the following steps to the desktop app and CLI on Windows. To bypass the desktop app, you can download the CLI independently.
Open the invitation email you received for your StrongDM account.
Click the link included in the email to set your password.
Log in to StrongDM and go to the Download & Install page in the Admin UI.
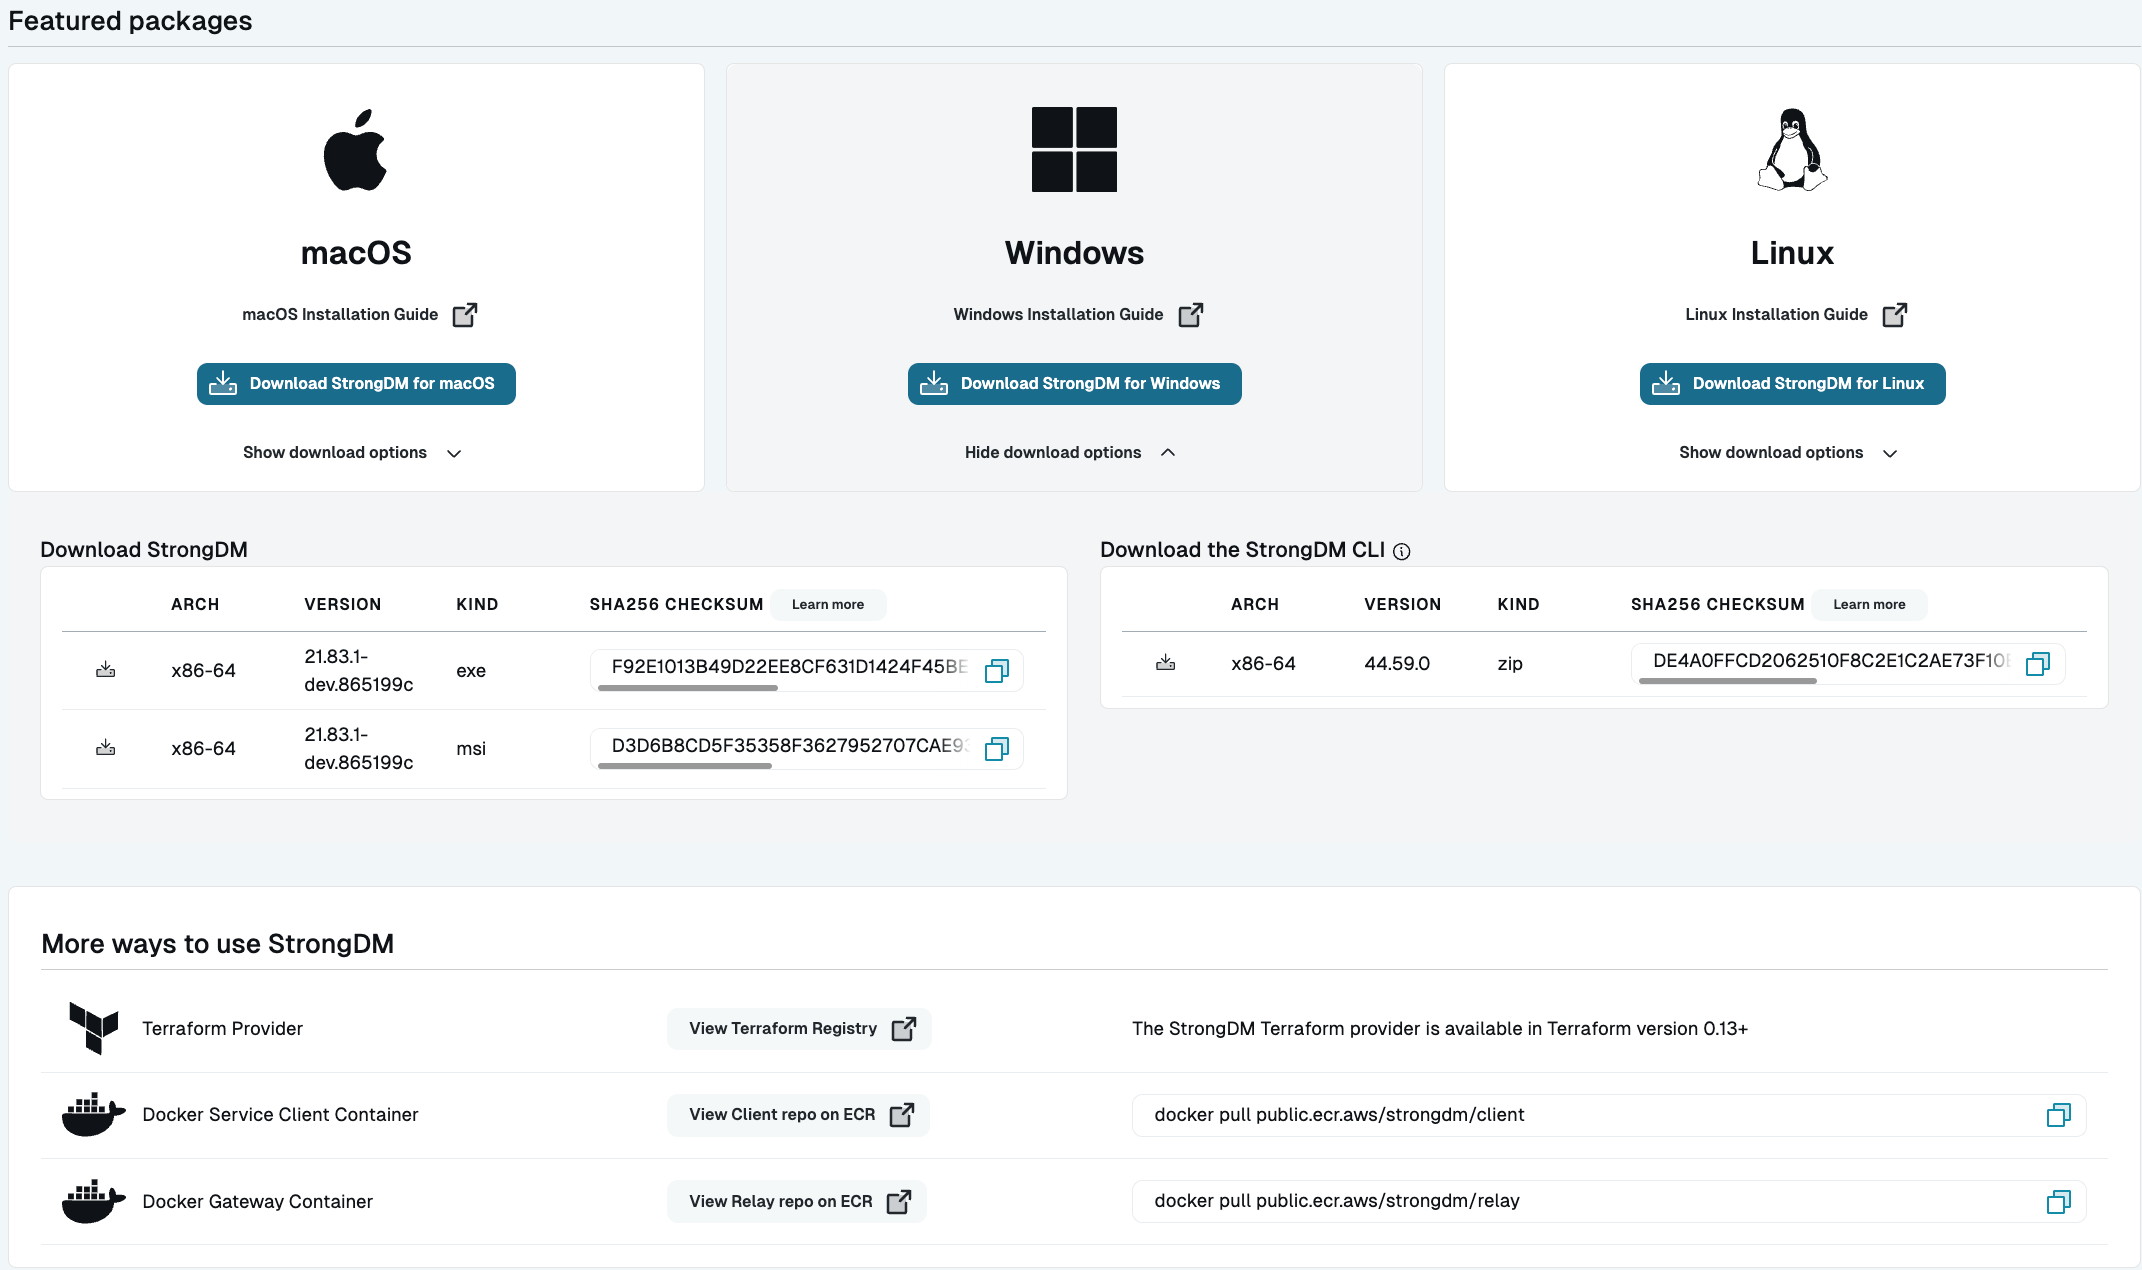
Example of Admin UI Download & Install Page Under Windows, click Download StrongDM for Windows to download the desktop app and CLI immediately, or click Show download options for other options.
- EXE: This full installer version includes the desktop app and CLI together. Available for x86 architectures, the EXE is installed manually. When run as administrator, the EXE installs the StrongDM Virtual Network Adapter, which enables you to access Virtual Networking Mode resources that may be available to you. When run as a non-administrator, StrongDM is installed, but the adapter is not installed or updated. The EXE is the recommended installation option.
- MSI: This installer version includes the desktop app and CLI together. Available for x86 architectures, the MSI provides easy prompts that guide you through the installation process.
- CLI: The StrongDM CLI option includes only the CLI (not the desktop app) for x86-64 or ARM64 architectures. Download and install the CLI only if you don’t want to install the desktop app.
Once the download is successful, the file name appears as SDM-<VERSION_NUMBER>.msi or SDM-<VERSION_NUMBER>.exe, depending on the selected kind.
Optionally, check that the downloaded binary is legitimate and verify the checksum using PowerShell, as in the following example:
Get-FileHash SDM-21.54.0.exe | Format-ListAlgorithm : SHA256 Hash : F68C6AEB471E2E85F59011ACF400A823FCB19953802917DC97DB55B366B678BA Path : C:\Users\[User]\Downloads\SDM-21.54.0.exeThe checksum should match the value in the SHA256 Checksum section of the Admin UI.
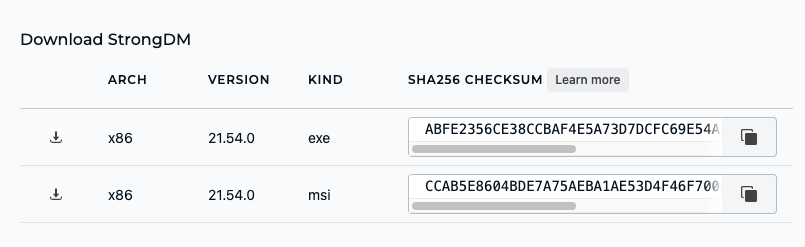
Example of StrongDM SHA256 Checksums on the Admin UI Download & Install Page
Install StrongDM
EXE
MSI
To install StrongDM (SDM) with the installer version (MSI), follow these steps.
- Double-click the downloaded MSI file (SDM-<VERSION_NUMBER>.msi). The SDM Setup Wizard opens.
- On the welcome screen, click Next.
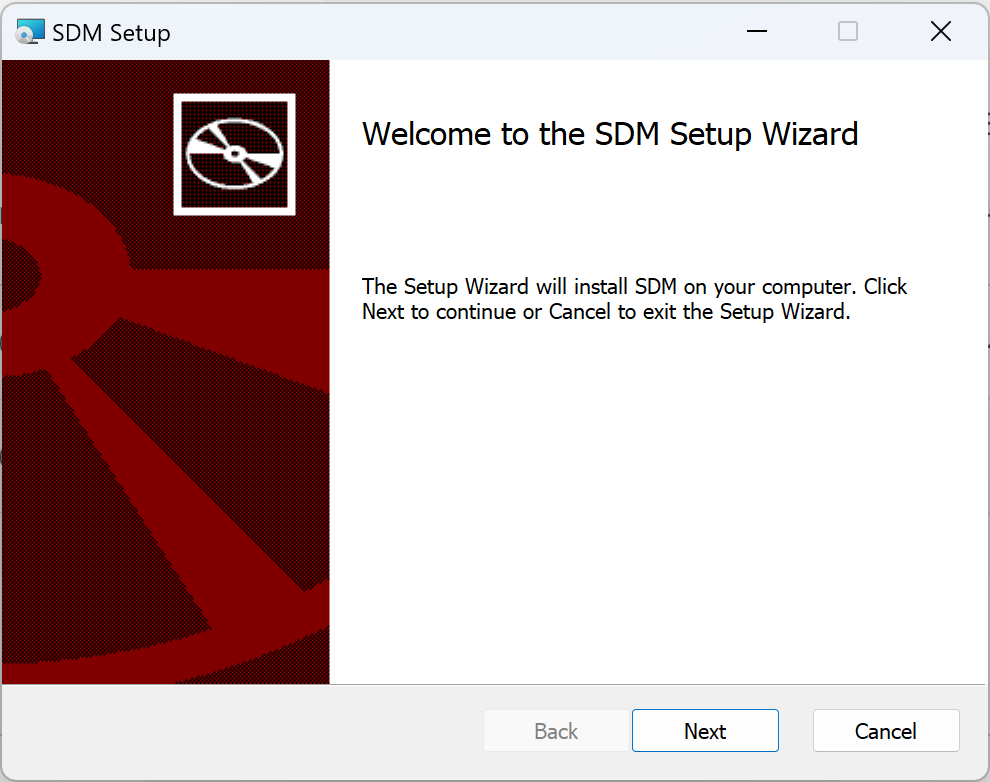
SDM Setup Wizard > Welcome - Choose one of the following installation scopes and then click Next:
- Install just for you installs StrongDM in a per-user folder that is available for only your user account (for example,
C:\Users\<NAME>\AppData\Local\Programs\SDM). This scope does not require local Administrator privileges. - Install for all users of this machine installs StrongDM in a per-machine folder by default that is available for all users. You can change the default installation folder. This scope requires that you have local Administrator privileges.

SDM Setup Wizard > Installation Scope
- Install just for you installs StrongDM in a per-user folder that is available for only your user account (for example,
- Use the Back button to review or change any of your installation settings, or click Cancel to exit the setup wizard. When you’re satisfied with your settings, click Install.
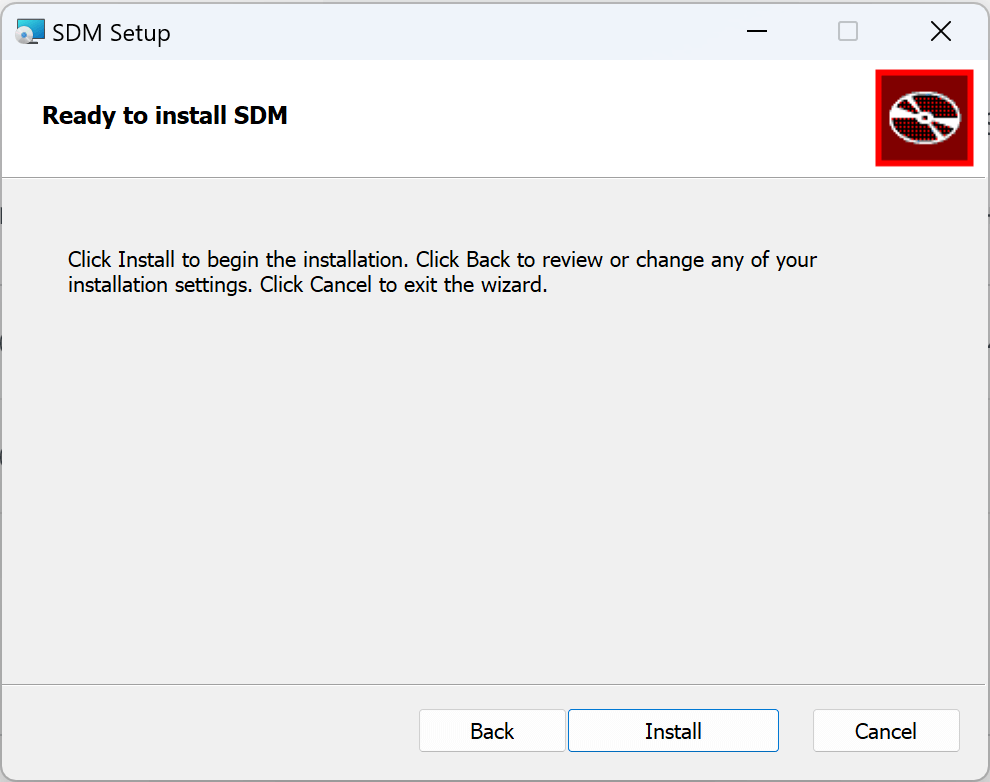
SDM Setup Wizard > Ready to Install SDM - When installation is complete, the setup wizard provides the option to run StrongDM. If you wish to open the desktop app now, keep the Run SDM checkbox selected. If you don’t, uncheck Run SDM.
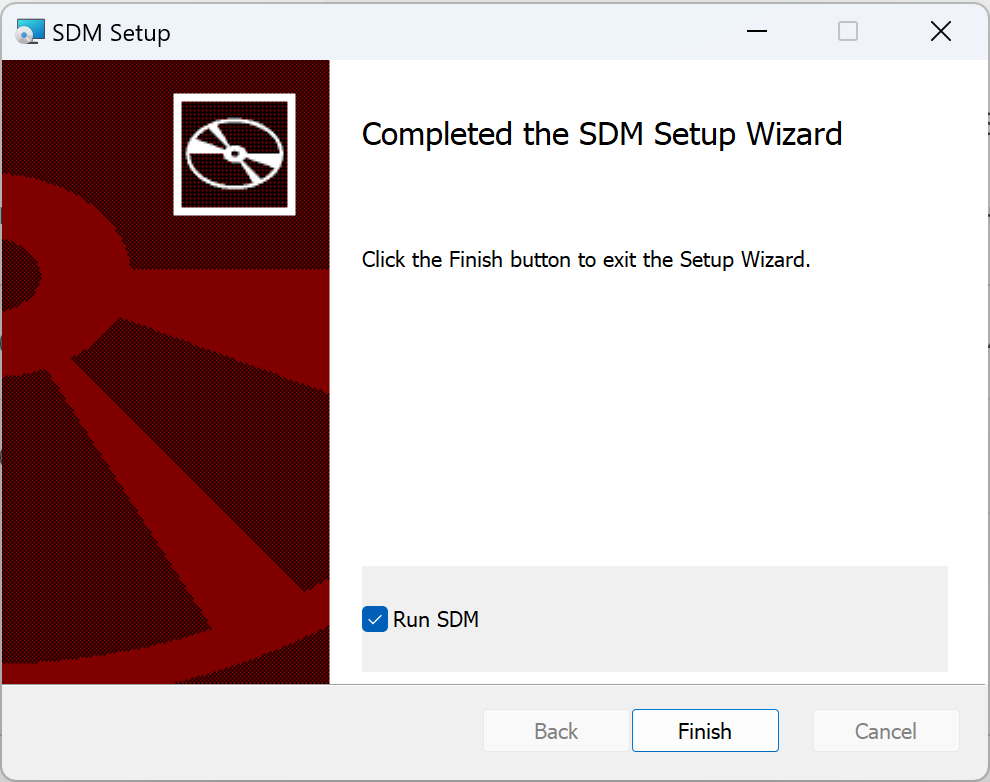
SDM Setup Wizard > Completed SDM Setup Wizard - Click Finish to exit the setup wizard.
That’s it! You’ve installed StrongDM. Go ahead and try a connection!
To install StrongDM (SDM) with the installer version (MSI), follow these steps.
- Double-click the downloaded MSI file (SDM-<VERSION_NUMBER>.msi). The SDM Setup Wizard opens.
- On the welcome screen, click Next.
SDM Setup Wizard > Welcome - Choose one of the following installation scopes and then click Next:
- Install just for you installs StrongDM in a per-user folder that is available for only your user account (for example,
C:\Users\<YOUR-NAME>\AppData\Local\Programs\SDM). This scope does not require local Administrator privileges. - Install for all users of this machine installs StrongDM in a per-machine folder by default that is available for all users. You can change the default installation folder. This scope requires that you have local Administrator privileges.
SDM Setup Wizard > Installation Scope
- Install just for you installs StrongDM in a per-user folder that is available for only your user account (for example,
- Use the Back button to review or change any of your installation settings, or click Cancel to exit the setup wizard. When you’re satisfied with your settings, click Install.
SDM Setup Wizard > Ready to Install SDM - When installation is complete, the setup wizard provides the option to run StrongDM. If you wish to open the desktop app now, keep the Run SDM checkbox selected. If you don’t, uncheck Run SDM.
SDM Setup Wizard > Completed SDM Setup Wizard - Click Finish to exit the setup wizard.
As a last installation step, you need to set the SDM_APP_DOMAIN environment variable to tell your desktop app where to find your StrongDM service. This can be done automatically each time your computer is started by setting an environment variable.
- In Windows, go to Control Panel > System > Advanced System Settings.
- In Environment Variables, go to the System Variables section and create a new system variable
SDM_APP_DOMAINwith a value ofapp.uk.strongdm.com, then select OK.
That’s it! You’ve installed StrongDM. Go ahead and try a connection!
To install StrongDM (SDM) with the installer version (MSI), follow these steps.
- Double-click the downloaded MSI file (SDM-<VERSION_NUMBER>.msi). The SDM Setup Wizard opens.
- On the welcome screen, click Next.
SDM Setup Wizard > Welcome - Choose one of the following installation scopes and then click Next:
- Install just for you installs StrongDM in a per-user folder that is available for only your user account (for example,
C:\Users\<YOUR-NAME>\AppData\Local\Programs\SDM). This scope does not require local Administrator privileges. - Install for all users of this machine installs StrongDM in a per-machine folder by default that is available for all users. You can change the default installation folder. This scope requires that you have local Administrator privileges.
SDM Setup Wizard > Installation Scope
- Install just for you installs StrongDM in a per-user folder that is available for only your user account (for example,
- Use the Back button to review or change any of your installation settings, or click Cancel to exit the setup wizard. When you’re satisfied with your settings, click Install.
SDM Setup Wizard > Ready to Install SDM - When installation is complete, the setup wizard provides the option to run StrongDM. If you wish to open the desktop app now, keep the Run SDM checkbox selected. If you don’t, uncheck Run SDM.
SDM Setup Wizard > Completed SDM Setup Wizard - Click Finish to exit the setup wizard.
As a last installation step, you need to set the SDM_APP_DOMAIN environment variable to tell your desktop app where to find your StrongDM service. This can be done automatically each time your computer is started by setting an environment variable.
- In Windows, go to Control Panel > System > Advanced System Settings.
- In Environment Variables, go to the System Variables section and create a new system variable
SDM_APP_DOMAINwith a value ofapp.eu.strongdm.com, then select OK.
That’s it! You’ve installed StrongDM. Go ahead and try a connection!
Launch StrongDM Desktop
Use these steps to launch the desktop app on Windows. When you launch the application, all authentications and resource access get routed through StrongDM.
- Open the Start menu and search for SDM or navigate to the Downloads folder. Click to launch the SDM application.
- Click the sdm icon in the tray.
- Enter the email and password created during the email invitation step. You may also be redirected to your single sign-on (SSO) provider.
- After logging in, a list of resources you have permission to access appears in the Resource Center.
- Click one of these resources to enable a connection and gain access. A green lightning bolt icon appears next to the connected resource.
- You can now connect to the resource on your machine using your preferred tool. When prompted for connection information, you can usually use localhost for the hostname/IP, leave the username and password blank, and specify the port listed next to the resource in StrongDM Desktop. If the connection fails using these defaults, check the Connect to Resources documentation for more information.
Run StrongDM at startup
By default, StrongDM requires a manual launch whenever your Windows machine is started or restarted. With the following steps, you can optionally configure StrongDM to automatically run at startup.
- Open the Windows search and type run. Launch the Run application. You can also use the shortcut Windows logo button + R.
- Type
shell:common startupand click OK. The Startup folder opens. - Copy the SDM shortcut from the app menu (for example,
C:\Users\[user]\AppData\Roaming\Microsoft\Windows\Start Menu\Programs\StrongDM) and paste it in the Startup folder. When you restart your computer, the StrongDM Desktop app appears in the taskbar. Depending on your network settings, you may have to allow access for the sdm32.exe file.
Set up the StrongDM CLI
To set up the CLI that is included with the desktop app on Windows, go to the Account menu and select Install sdm in PATH.
Alternatively, you can use the following steps to set up the CLI manually. Open PowerShell (as Administrator) and perform the following steps:
- Remove any existing sdm.exe copies:
rm $HOME\AppData\Local\Microsoft\WindowsApps\sdm.exe
- Symlink the
sdm32.exebinary assdm.exein the existing path location:
New-Item -ItemType SymbolicLink -Path $HOME\AppData\Local\Microsoft\WindowsApps\sdm.exe -Value $HOME\AppData\Local\SDM\resources\sdm32.exe
- Test that the CLI is installed correctly by running
sdm --version. If it is correctly installed, the version displays.
SSH with Windows 10/11
Windows 10 and 11 come with OpenSSH already installed. However, the executable is not where StrongDM looks for it by default. In order to use sdm ssh commands, a symbolic link to the ssh.exe binary must be created in the WindowsApps path.
This can be accomplished by opening PowerShell (as Administrator) and running the following command:
New-Item -ItemType SymbolicLink -Path $HOME\AppData\Local\Microsoft\WindowsApps\ssh.exe -Value C:\Windows\System32\OpenSSH\ssh.exe
Download the StrongDM CLI Only
On Windows, you can bypass the desktop app and download the CLI independently. Use the following steps to install the CLI only.
- Open the invitation email you received for your StrongDM account.
- Click the link included in the email to set your password.
- Log in to StrongDM and go to the Download & Install page in the Admin UI.
- Under Windows, click Show download options.
- From the Download the StrongDM CLI section, download the StrongDM CLI for your architecture (x86-64 or x86). The files are downloaded to a zipped folder on your computer. This depends on your architecture, but the folder name appears as sdmcli_<VERSION_NUMBER>_windows_amd64, with a file similar to sdm.amd64.exe inside. Unzip the files.
- Take the unzipped sdm.amd64.exe file and copy it to a directory in your PATH parameter. The suggested location is
C:\Users\[user]\AppData\Local\Microsoft\WindowsApps\sdm.exe, but any location specified in PATH is acceptable. - Name the copied file sdm rather than sdm.amd64 so that you can call it via
sdmcommands. This change is consistent with CLI usage throughout the StrongDM documentation. - Test that the CLI is installed correctly by running
sdm --version. If it is correctly installed, the version displays.
sdm update.Recommended Reading
For detailed information on how to use the desktop app and CLI, please see the documentation: