SSO With Keycloak
Last modified on March 27, 2025
This guide provides step-by-step instructions on how to configure single sign-on (SSO) with Keycloak. You already use Keycloak to conveniently manage permissions to applications. After SSO configuration is complete, you’ll also be able to use Keycloak to manage permissions to your Datasources.
Steps
- In your Keycloak admin console, go to the Clients section and click Create to add a client.
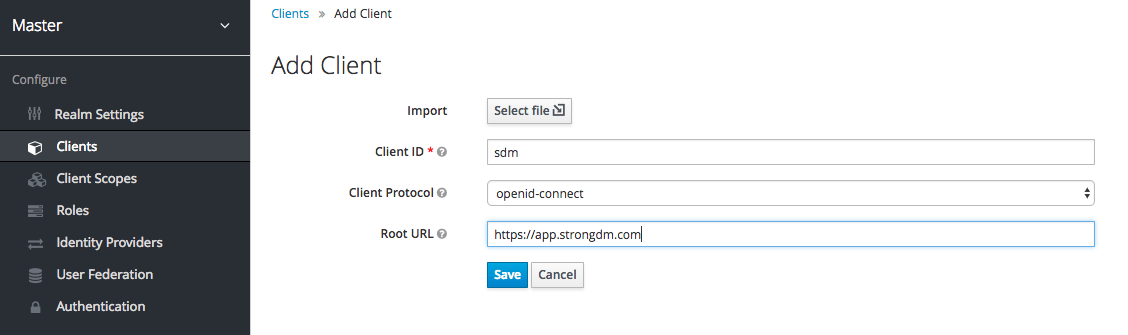
- On the Add Client page, enter basic information and then save:
- Client ID: Enter a name like StrongDM.
- Client Protocol: Select openid-connect.
- Root URL: Enter the appropriate URL depending on your tenant’s location:
Configure credentials
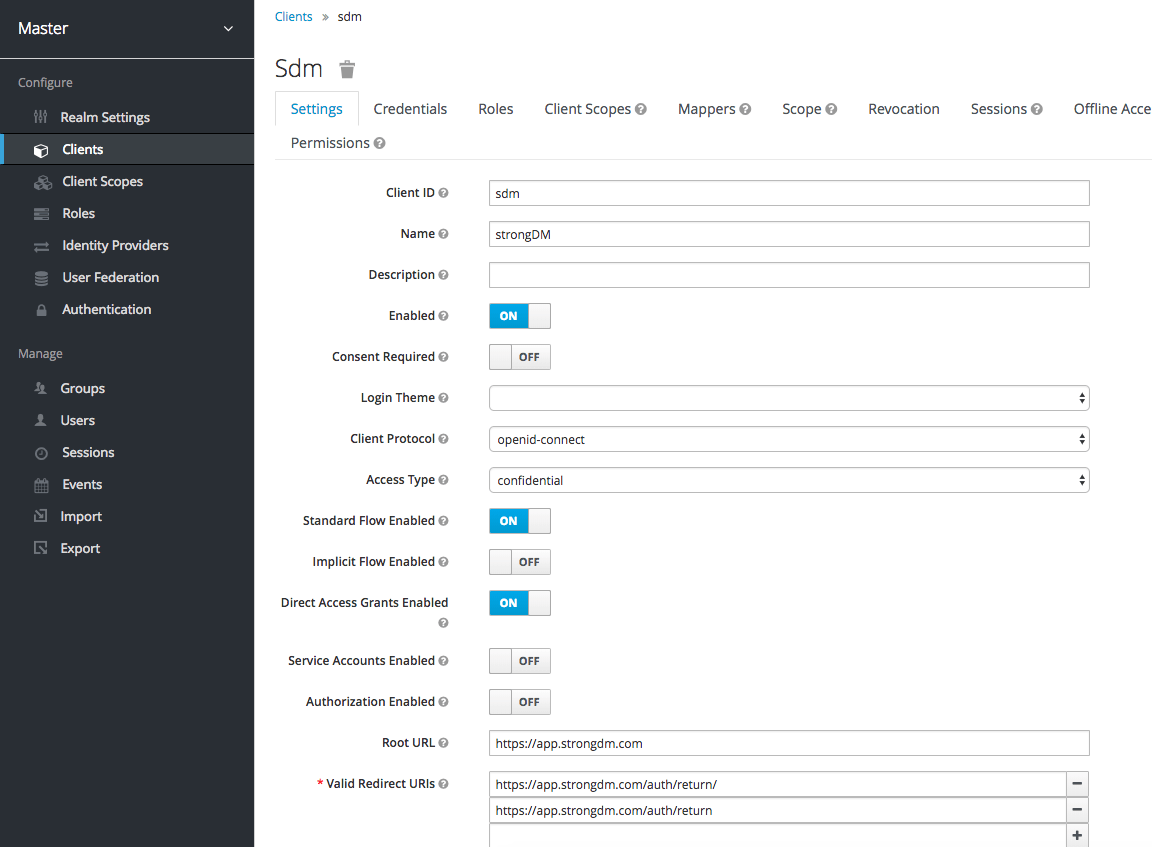
- On the Settings tab, do the following:
- Ensure that Client Protocol is openid-connect.
- Set Access Type to confidential.
- Under Valid Redirect URIs, add the following URLS depending on the tenant location:
- Other fields are optional and can be set as you prefer. When done, click Save.
Enter details
- On the Credentials tab, copy the Secret value. You will need this in the next step.

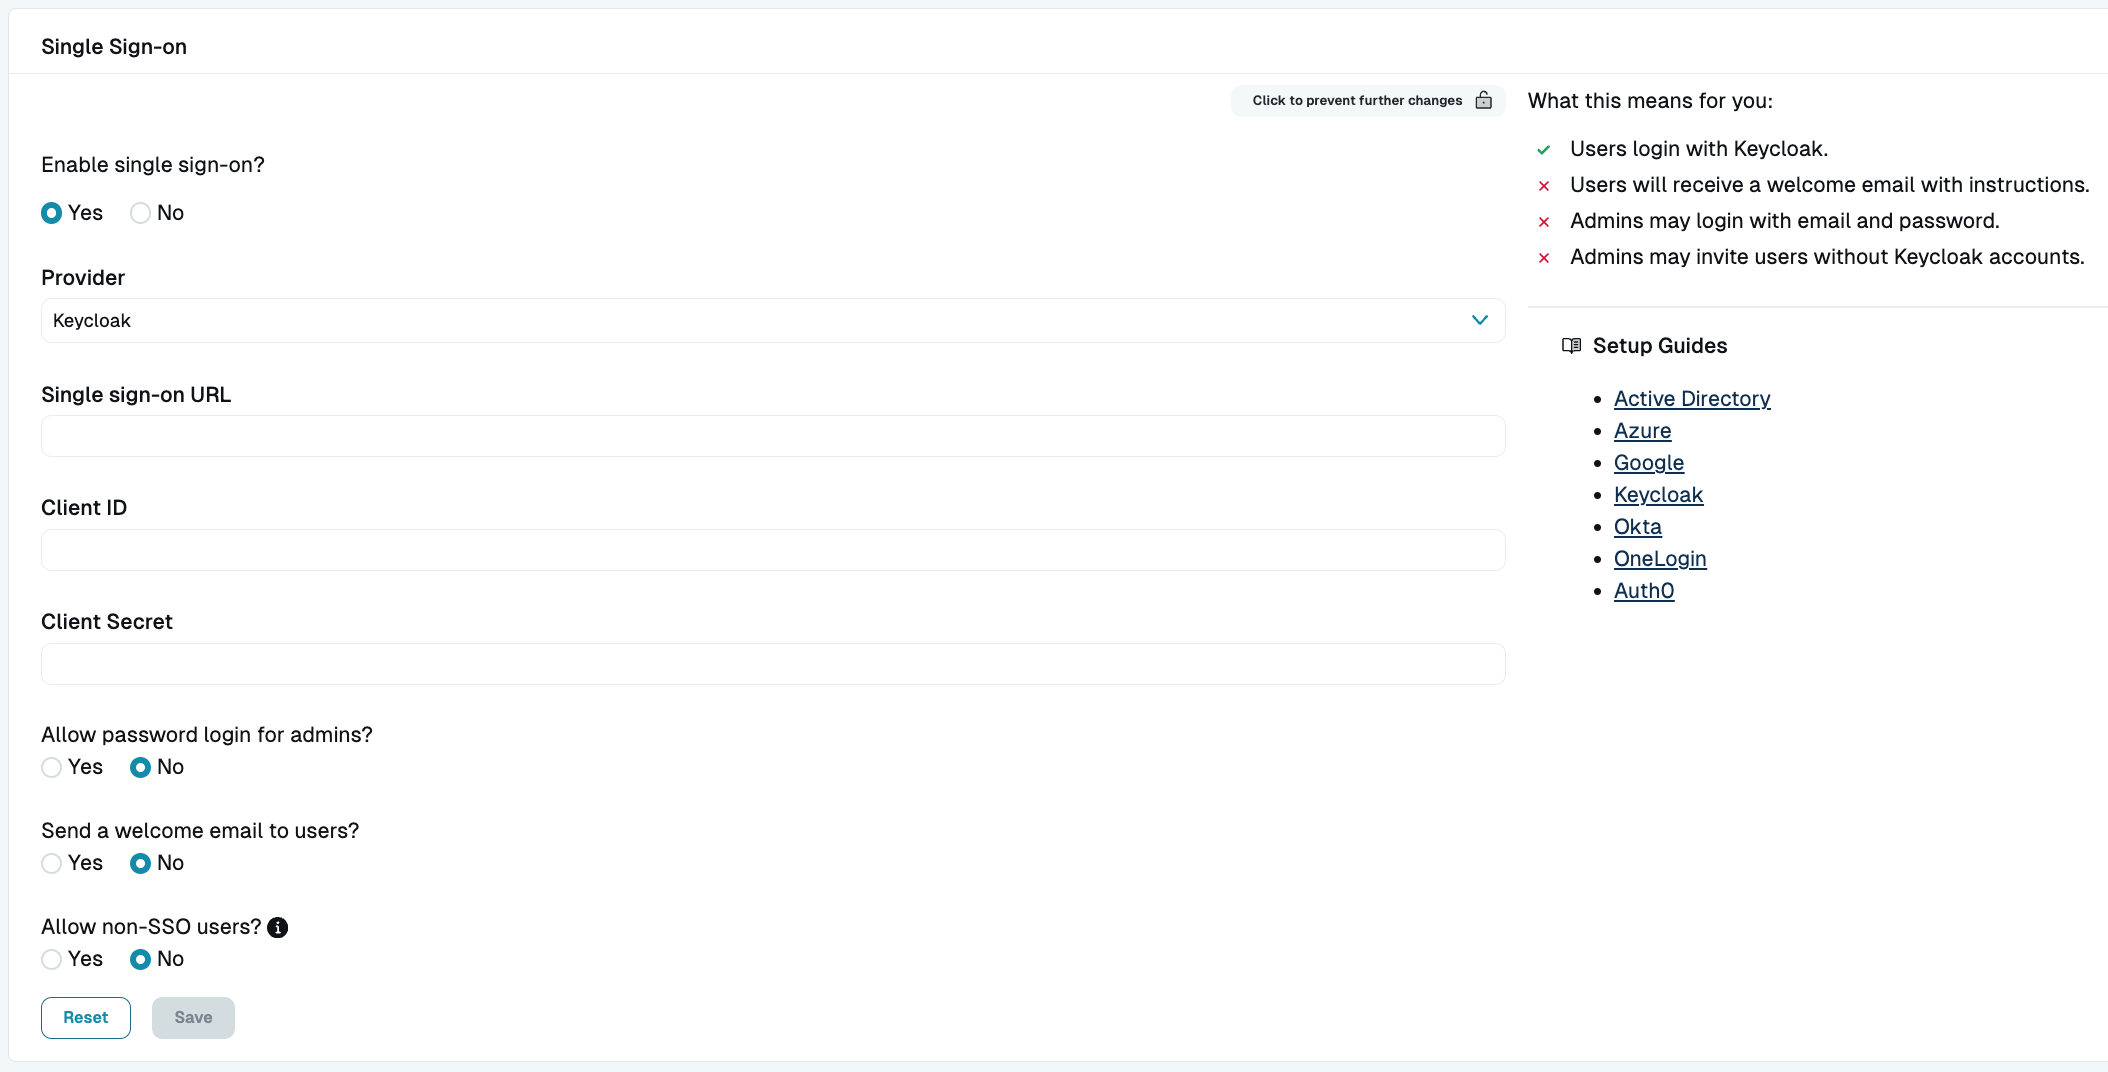
Record client secret - Next, enter the account details in the StrongDM Admin UI. Go to Settings > User Management. In the Single Sign-on section, set the following:
- Provider: Select Keycloak.
- Single sign-on URL: Add your URL (add
/auth/realms/<REALM_NAME>to your Keycloak base URL). - Client ID: Enter your client ID.
- Client Secret: Paste the secret that you copied previously.
- Select your desired general SSO settings and click activate.
Configure Keycloak in StrongDM - Verify that all users in StrongDM exist in Keycloak.
Want to see StrongDM’s capabilities beyond SSO with Keycloak? Learn more about how it works or get a demo to see it in action.