SSO With Okta
Last modified on March 27, 2025
This document details the steps to set up Okta single sign-on (SSO) to manage authentication for StrongDM.
Requirements
- OpenID Connect (OIDC) must be enabled for your account if you are using OIDC for Okta SSO integration with StrongDM. If it is not enabled, please contact Okta Support and request that they enable it. This can be completed in minutes.
- You must be a StrongDM user with the Administrator Permission Level and a User with administrator rights in your Okta account.
Supported Features
- If you wish to use IdP-initiated SSO, you can implement Okta SSO via the generic SAML provider rather than via this OIDC integration.
Steps
These steps describe how to create an OIDC app using Okta’s App Integration Wizard (AIW).
- Log in to Okta.
- From the Admin Console, go to Applications > Applications and click Browse App Catalog (if you have already added the StrongDM app through our User & Group Provisioning guide you can skip to Step 7).
- Search for and select the “StrongDM” app, then click Add.
- Enter the Base URL for API requests to your StrongDM region:
- Change the label for the app if you’d like, then click Done.
- On the Sign On tab, click Edit in the upper-right, then in the Credentials Details section set Application username format to “Email”.
- Click Save.
- From the Client Credentials section, copy the Client ID and Client secret values. You will need these values in the next step.
- Lastly, copy the app’s Okta domain (
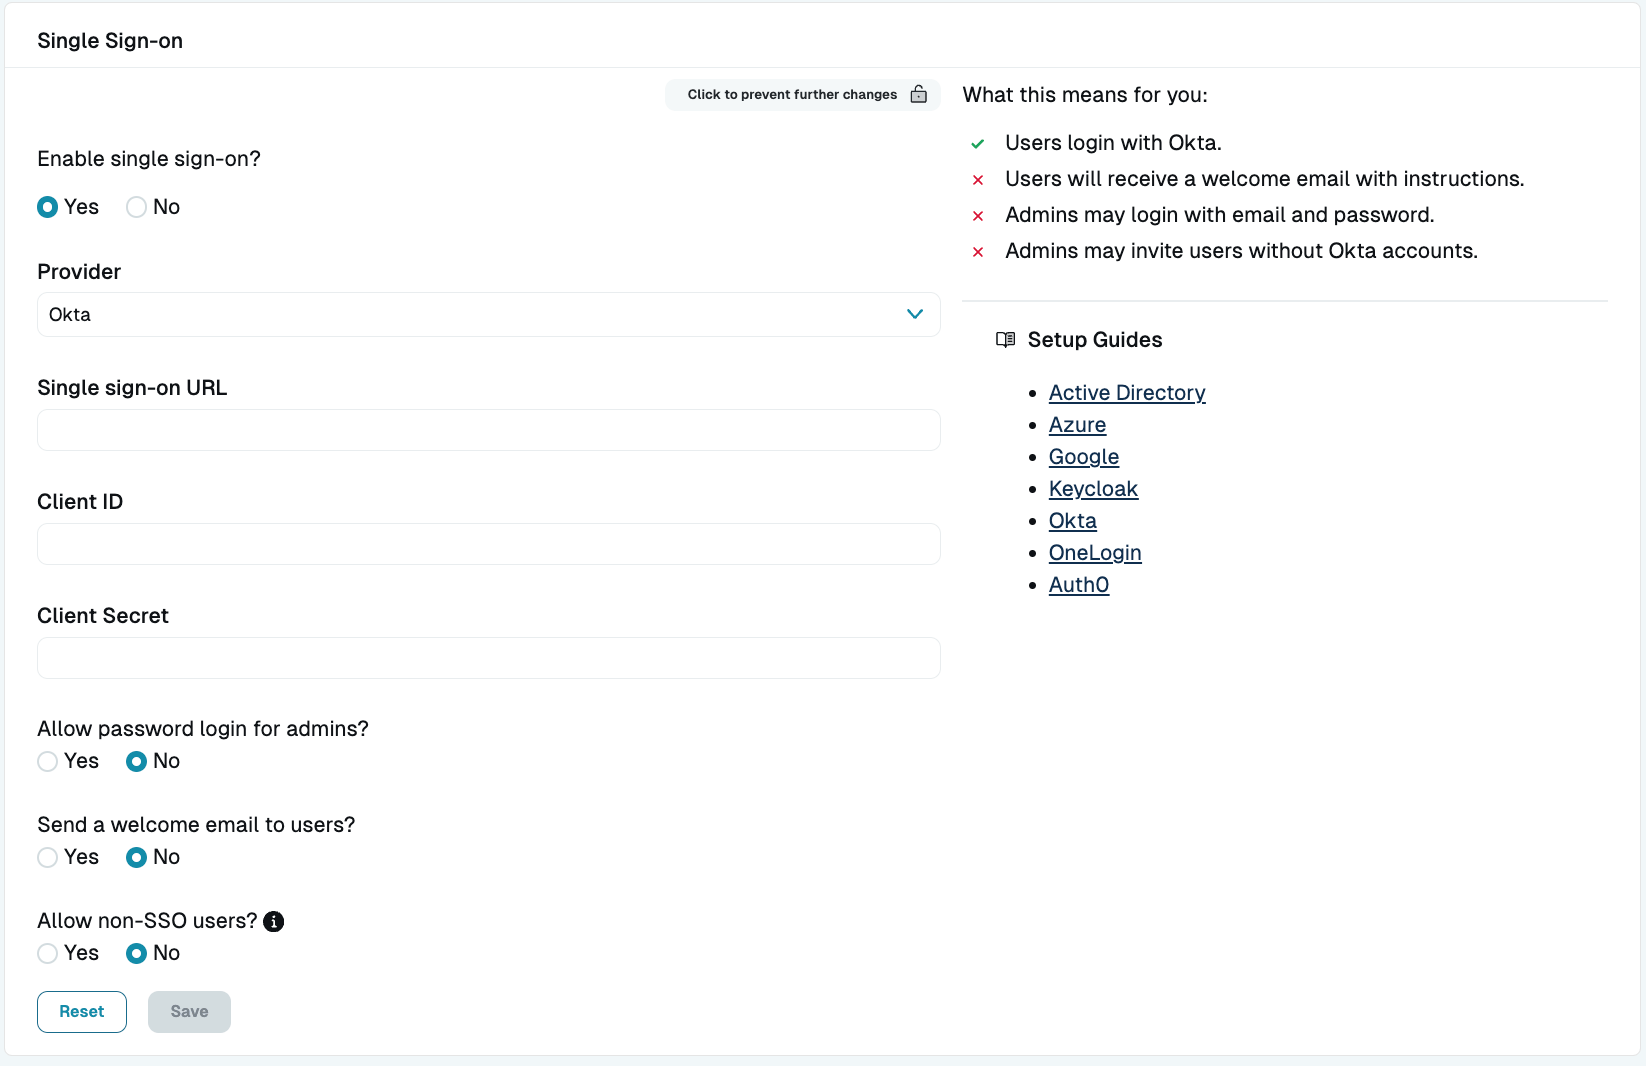
https://<ORGANIZATION_NAME>.okta.com), which will be the single sign-on URL in the next step. - Enter the account details in the StrongDM Admin UI. Go to Settings > User Management. In the Single Sign-on section, click the lock icon to set the following:
- Provider: Select Okta.
- Single sign-on URL: Add your Okta domain (
https://<YOUR-ORG>.okta.com). - Client ID: Paste your client ID.
- Client Secret: Paste your client secret.
- Select your desired general SSO settings and click activate.
Configure Okta SSO in StrongDM - Go back to Okta and confirm Okta access. Confirm that the email addresses for all users are identical in both StrongDM and in Okta. Confirm that all users who you intend to grant database access have access to the StrongDM application by default, and if all of the above is true, you should be ready to enable SSO.