SSO With ADFS
Last modified on March 27, 2025
This guide provides step-by-step instructions on how to configure single sign-on (SSO) with Active Directory Federated Services (ADFS). You already use ADFS to conveniently manage permissions to applications. After SSO configuration is complete, you’ll be able to use ADFS to manage permissions to your databases.
Prerequisites
Your ADFS server will need a valid TLS certificate.
Steps
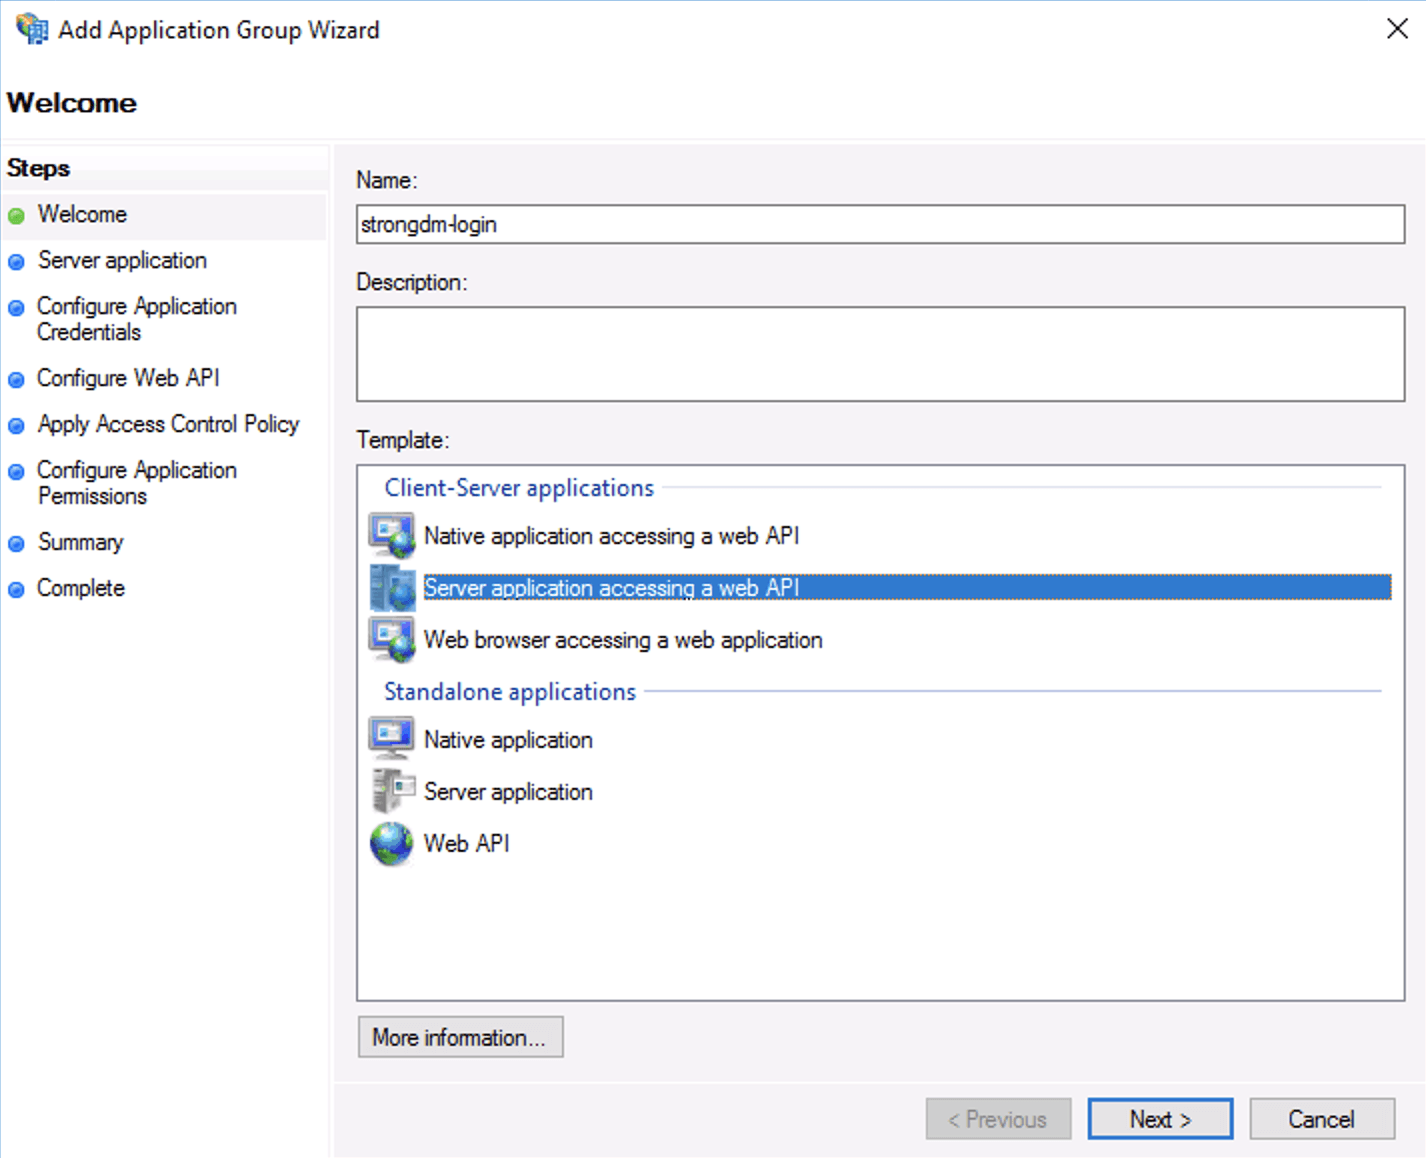
Within Application Groups, add a new application group. From the Application Group Wizard’s Welcome screen, select the client-server application template Server application accessing a web API. Provide a name and click Next.
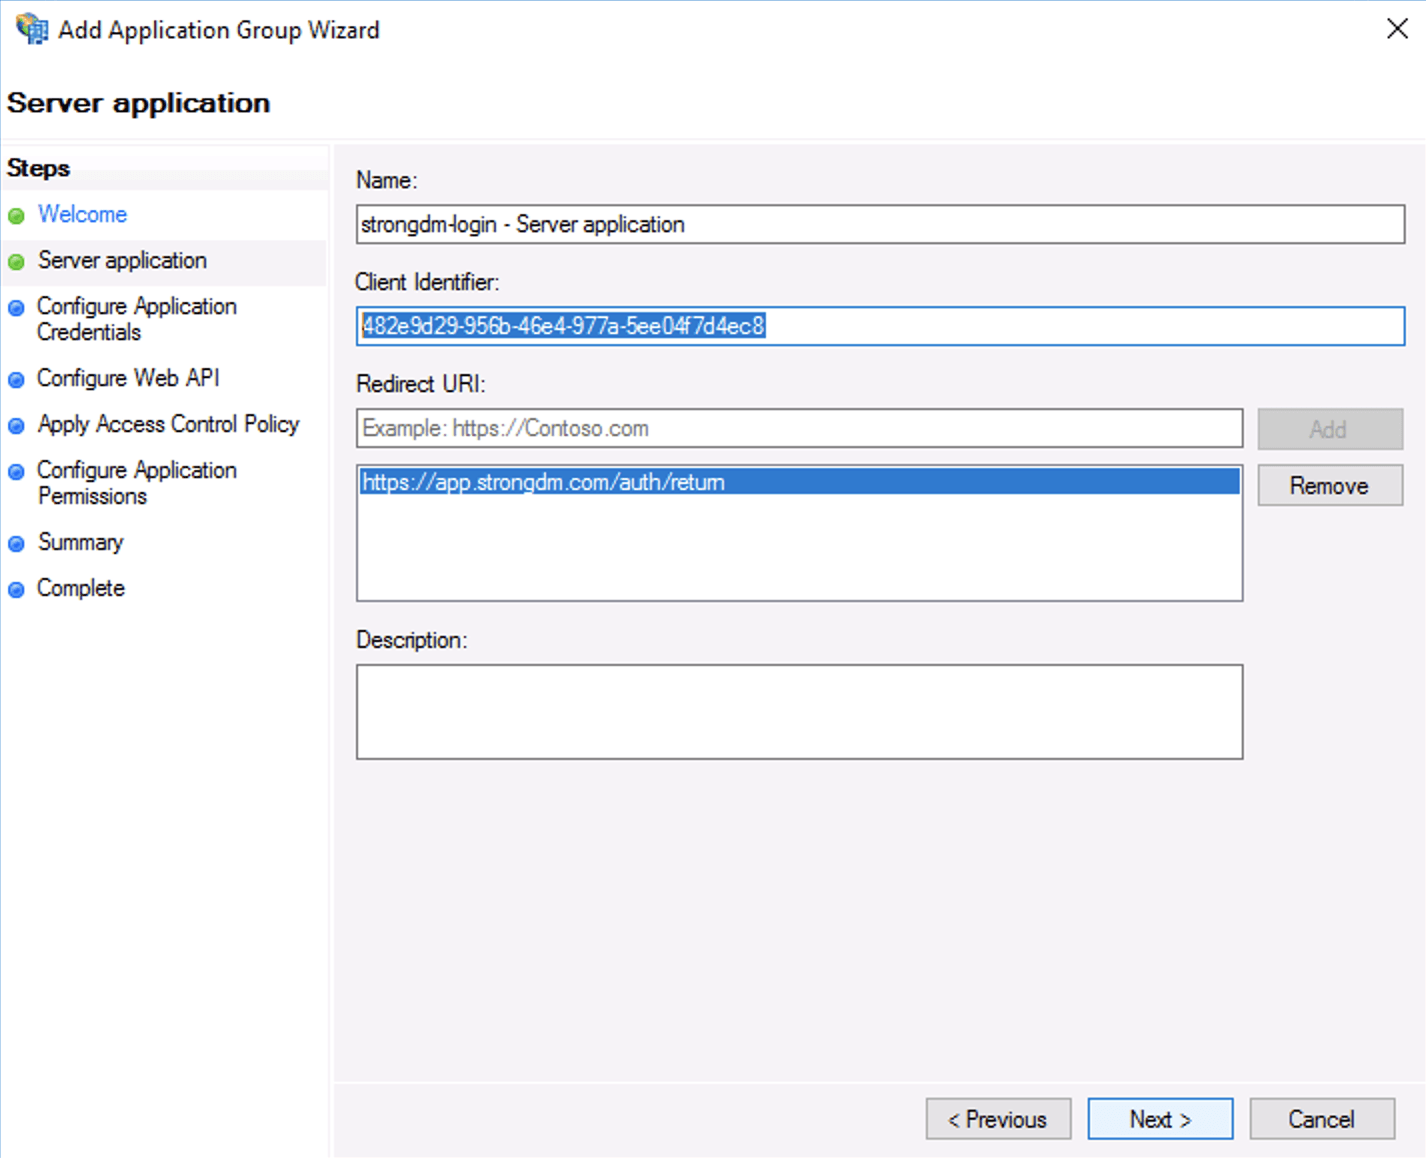
ADFS Admin In Server application, you’ll be configuring the server application redirect URI. Save the client identifier; you will need this in the following steps. Add the following redirect URI depending on your tenant location:
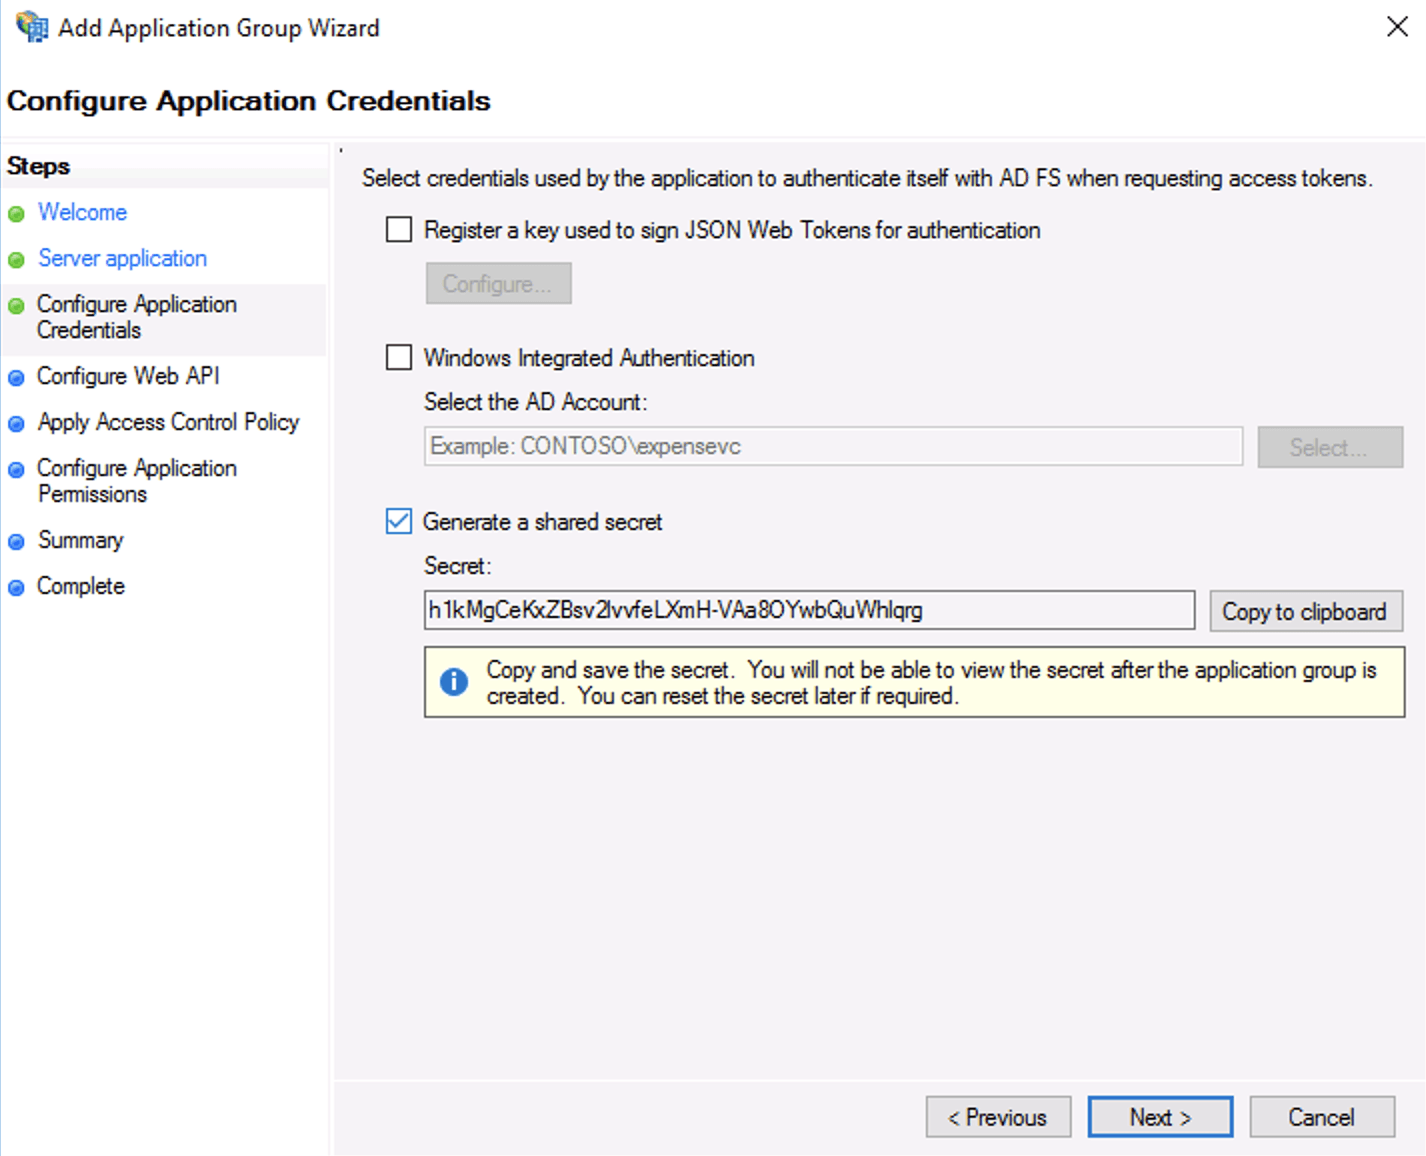
Configure Client Identifier and Redirect URI In Configure Application Credentials, select the checkbox for Generate a shared secret and save the secret for later.
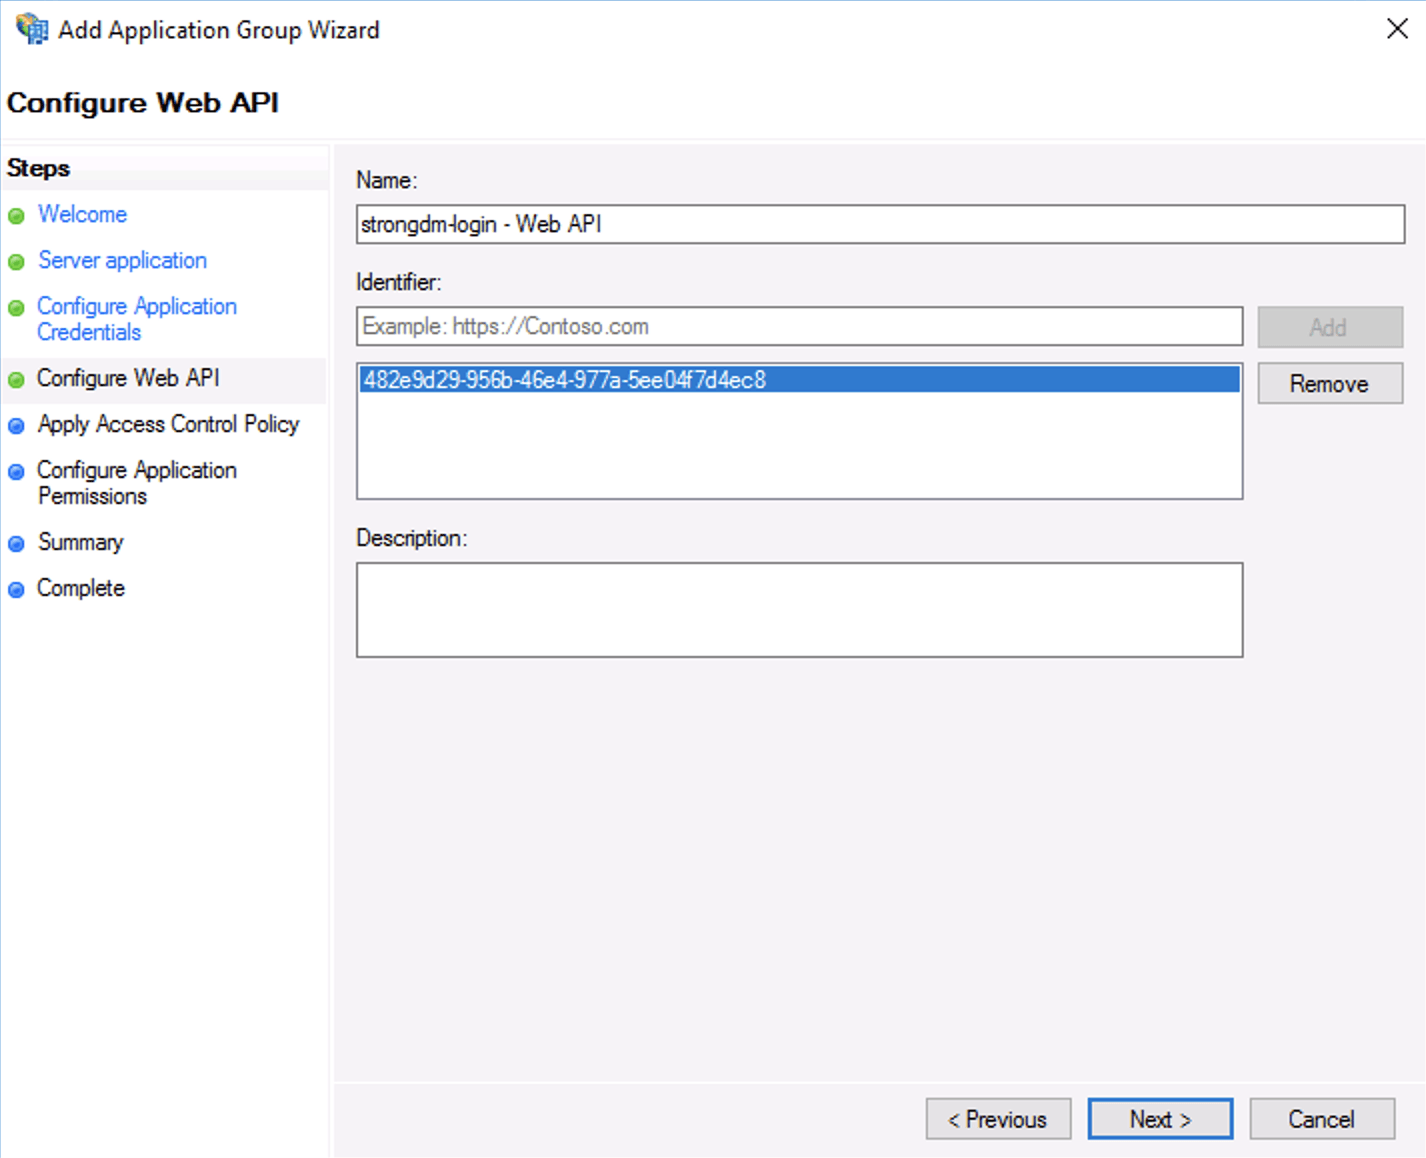
Copy Shared Secret In Configure Web API, add the client identifier you saved from the previous step.
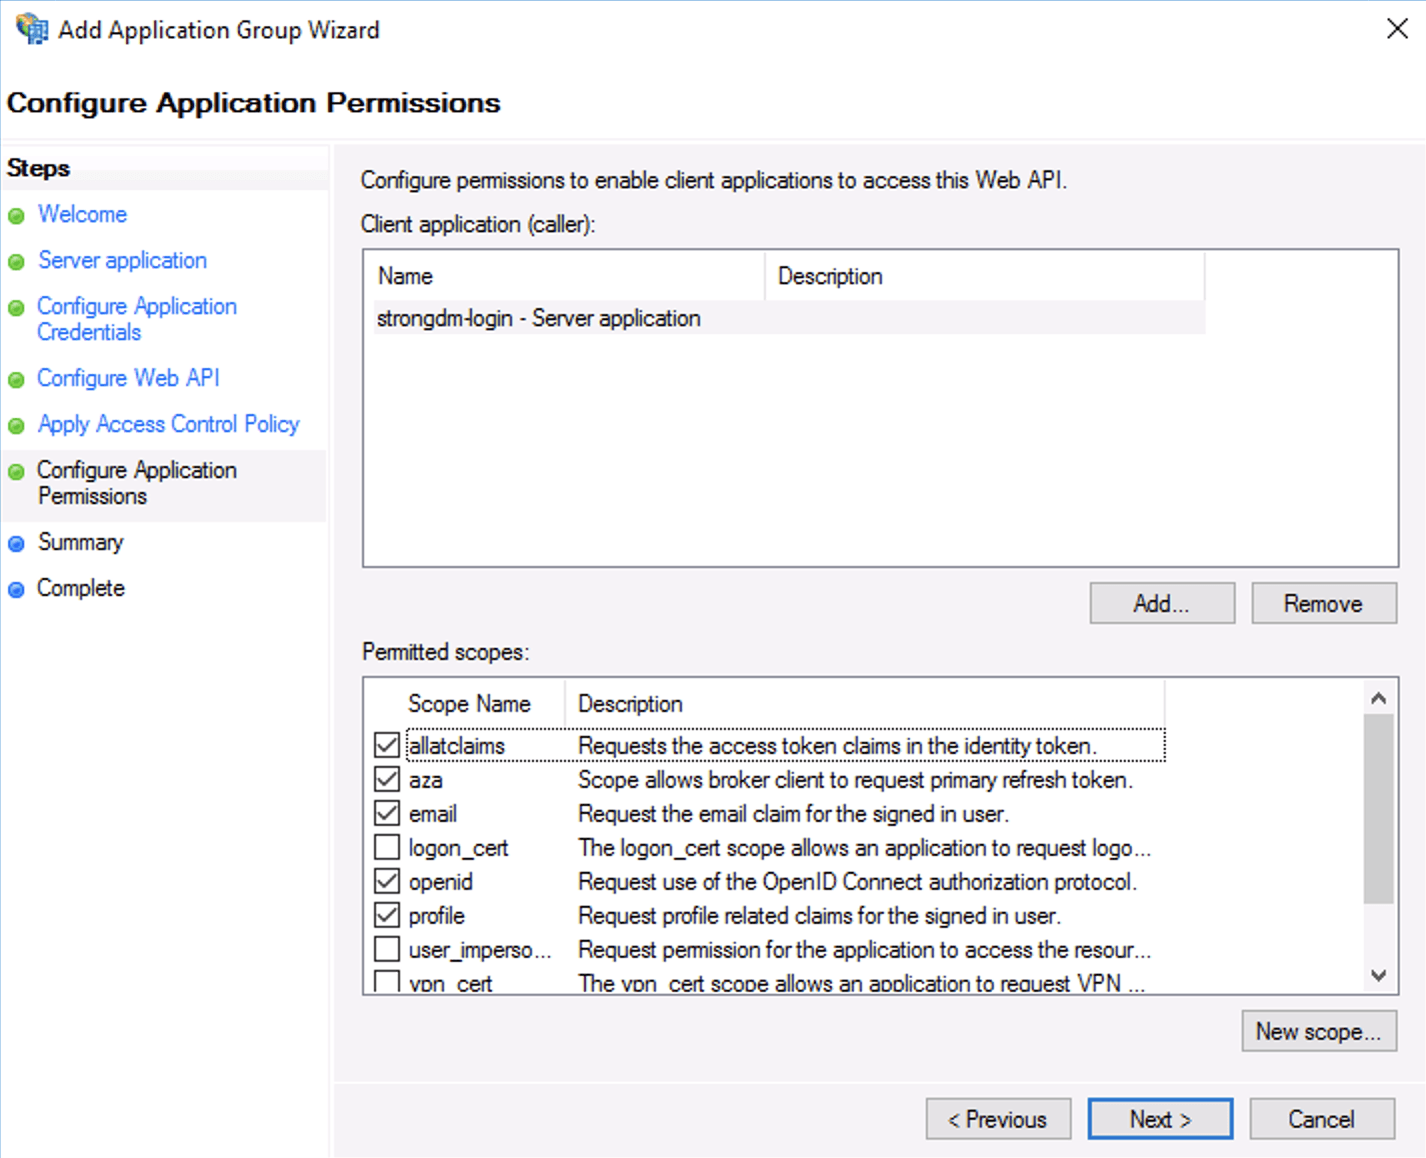
Configure Web API In Configure application permissions, select the checkboxes for the following scope names:
- allatclaims
- aza
- openid
- profile
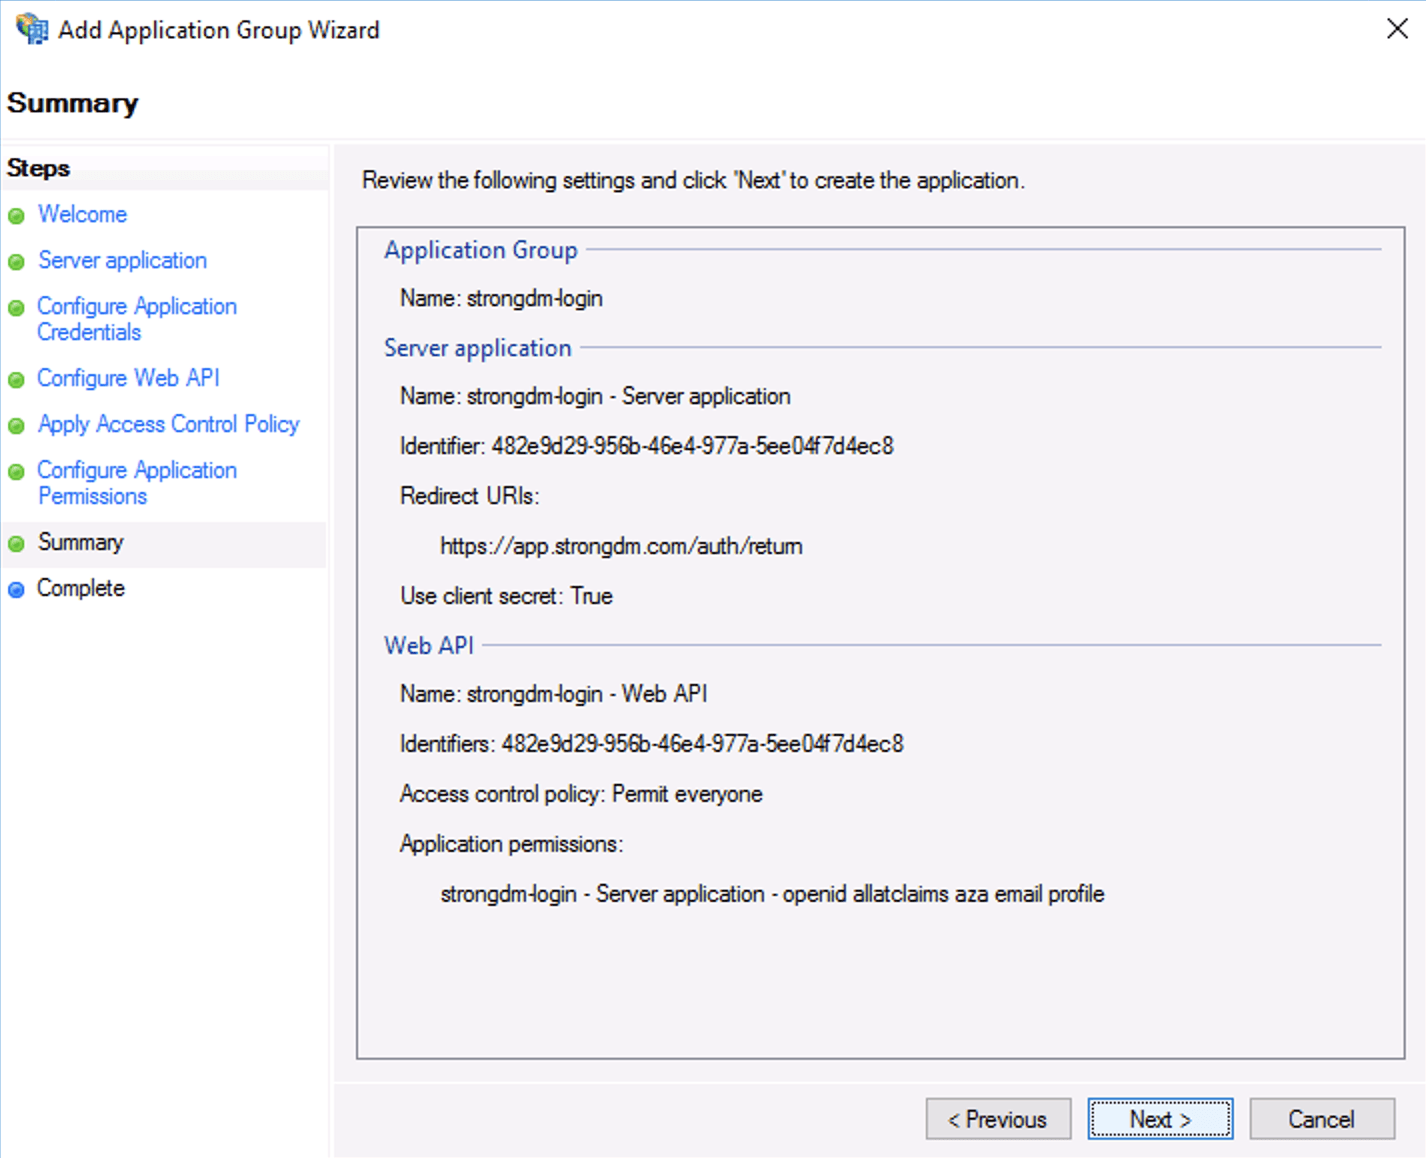
Configure Permissions to Access Web API In Summary, review the settings and click Next.
Review Settings From the Add Transform Claim Rule Wizard’s Configure Claim Rule screen, enable login by email instead of UPN. By default StrongDM will match your login email address to the UPN returned by ADFS. If you would prefer to use email, edit the Web API and add the following transformation rule as shown.
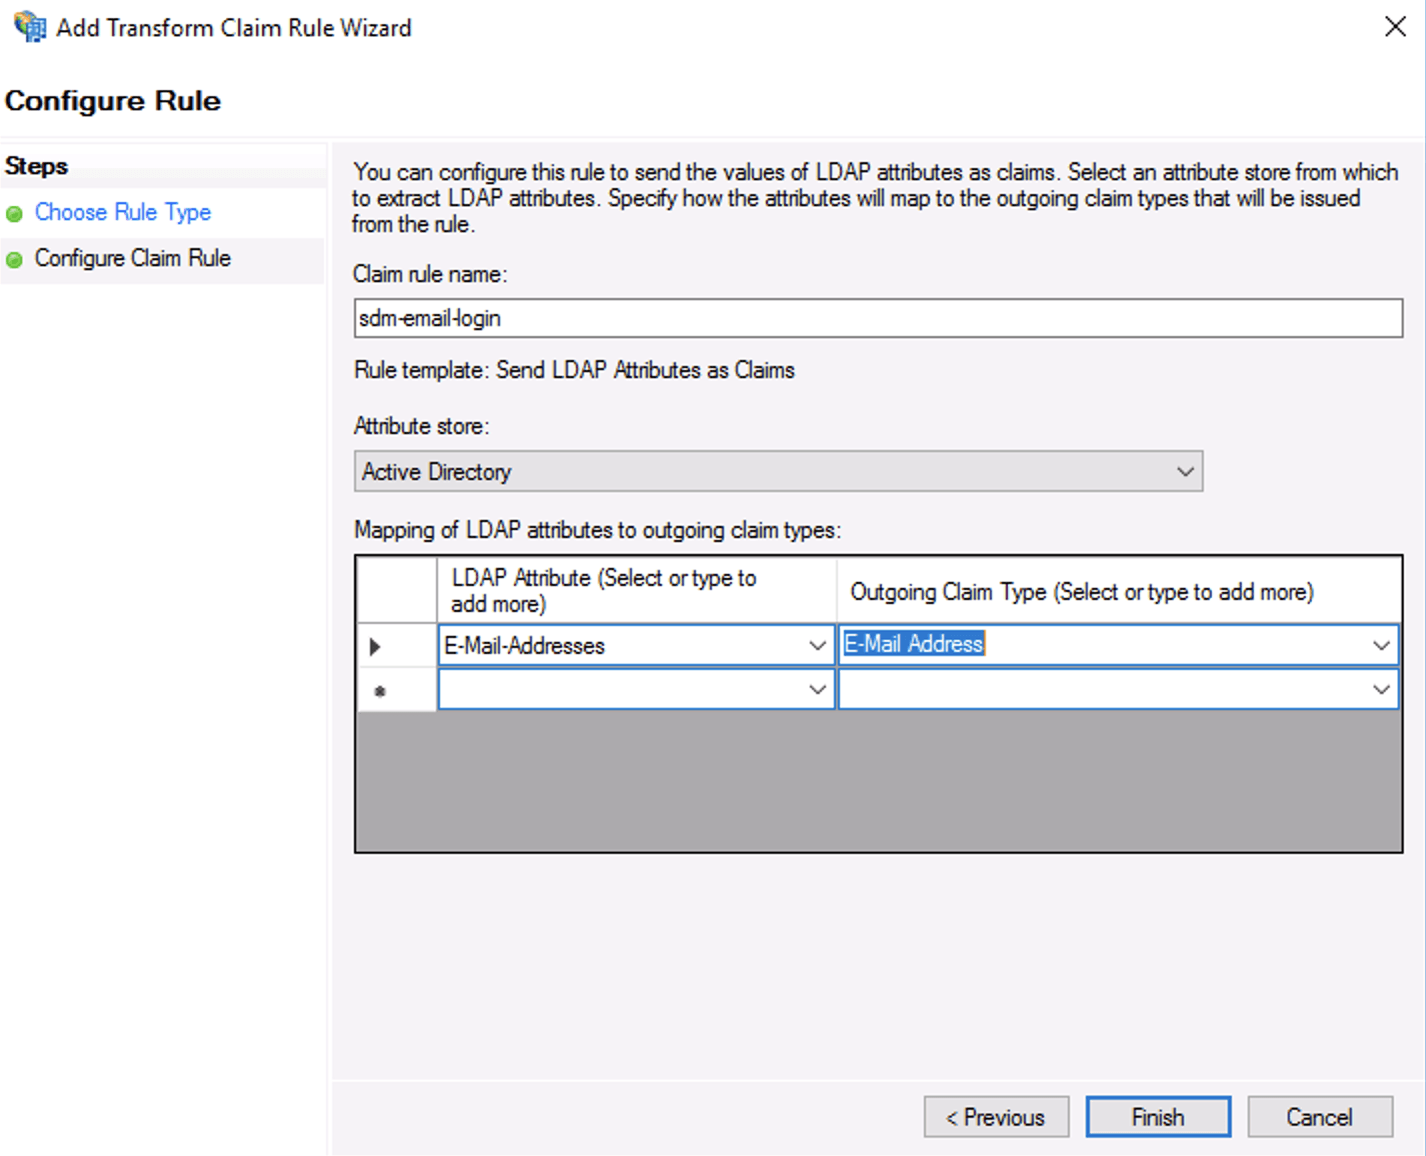
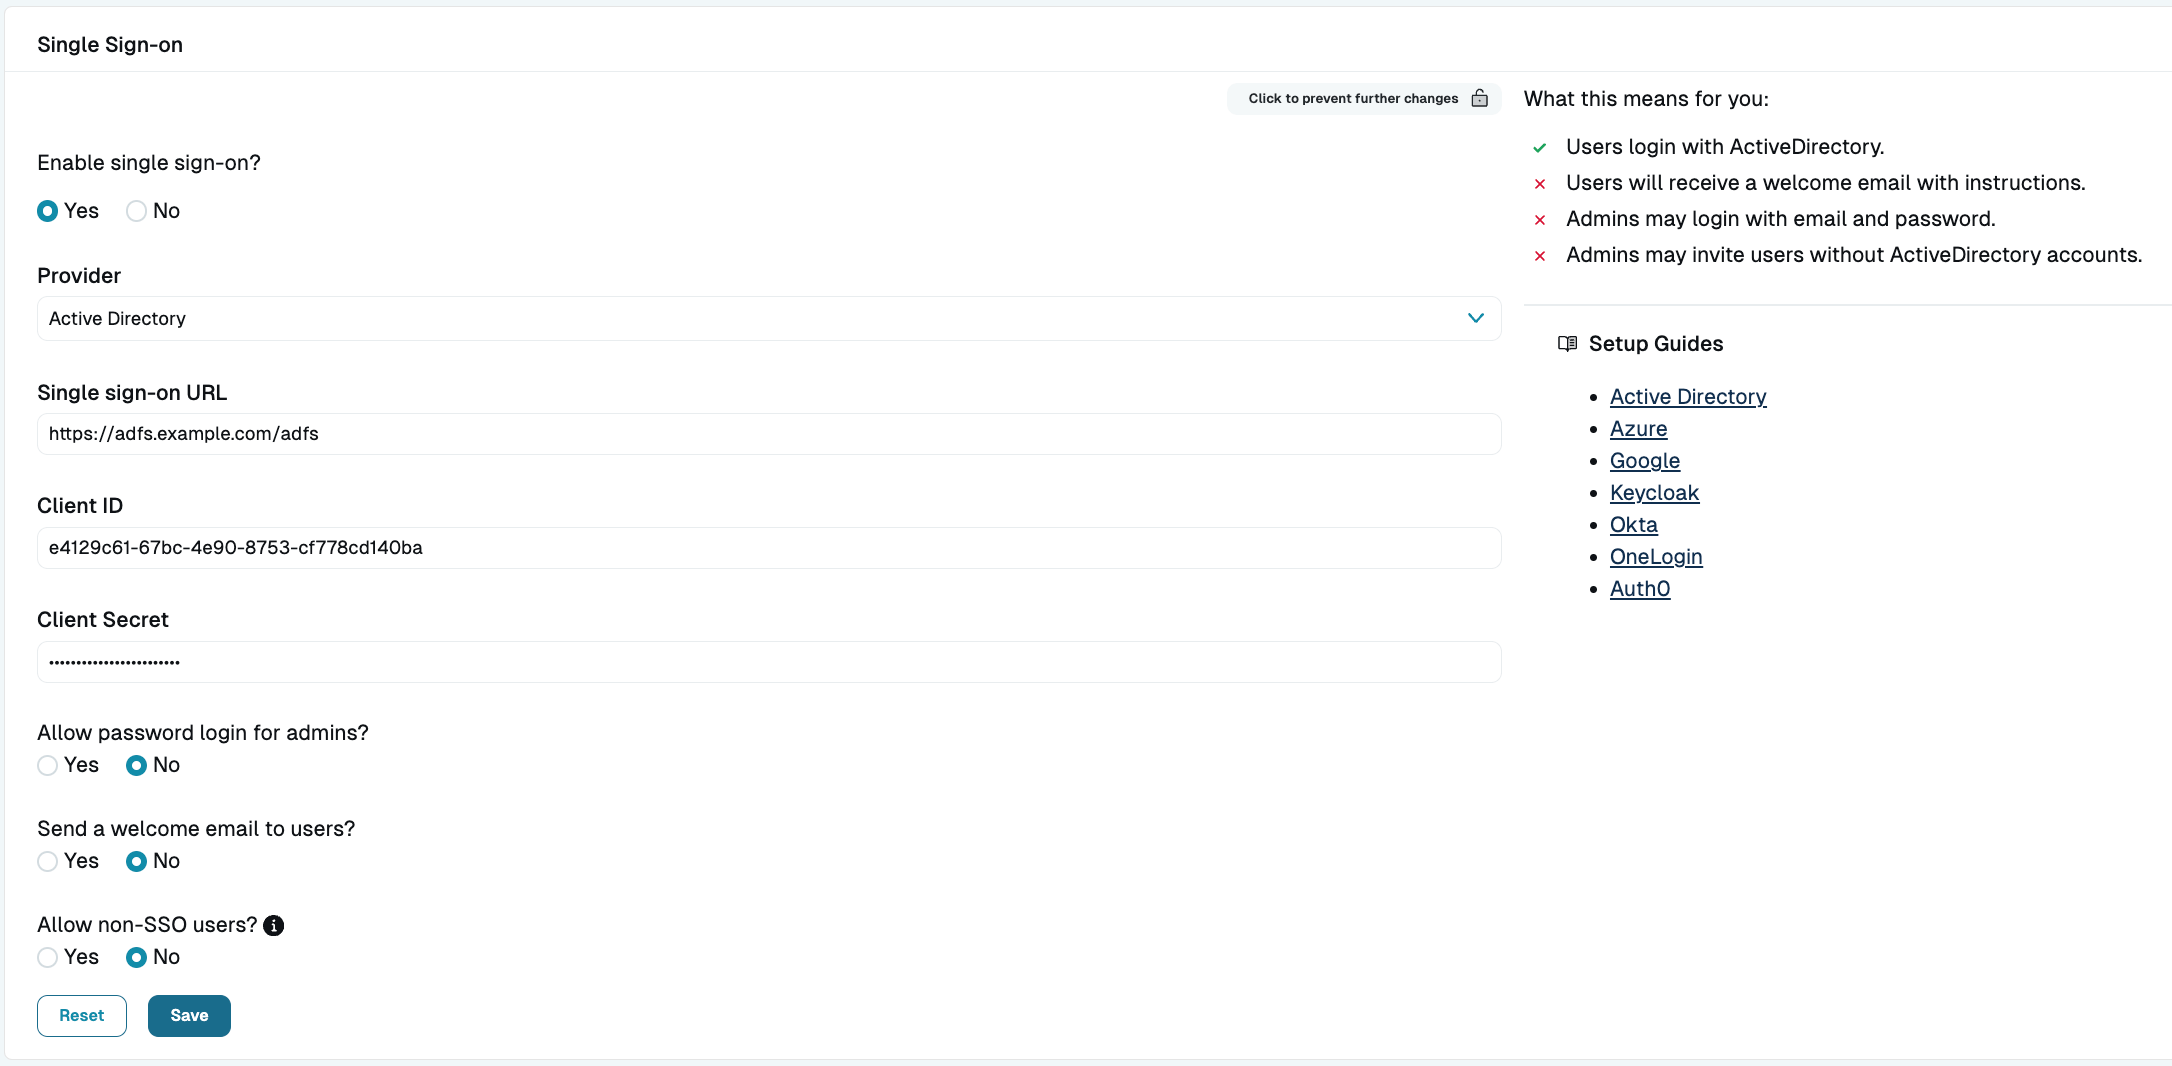
Map E-Mail-Addresses LDAP Attribute to Outgoing Claim Next, enable ADFS in the StrongDM Admin UI in Settings > User Management. Click the lock to make changes, and then select Active Directory from the provider drop-down menu. Add your client details as shown and click activate.