SSO With Microsoft Entra ID
Last modified on January 12, 2024
This guide will show you how to configure Microsoft Entra ID (formerly Azure AD) as a single sign-on (SSO) provider to authenticate to StrongDM for your organization.
If you intend to use Entra ID for both provisioning and SSO, the best practice is to use two separate Entra ID apps: one to manage the SCIM integration and one to manage the SSO integration.
Prerequisites
Ensure that you have the appropriate roles:
- In Microsoft Entra ID (formerly Azure AD), you must be an Application Administrator or Global Administrator.
- In StrongDM, you must be an Account Administrator.
Azure SSO Configuration Guide
App registration and configuration in Microsoft Entra ID
- Log in to the Azure portal or Microsoft Entra admin center, and go to App registrations.
- Click New application registration and set the following:
- Name: Provide a descriptive name for this app.
- Supported account types: Specify if you want this app to span across multiple directories.
- Redirect URI: Select Web and then specify the redirect URI as
https://app.strongdm.com/auth/return.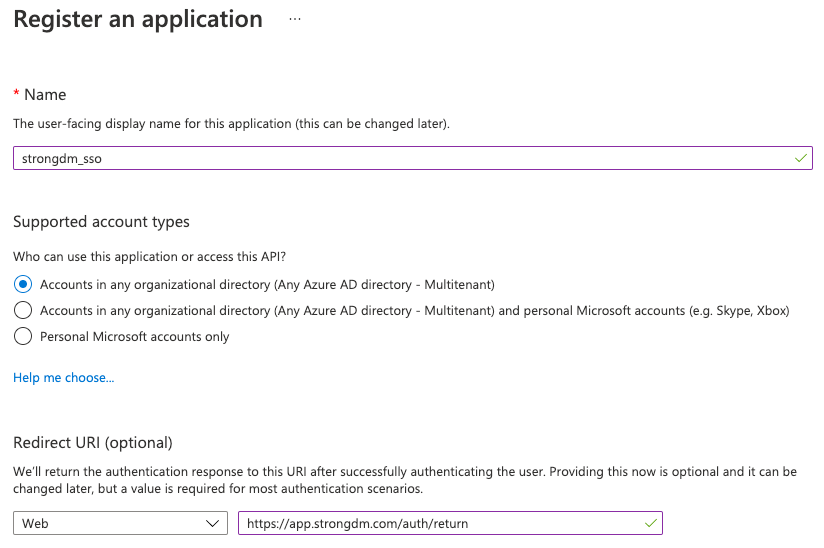
Register an application
- Click Register.
- The app’s Overview section will appear. Copy the Application (client) ID and save it for later use. You will be pasting the application ID into the StrongDM Admin UI in a later step.
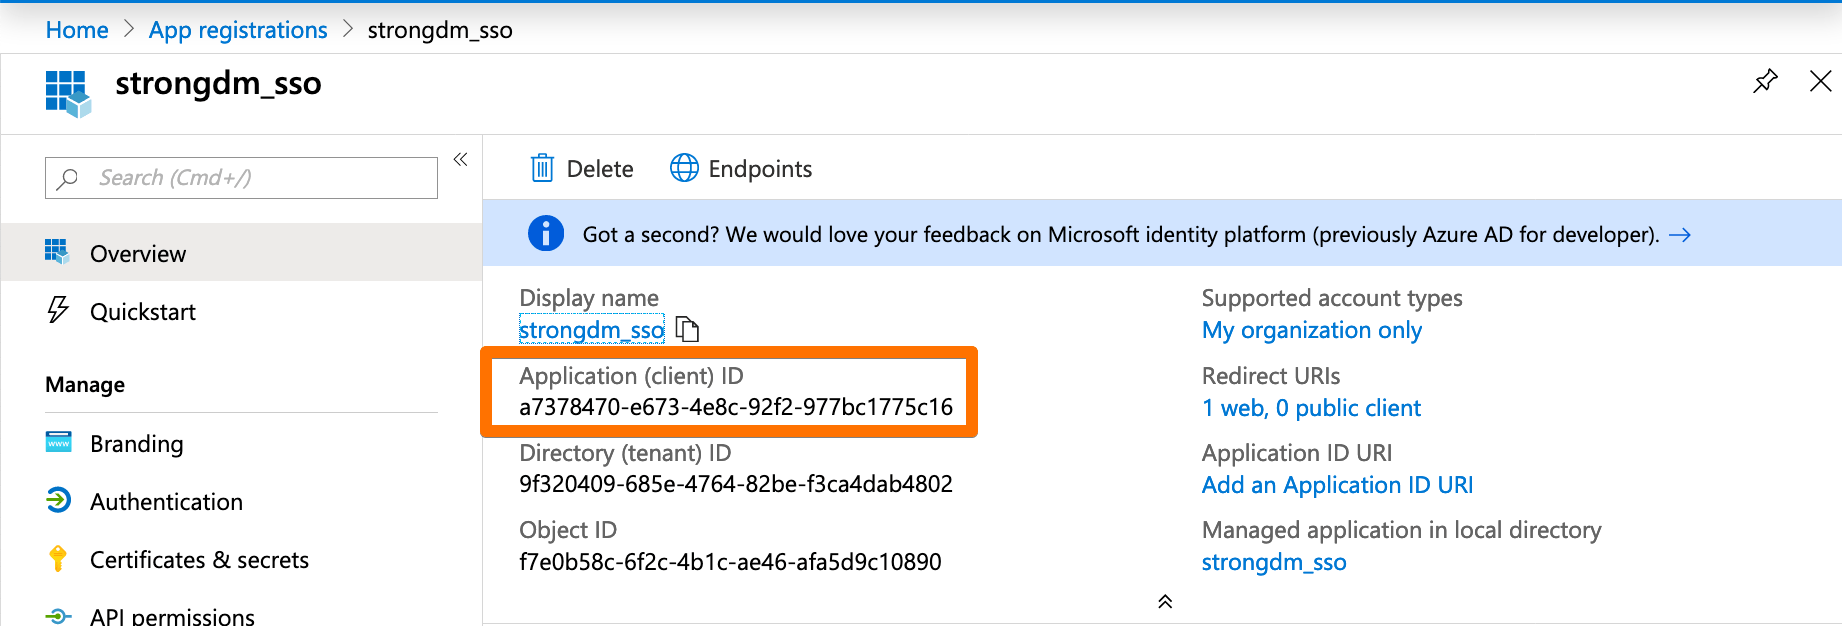
Application ID - In the app’s Branding section:
- Set the Home page URL as
https://app.strongdm.com. - Copy the Publisher Domain and save it for later use in the Admin UI.
- Click Save.
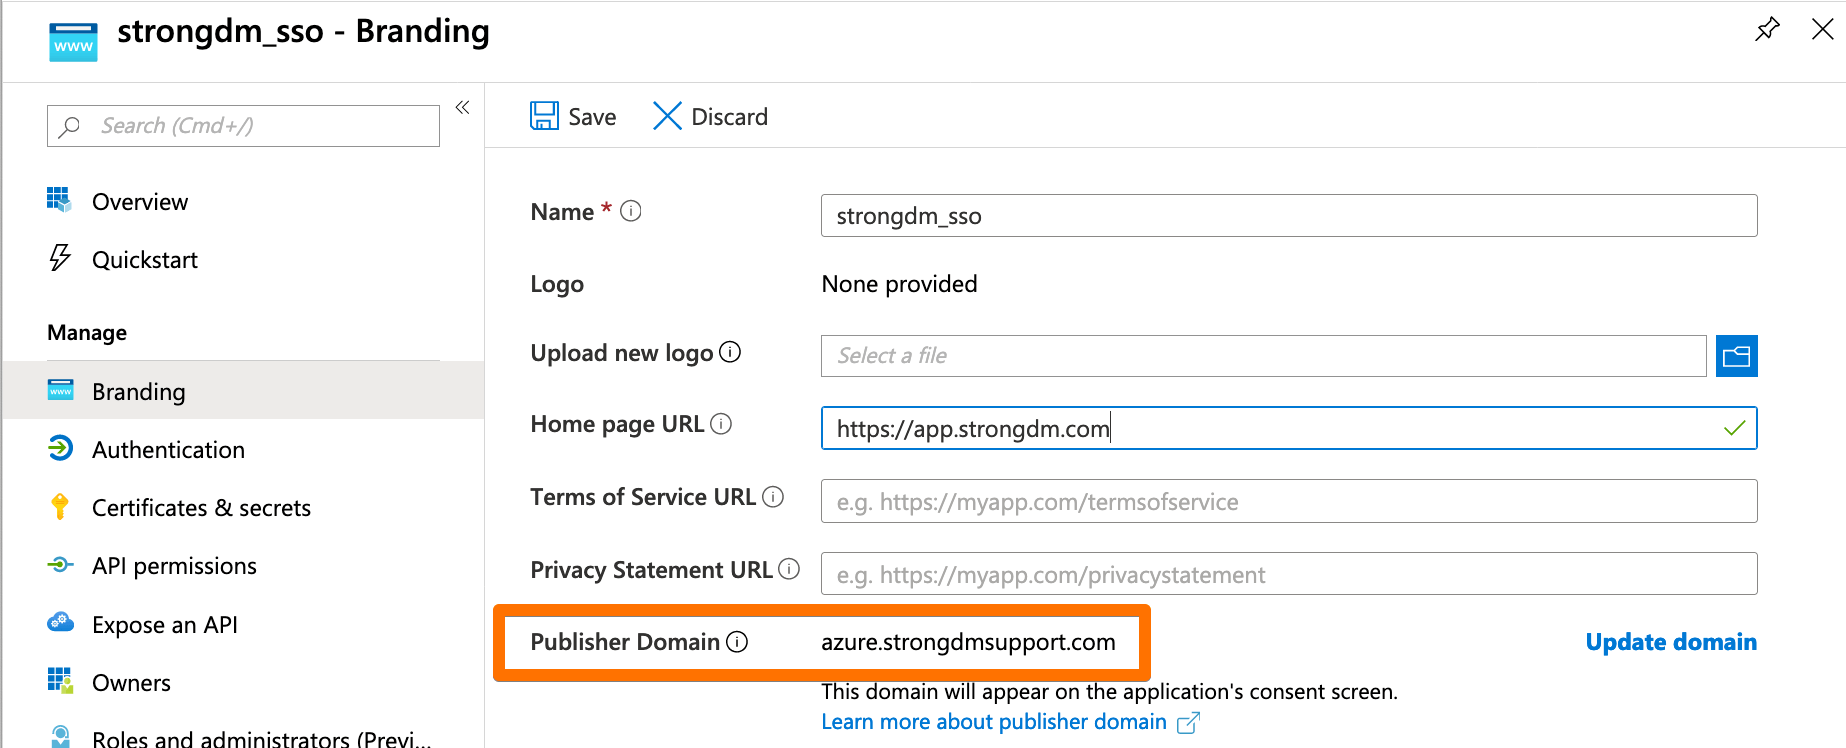
Publisher Domain
- Set the Home page URL as
- In the app’s Certificates & secrets section:
- Click + New client secret.
- Provide a description, set the expiration, and click Add.
- The client secret will be shown only one time, so copy the value (not the secret ID) now for later use in the Admin UI.
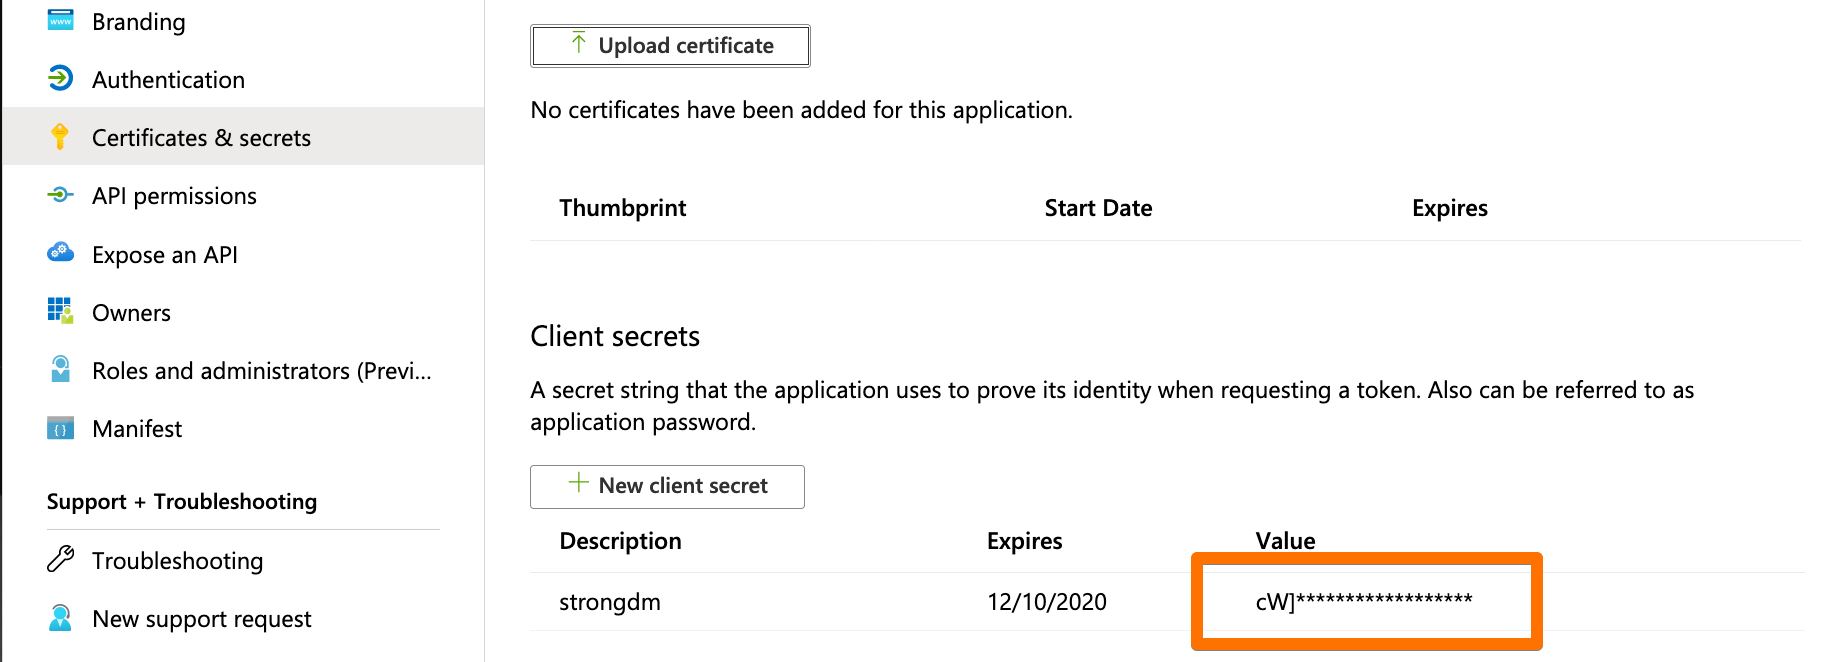
Client Secret Value
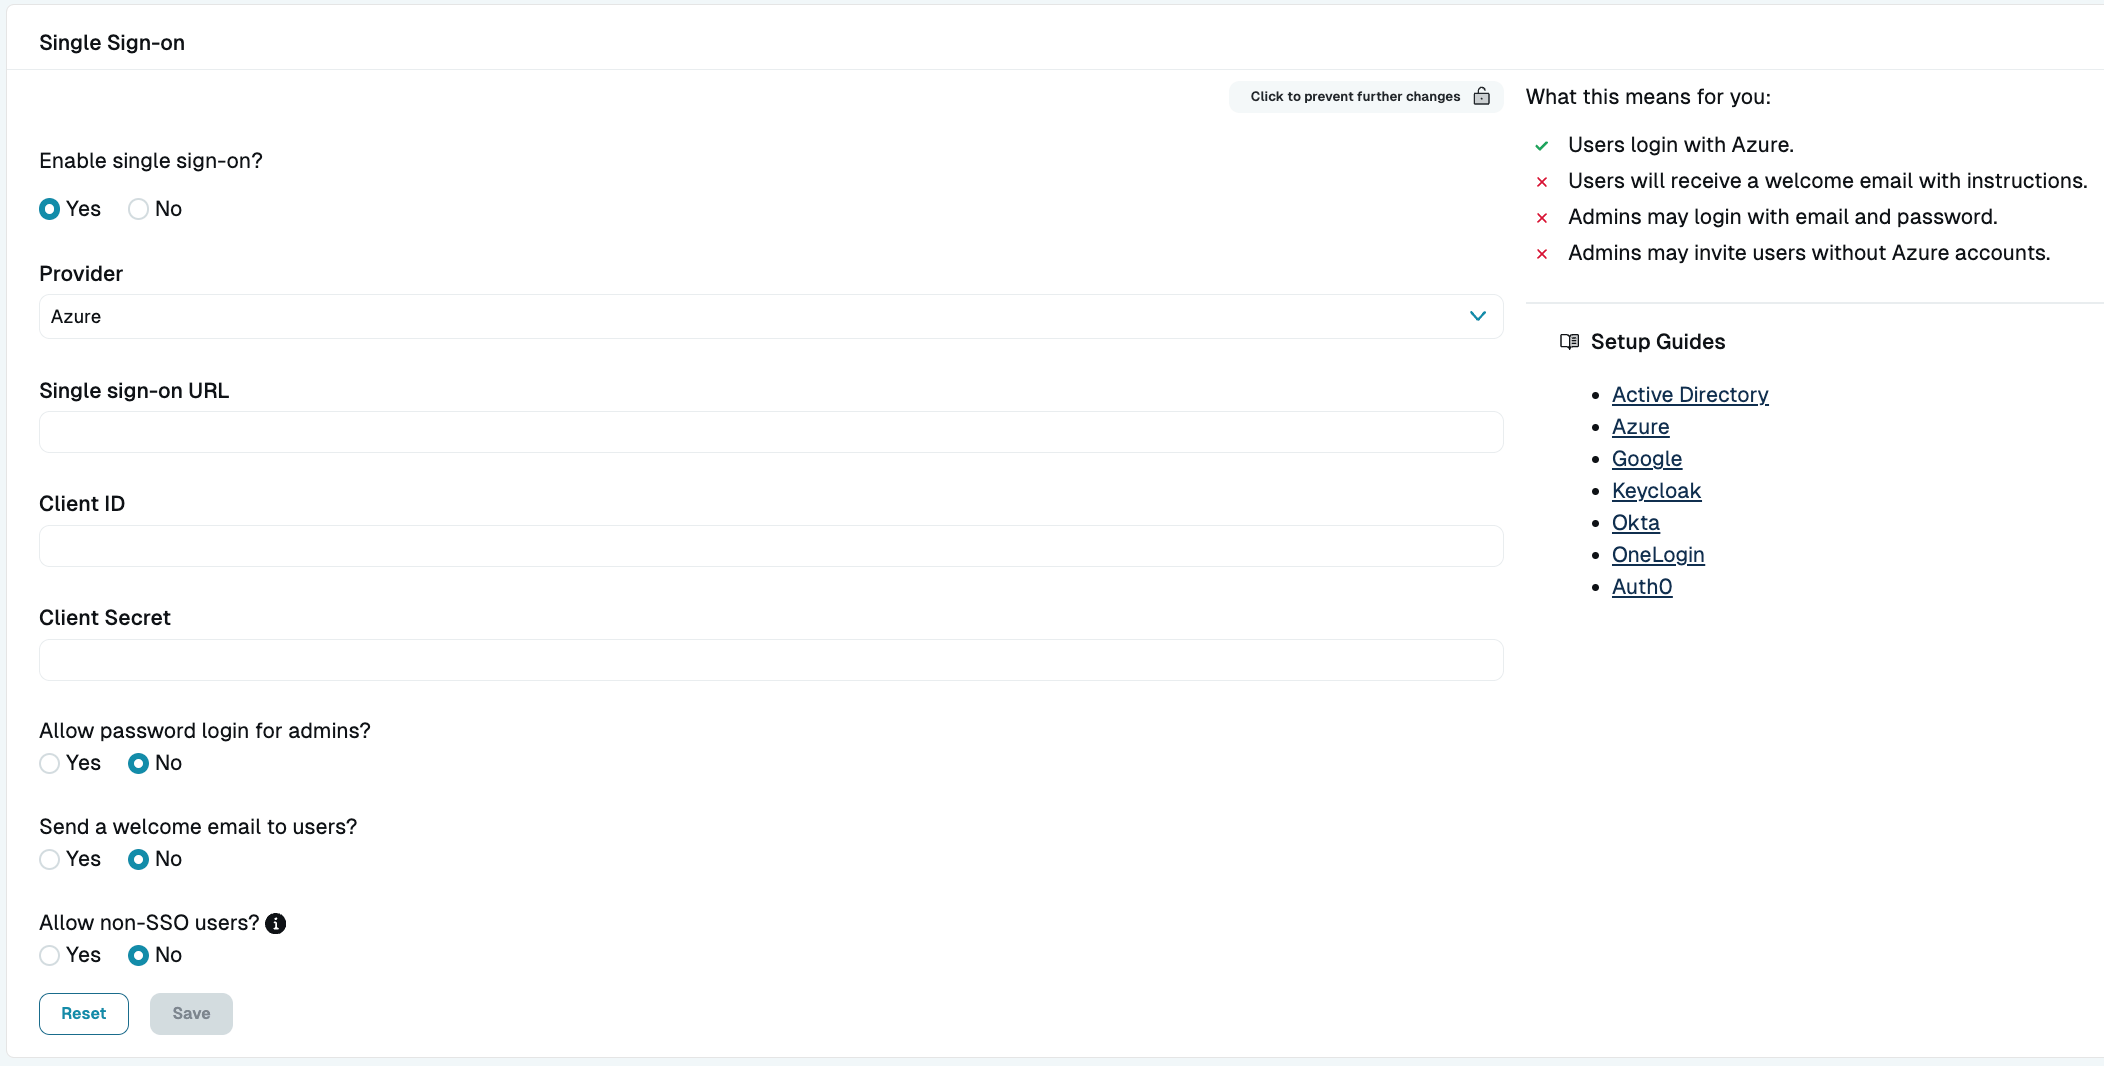
Add SSO in StrongDM
- In the Admin UI, go to Settings > User Management.
- In the Single Sign-on section, click the lock to make changes, and then set the following:
- From the dropdown selector, select Azure as the SSO provider.
- Single sign-on URL: Set
https://login.microsoftonline.com/<PUBLISHER_DOMAIN> - Client ID: Set the
Application (client) IDthat you copied from the app’s Overview section. - Client Secret: Set the
client secret valuethat you copied from the app’s Certificates & secrets section.
- Select your desired general SSO settings.
- Click activate.
Microsoft Entra ID SSO configuration is now complete.