Insider threats are the leading cause of more than 60% of data breaches. That's why you need a complete view of who has access to what in your organization's system, when, and how.
If you're using Linux systems, knowing how to list users is essential for user account management and overall system security.
This article will explore nine methods you can use to list users in Linux, from basic file reading to advanced commands. So read on to get the full scoop.
1. Using the '/etc/passwd' File
This is a plain text file that stores information about every known user account in the system. It contains information such as the username, login shell, user home directory, user ID number, group ID, and the user's full name.
The password field contains a placeholder value, typically an "x" or "*." This indicates that the actual password is stored elsewhere.
This file is the standard authentication method for Linux systems, alongside the "/etc/shadow" file.
To display the list of users in this file, you can use "cat /etc/passwd." This action will display an output that looks like this:
root:x:0:0:root:/root:/bin/bash
joe:x:1001:1001:Joe Smith:/home/joe:/bin/bash
sean:x:1002:1002:Sean Doe:/home/sean:/bin/bash
carlos:x:1003:1003:Carlos Sanchez:/home/carlos:/bin/bash
Each line in the sample "/etc/passwd" file above represents a different user, with fields separated by colons. The first line is typically the root user.
2. Using the 'getent' Command
The "getent" Unix command is commonly used to query various administrative databases managed by the Name Service Switch (NSS) library. It helps administrators retrieve user and group information in databases such as "passwd," "hosts," "protocols," "group," "services," and "networks."
To list users, you can use the "getent passwd" command. This command will return a list of users in a similar format to "cat /etc/passwd" from the previous method. However, the output is usually more detailed because it fetches data from all configured databases.
3. Using the 'awk' Command for Parsing
The "awk" command helps you find specific information or fields from lines in text files, such as "/etc/password."
Its basic syntax is as follows:
awk 'pattern {action}' file
The pattern part of the syntax specifies a condition or filter that determines which lines of the file the action should apply to. Patterns are optional; if omitted, the action is applied to all lines.
The "{action}" part defines the operation to perform on lines matching the pattern. Examples of actions include printing it in full or printing just the first and second fields of each line.
The "file" part represents the name of the text file for which "awk" should perform the specified action.
Take, for instance, the command below:
awk -F: '$3 > 1000 {print $1}' /etc/passwd
This command tells "awk" to filter lines where the third field (user ID, UID) is greater than 1,000 and print the usernames of these users.
The "-F" option specifies the field delimiter (separator) for parsing structured text. By default, "awk" treats whitespace (spaces or tabs) as the field delimiter. However, many files, like "/etc/passwd," use other characters (e.g., colons) as field separators. In such cases, you need to explicitly define the delimiter using "-F."
The output for this command would look like:
joe
sean
carlos
4. Using the 'cut' Command for Simplicity
This command is much simpler than the "awk" command. It lets you extract specific text or fields from text files or input streams.
For instance, if you want to extract just the list of usernames from the "/etc/passwd" file, you can use the following command:
cut -d: -f1 /etc/passwd
This command extracts the first field, which is the username. It uses the "-d:" option to specify that the colon is the field delimiter.
The result will be in a single column, as shown below:
root
joes
sean
carlos
5. Using the 'compgen' Command
This is yet another command you can use to list users in Linux.
The "compgen -u" command lists all usernames available in the shell's environment. While this often includes entries from "/etc/passwd," the command itself doesn't directly parse the file. The usernames listed depend on the system's configuration and may include users from other sources, like LDAP or NIS if they're set up.
The basic syntax for the "compgen" command is "compgen [option]."
To use this command to list users in the shell’s environment, you can use:
compgen -u
This will, again, list usernames as shown below:
root
joe
sean
carlos
6. Using the 'lslogins' Command (for Linux Systems With util-linux)
The "lslogins" command is part of the util-linux package, a collection of utilities that are essential for system management. It lets you display information about all of the users in the Linux system.
However, it may not be available on minimalist or older Linux distributions. In such scenarios, you can leverage alternative commands (e.g., last, who) though they provide only partial information.
The "Islogins" command scans "/etc/passwd," "/etc/shadow," and the "wtmp" and "btmp" logs. The output of this command offers comprehensive user details, including login count, last login time, and more.
Here’s an example of an output after "lslogins" is run:
0:root:root:/root:/bin/bash:150:2024-11-13:22:45
 1001:joe:Joe Smith:/home/joe:/bin/bash:45:2024-11-13:08:23
 1002:sean:Sean Doe:/home/sean:/bin/bash:22:2024-11-10:12:15
If you want to list only user accounts, you can use the "-u" option:
lslogins -u
7. Using the 'getent' Command With LDAP Integration
The "getent" command is a useful tool for querying system databases such as "passwd," "group," and others using the Name Service Switch (NSS). When Lightweight Directory Access Protocol (LDAP) integration is configured on a Linux system, "getent" can also retrieve user data from the LDAP directory in addition to the local system database (e.g., /etc/passwd).
To retrieve all user entries visible to the system, you can run:
getent passwd
LDAP users will typically appear with unique UIDs, specific home directory paths, or descriptive fields indicating that they're sourced from LDAP. However, this depends on your organization's LDAP configuration.
If you need to identify LDAP users specifically, you can query with "ldapsearch" for precise results.
Assuming you’ve configured LDAP properly, running "getent passwd" might produce the following results:
root:x:0:0:root:/root:/bin/bash
 joe:x:1001:1001:Joe Smith:/home/joe:/bin/bash
 maria:x:2001:2001:Maria Garcia:/home/maria:/bin/bash
 emma:x:2002:2002:Emma Thompson:/home/emma:/bin/bash
In this case, Maria and Emma are LDAP users based on their UID range and the directory structure.
8. Using GUI Tools
You can also list users in Linux by leveraging graphical tools. However, these tools are available only on systems with a graphical interface installed. Minimalist or server-focused distributions often lack GUI components by default.
If your Linux system has a GNOME graphical interface, here’s how to go about it:
- Click “Overview” from the system settings.
- Type “settings” and click on the available option.
- Select “Users” then “Unlock.”
- The new window that appears will have options such as listing existing accounts, creating new ones, and editing them.
9. Checking Active and Currently Logged-In Users
User management also involves real-time monitoring, which involves checking logged-in users and their activities. To do this, you can use Linux commands like "who" and "w."
The "who" command lists currently logged-in users along with their session details, such as the terminal they’re using, login time, and more. An output for this command might look like this:
root:tty1:2024-11-22:09:35:(:0)
 joe:pts/0:2024-11-22:09:40:(:0)
 sean:pts/1:2024-11-22:10:00:(:0)
As for the "w" command, it provides information about the user’s activities. For instance, an output for this command might look like this:
 10:05:40 up 1 day,  3:12, 3 users,  load average: 0.08, 0.04, 0.01
 root     tty1    :0       09:35   1.00s 0.04s  0.00s -bash
 joe      pts/0   :0       09:40   10.00s 0.08s 0.04s sshd: joe [priv]
 sean     pts/1   :0       10:00   5.00s 0.02s  0.02s –bash
How StrongDM Simplifies and Secures Linux User Access
Listing users on Linux with commands like cat /etc/passwd, getent, or awk is foundational for system administration, but it’s only the beginning of secure access management. In large or fast-moving environments, these manual methods don’t scale. Static files and ad hoc scripts can’t answer the real security questions: Who should have access? How was it granted? And when does it expire?
That’s where StrongDM changes the equation.
StrongDM gives you a unified, policy-driven control plane for Linux and every other infrastructure resource databases, Kubernetes clusters, and internal apps. Instead of managing users across dozens or hundreds of /etc/passwd files, StrongDM federates authentication through your existing SSO provider (like Okta or Azure AD) and enforces least privilege automatically.
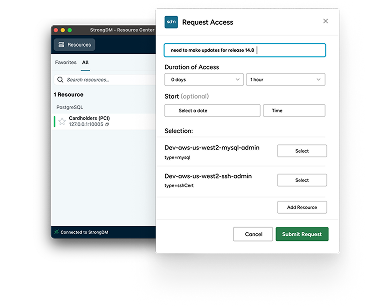
With Just-in-Time access, admins can grant short-lived Linux access only when it’s needed, and StrongDM automatically revokes it when the session ends, eliminating standing privileges. Access requests and approvals happen directly in familiar tools like Slack or Jira, so teams stay productive while staying compliant.
Under the hood, StrongDM’s policy engine evaluates dynamic context user role, device health, time, or location before granting access. And because credentials are injected securely at connection time, users never see SSH keys or passwords, eliminating one of the most common insider threat vectors.
Finally, every Linux session command, query, and connection metadata is captured in a tamper-proof audit log that can stream directly to your SIEM for compliance and forensic analysis.
In short: StrongDM turns Linux access from a manual, user-by-user grind into a centralized, automated, and audit-ready process. You get the visibility and control you need without the operational friction.
Book a demo today to experience StrongDM in action.