SSH (Secure Shell) is essential for secure communication because it can create encrypted connections. It provides a range of identity verification techniques, from simple passwords to more complex ones like public-key techniques.
Security is greatly improved by certificate-based authentication, which uses cryptographic key pairs rather than passwords. For enterprises that prioritize security, this approach not only strengthens security but also makes user management and access control easier.
With an emphasis on the significance of certificate-based authentication, this article seeks to clarify SSH authentication. It gives you a thorough understanding to support the safety of your digital interactions by outlining the benefits of using this approach over traditional ones and covering the implementation steps.
Generating and Configuring SSH Certificate-Based Authentication (Step-by-Step Guide)
Prerequisites
Before we start, make sure you have the following:
1. SSH Installed: Make sure SSH is installed on both your local machine and the server. You can check by running "ssh -v" in the terminal.
2. Access to Server: Ensure you have access to the server where you want to set up certificate-based authentication.
Ensure you have administrative privileges on the server to make configuration changes.
3. User Account on Server: Make sure you have a user account on the server where you want to implement certificate-based authentication.
4. Public/Private Key Pair: Ensure you already have an existing SSH key pair on your local machine. If not, generate one using "ssh-keygen"
Step 1: Generate SSH Key Pair
Open a terminal on your local machine.
Run the command:
if [ -f ~/.ssh/id_rsa ]; then
echo "An RSA key pair named id_rsa already exists. Do you want to use this existing key pair? (y/n)"
read use_existing_key
if [ "$use_existing_key" = "y" ]; then
echo "Using existing key pair."
else
echo "Creating a new RSA key pair with a different name."
ssh-keygen -t rsa -b 2048 -f ~/.ssh/new_key_name
fi
else
ssh-keygen -t rsa -b 2048 -f ~/.ssh/id_rsa
fi
This checks if an RSA key pair named id_rsa already exists. If it does, users are prompted to choose whether to use the existing key pair or create a new one with a different name. If id_rsa doesn't exist, a new key pair is generated as usual.
Step 2: Copy the Public Key to the Server
Use the following command to copy your public key to the server:
ssh-copy-id user@your_server
Replace "user" with your server username and "your_server" with the server's IP address or domain.
Step 3: Verify SSH Key Authentication
Attempt to SSH into the server:
ssh user@your_server
You should be able to log in without entering a password.
How SSH Certificate-Based Authentication Works
SSH certificate-based authentication relies on cryptographic keys, where users have a private key and a matching public key. Unlike traditional passwords, this method involves creating a special key pair. When a user tries to connect to an SSH server, their public key is stored on the server, while the private key stays safe with the user. To confirm the user's identity, the server unlocks information using the stored public key.
Advantages of Certificate-Based Authentication
This approach has significant advantages over traditional methods.
- First, it eliminates passwords, reducing risks like brute-force attacks.
- Using cryptographic keys adds a strong layer of security, making it tougher for unauthorized access.
- Certificate-based authentication also simplifies user access management, allowing centralized control and easy revocation of privileges when necessary.
Generating SSH Key Pair
Creating a new SSH key pair is a thoughtful process to ensure strong security. Here are the steps to follow:
Choosing the Right Algorithm: Begin by picking a strong cryptographic algorithm for your key pair, like RSA or ECDSA. Each offers different security levels, so consider your system's needs to make an informed decision.
Setting a Secure Passphrase: Boost the security of your key pair by adding a secure passphrase. This extra layer of protection makes it tougher for unauthorized access even if the private key is compromised.
Locating and Managing Keys: Once generated, know where your key pair is stored. Usually, it's in the user's home directory under the hidden folder ".ssh." Regularly back up your keys to prevent data loss and aid in easy recovery.
The key pair has two parts – the public key (shared with SSH servers) and the private key (securely stored on your device). Knowing their functions in authentication is essential because they cooperate to create safe connections.
Creating SSH Certificate
Introduction to SSH Certificates
SSH certificates boost security by advancing key-based authentication. Unlike traditional keys, SSH certificates carry extra info, offering more control over user access.
Generating a Certificate from the Public Key
Creating an SSH certificate involves deriving it from the public key. This certificate holds metadata, including user details and permissions. Linking this certificate with a user's public key gives administrators a powerful tool for precise control over system access.
Configuring Certificate Options for Enhanced Security
SSH certificates provide various configuration options to customize security measures. From setting expiration dates to restricting access to specific IP ranges, these options let administrators enforce strict security policies. This customization ensures a strong defense against potential threats.
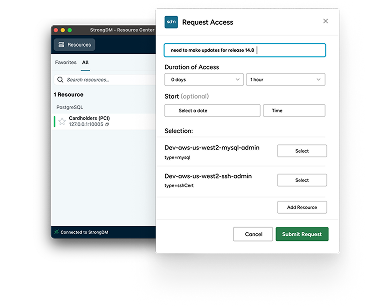
Highlighting StrongDM's Role
Managing SSH certificates can be complex, especially in large environments. StrongDM offers a centralized platform for audit trails and access control, making certificate management easier. Its intuitive interface makes it easier to deploy and maintain SSH certificates, which helps create a more secure and controllable infrastructure. StrongDM integration simplifies and secures SSH certificate management by reducing its complexity.
Configuring SSH Server for Certificate Authentication
Accessing the SSH configuration file
To start certificate-based authentication, first access the SSH server configuration file located at /etc/ssh/sshd_config. This file contains important settings that control the behavior of the SSH server.
Enabling Certificate-Based Authentication
To take advantage of the security benefits of certificate-based authentication, admins must activate this option in the SSH config file. Specify "PubkeyAuthentication yes" and "PasswordAuthentication no" to tell the server to prioritize public key methods, to reduce password-related risks and increase security.
Specifying Authorized Certificates and Users
Once certificate-based authentication is enabled, administrators decide which certificates and users are allowed access. This means that each user's authorized keys are specified in the "authorized_keys" file. This advanced setting ensures that only users with the correct certificate can successfully authenticate.
Integrating StrongDM for Centralized Control
To make SSH server access control easier and more powerful, you can Include StrongDM because it's a centralized platform that helps manage users, certificates, and permissions and makes it easy to enforce access policies across multiple servers.
Distributing and Installing SSH Certificates
Copying Keys to the Server
To start using SSH certificates, copy the user's public key and certificate to the server. Append the public key to the server's "authorized_keys" file, making sure the server recognizes and trusts the associated certificate for authentication.
Configuring the Client
Configure the SSH client on the client side by specifying the private key file in the SSH configuration file. Add the following line to the client's SSH config file, usually located at ~/.ssh/config:
IdentityFile /path/to/your/private-key-file
Replace /path/to/your/private-key-file with the path to your private key file.
This ensures that the SSH client uses the specified private key for authentication.
Verifying Setup and Login
Once installed and configured, verify your setup by attempting to log in via SSH. Users must connect to the server without entering a password. This demonstrates the effectiveness of certificate-based authentication.
Leveraging StrongDM for Auditing
To simplify the distribution of certificates between servers and clients, you can use StrongDM because its platform centralizes control of distribution, ensures consistent configuration, and reduces the risk of errors.
Best Practices and Security Considerations
Setting file permissions
To increase the security of your SSH key pairs and certificates, apply strict file permissions. Allow only the intended users to read and write these sensitive files. This prevents unauthorized users from tampering with or accessing key authentication components.
Regular key rotation and revocation
Regularly updating key pairs and certificates through a regular rotation policy is important to reduce security risks. Administrators should be prepared to immediately revoke and replace keys if unauthorized access is suspected.
Monitoring and Logging
Establish a solid monitoring and logging system to quickly detect and respond to security incidents. Keep an eye on SSH authentication logs for unusual activities, like repeated failed login attempts.
Leveraging StrongDM for Auditing
StrongDM is essential for auditing and compliance. Its centralized platform offers thorough audit trails, letting admins track user activities, including SSH interactions. This visibility helps meet compliance requirements and aids in post-incident analysis.
Troubleshooting Common Issues
Identify and resolve permissions issues
If you encounter issues with SSH authentication, check and adjust the file permissions for your keys and certificates.
Take notes of the following permissions:
- SSH private key files (e.g., id_rsa): 600
- SSH public key files (e.g., id_rsa.pub): 644
- SSH certificate files: 644
- SSH directory (e.g., ~/.ssh/): 700
This guidance helps users ensure secure and appropriate permissions for their SSH keys and certificates, reducing the risk of authentication issues.
Debugging Connection Issues
When dealing with connection problems, follow a step-by-step debugging process. Check network connectivity, firewall settings, and SSH configuration on both the client and server sides. This method helps you find and fix issues that can disrupt your SSH connection and ensure a reliable and secure communication channel.
Checking server and client logs
Always Check server and client logs for authentication errors or unexpected behavior. Logs provide insight into potential issues such as failed authentication attempts or misconfigurations.
Take advantage of StrongDM's troubleshooting capabilities
StrongDM provides powerful troubleshooting capabilities to streamline the resolution of common SSH authentication issues.
Administrators can use this platform to gain detailed logs, audit trails, and real-time insights into user activity.
To sum things up, This article guides you through key steps in creating SSH certificates for secure authentication, with a focus on the significance of strong file permissions, security monitoring, and problem-solving. Promoting the use of SSH certificates strengthens data exchange and is consistent with the standards for evolving digital security.
StrongDM, which is regarded as an essential tool, simplifies the management of SSH certificates by providing centralized control, thorough logging, and effective access control.
Integrating certificate-based SSH authentication with best practices and tools like StrongDM forms a comprehensive strategy, empowering organizations to navigate the dynamic digital security landscape successfully.
Want to see StrongDM in action? Book a demo.