PostgreSQL is an open-source database system that is a popular choice for managing data and building applications.
While primarily geared towards developers, PostgreSQL is also designed to help system administrators safely and robustly store information in databases. And because many networks use Active Directory to manage users and their resource permissions, it makes sense to tie PostgreSQL into this authentication configuration as well.
In this post, we will demonstrate how to install a PostgreSQL database and then configure Active Directory users to authenticate to it.
Install PostgreSQL
First, you will install PostgreSQL on a server of your choice. I’m using Ubuntu Linux 18.10, which makes the install easy by using the apt system. Open a terminal and issue these commands:
sudo apt update
sudo apt install postgresql postgresql-contrib -y
Once installed, PostgreSQL uses ident authentication, which means the database wants to authenticate users with a matching Linux system account. By default, PostgreSQL automatically creates a system account called postgres, as well as a database user also called postgres. Together these accounts are referred to as a “role,” which PostgreSQL uses instead of users and groups.
To login to this Postgres account, type:
sudo -i -u postgres
Your terminal prompt should change to a postgres@ prefix.
Type psql and hit Enter. Your terminal prompt should change to postgres=#. You can now interact directly with the PostgreSQL database.
Configure Active Directory User Accounts
In order to properly configure authentication with Active Directory, we need to create an AD user that has a one-to-one relationship with a PostgreSQL role. In other words, we need to create a user on each system with the same login name.
Let’s start on the Active Directory side. Create a new user in the Users container and name it whatever you like. I’ve got a test AD environment with a domain name of samplecompany.local, and I’ve created a test user named tommy.
Additionally, we need to create an AD user that will be used to perform LDAP lookups. To keep things simple, I created a user named ldap and placed it in the Users container. Whatever you name your account and wherever you place it in your AD structure, be sure to make note of it as we will need that information in future steps.
Configure PostgreSQL role and database
Next, we’ll create a matching tommy user in the PostgreSQL environment. From your postgres=# prompt, type \q and press Enter to get back to a postgres@ prompt. Then, create a new user:
createuser --interactive
You will be prompted with Enter name of role to add. Call this role whatever the name of your AD user is. In my example, I’ll call him tommy by typing tommy and pressing Enter.
When you’re asked Shall the new role be a superuser? answer Y and press Enter.
By default, PostgreSQL assumes that for any role named X, that role will also have a database with name X. In my example, that means my user named tommy will have access to a database named tommy, so I will create it:
createdb tommy
To verify this database was created properly, type psql and hit Enter to get to the PostgreSQL prompt, then issue this command:
\l
You should see a database with the name you specified with the createdb command.
Configure PostgreSQL to allow remote connections
By default, your PostgreSQL install is likely configured to only allow connections from your local Linux server. To change this, edit the PostgreSQL configuration file (usually in /etc/postgresql/10/main/postgresql.conf) and look for a line that looks like this:
#listen_addresses = 'localhost'
Uncomment that line by removing the first “#” and change the ‘localhost’ to ‘*’. Save and exit the file, then restart PostgreSQL:
service postgresql restart
Configure PostgreSQL to query LDAP
Now we need to install some tools and make a few configuration file changes so LDAP is queried when someone tries to authenticate to PostgreSQL.
sudo apt-get install ldap-utils -y
You can double check your LDAP lookups are working correctly by using the ldapsearch tool in the following syntax:
ldapsearch -x -LLL -h 192.168.55.200 -D ldap@samplecompany -w 'myPASSword!' -b "dc=samplecompany,dc=local"
This command is broken down as follows:
- ldapsearch is the tool that conducts the search
- -x specifies simple authentication
- -LLL prints responses in LDIF format without comments and version
- -h specifies the host to connect to
- -D indicates the user that will bind to AD
- ldap@samplecompany is the LDAP bind user and NETBIOS name of the domain
- -w specifies the password for the user
- -b is the base dn for the search
If the command runs successfully, you should get several pages of text in the output with details on the users, computers and other objects in your domain. If the command fails, check out the ldapsearch tool’s help page.
Lastly, you need to open the pg_hba.conf file, usually located at /etc/postgresql/10/main/pg_hba.conf, which controls client authentication methods. On an empty line, paste the following:
host all all 192.168.55.0/24 ldap ldapserver=192.168.55.200 ldapbasedn="cn=Users,dc=samplecompany,dc=local" ldapbinddn="CN=ldap,CN=Users,dc=samplecompany,dc=local" ldapbindpasswd="'myPASSword!" ldapsearchattribute="sAMAccountName"
The configuration is broken down as follows (you will need to change the following settings to match your environment):
- host all all 192.168.55.0/24 specifies which subnets (in this case, only the 192.168.55.0/24 subnet) should be allowed to connect remotely to this PostgreSQL database
- ldap is the authentication type
- ldapserver=192.168.55.200 points to the IP address of one of the domain controllers
- ldapbasedn="cn=Users,dc=samplecompany,dc=local" is the starting point in the domain’s hierarchy for your search
- ldapbinddn="CN=ldap,CN=Users,dc=samplecompany,dc=local" specifies the ldap user, which will authenticate to Active Directory to perform the searches
- ldapbindpasswd="'myPASSword!" sets the password for the ldap user
- ldapsearchattribute="sAMAccountName" indicates the Active Directory attribute that will be searched for.
Save and exit the file, then restart PostgreSQL to make the changes take effect:
service postgresql restart
Connect to PostgreSQL remotely
From another machine, attempt to connect to the PostgreSQL server using the following syntax:
psql -h 192.168.55.69 -U tommy -W
In this example:
- 192.168.55.69 is the IP address of the PostgreSQL server
- -U tommy indicates the user to authenticate as
- -W requires a password prompt upon connecting to the server
After entering the password for the Active Directory user you want to use for PostgreSQL authentication (tommy in my example), your Terminal prompt should change to tommy=#, indicating that you have successfully authenticated to Active Directory using the tommy user, and are now ready to start working with data in the tommy database.
Securing and Auditing the PostgreSQL Databases
At this point, the server is configured to allow connections from Active Directory users who have a corresponding PostgreSQL role and database. This configuration, as you can imagine, can get a bit unruly to manage - especially as you increase the number of users and databases in the environment. Additionally, you will want to enforce security controls around the PostgreSQL configuration so that all user permissions and any database changes are captured for future auditing.
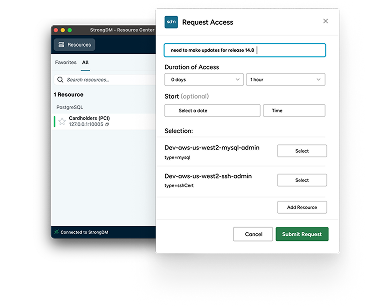
An easier way to integrate your database access with Active Directory is with StrongDM. StrongDM streamlines and simplifies database management challenges by keeping a detailed log of every user login and interaction with the PostgreSQL environment. StrongDM integrates with nearly every system, database and MFA/SSO solution under the sun to make adoption quick and easy for your company. Get started free for 14 days and see for yourself.